
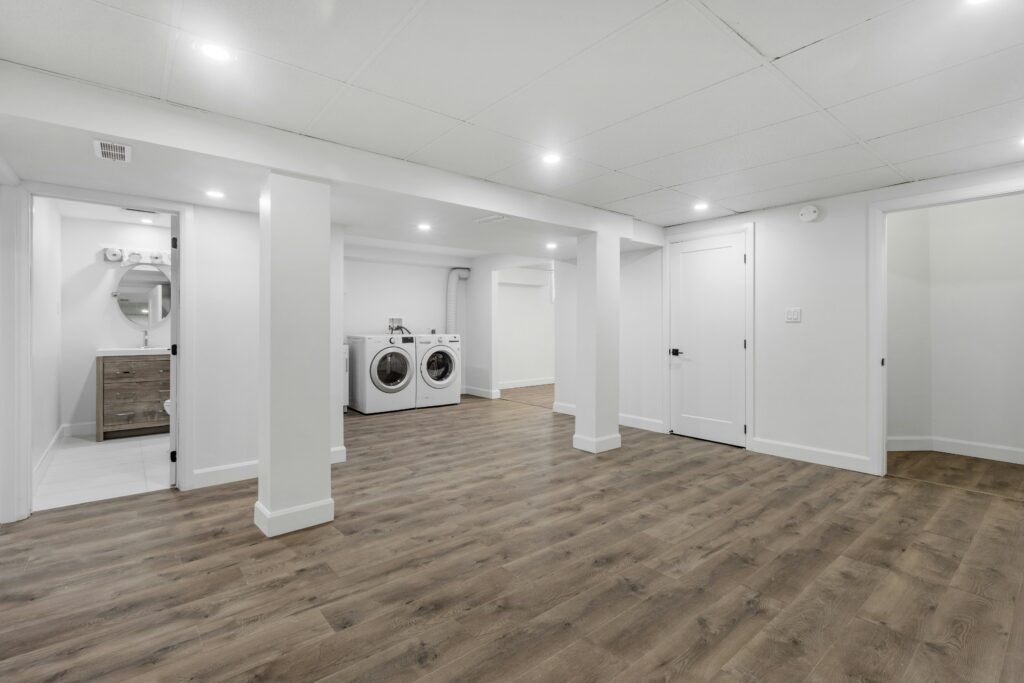
A finished basement offers endless possibilities — whether you want a cozy family retreat, a sleek home bar, or a functional home office. Once your DIY basement finishing project is complete, it’s time for the fun part: design. The best part? You can bring your vision to life with creative, affordable DIY ideas that suit any budget.
If you’re still in the planning or framing stage, start with our DIY Basement Finishing Guide for step-by-step building instructions. When your walls, lighting, and flooring are ready, these basement design ideas will help you create your dream basement — one project at a time.
1. Basement Bar Ideas DIY
Transform a corner of your basement into a home bar that’s perfect for entertaining.
A DIY basement bar can be as simple or elaborate as you’d like:
- Build a bar top from reclaimed wood or epoxy resin.
- Add LED strip lighting or under-shelf accent lights for a warm glow.
- Use open shelving for glassware and bottles.
- Include a compact fridge or beverage cooler to complete the setup.
Pro Tip: Paint the backdrop a dark color for contrast, or use peel-and-stick backsplash tiles for a quick upgrade.
Future article: Basement Bar Ideas DIY →
2. Basement Bathroom Ideas
Adding a bathroom to your finished basement makes it more functional for guests or family. If you’re not adding plumbing yet, start with the design details:
- Use vinyl plank flooring or ceramic tile for easy cleaning.
- Choose light, neutral colors to make the space feel larger.
- Add dimmable wall sconces or recessed lighting for a spa-like vibe.
Before you begin, check local building codes and confirm plumbing access.
3. Basement Bedroom Color Ideas
Color transforms a basement bedroom from basic to beautiful.
For warmth and comfort, soft neutrals and off-whites work best — they reflect light and make small spaces feel inviting.
Top paint ideas:
- Pale gray, beige, or greige for modern style.
- Light blue or green for a calming atmosphere.
- Accent wall in navy or charcoal for depth.
Pair a fresh coat of paint with layered lighting and cozy textiles to create a true retreat.
4. Basement Game Room Ideas
A basement game room is a perfect hangout zone for kids and adults alike.
Combine function and fun with these easy upgrades:
- Add a pool table or air hockey setup.
- Use area rugs to define zones and soften hard floors.
- Install sound-dampening panels or acoustic tiles.
- Include dimmable lighting and wall décor for personality.
For bonus style, paint one wall a dark color to create a “theater lounge” effect.
5. Basement Golf Simulator Ideas
Got a sports fan at home? Turn part of your basement into a golf simulator area.
With the right planning, it can double as a rec room or home theater space.
Setup checklist:
- Minimum ceiling height: about 10 feet for a full swing.
- Add a turf mat or shock-resistant flooring.
- Use a retractable screen and short-throw projector.
- Include soundproofing and soft lighting for an immersive feel.
This type of project is an excellent long-term investment that turns your finished basement into a one-of-a-kind experience.
6. Basement Home Office Ideas
A basement home office offers quiet focus away from daily distractions.
Even small basements can fit a productive workspace:
- Add a built-in desk or floating shelves.
- Use light-colored paint to make the area feel open.
- Layer light fixtures — overhead, desk, and accent lamps.
- Install a glass door or partial divider to keep the space connected yet private.
Pair your design with ergonomic furniture and good ventilation to keep your workday comfortable.
7. Basement Kitchen Bar Ideas
If you entertain often, consider a basement kitchen bar — a combination kitchenette and hangout zone.
Ideas to inspire:
- Add a sink and mini dishwasher for convenience.
- Use open shelving, tile backsplash, and statement pendant lighting.
- Include durable vinyl flooring or epoxy coating for style and easy cleanup.
A small kitchen bar instantly adds value and can serve as a snack station during movie nights or family gatherings.
Bonus: Combine Spaces for the Ultimate Dream Basement
You don’t have to limit your basement to one theme. Try mixing zones:
- Home theater + bar for weekend entertainment.
- Home gym + office for productivity and wellness.
- Bedroom + lounge nook for guests.
No matter your project size, simple upgrades like mirrors, smart lighting, and accent rugs can make a huge difference.
And remember — every upgrade adds value. According to the National Association of Realtors, a well-finished basement can increase home value by up to 10–15%.
Basement Finishing FAQs
Q: What adds the most value to a finished basement?
A: Spaces with purpose — like a home theater, gym, or office — add the most value. Open layouts with durable flooring and good lighting create long-term appeal.
Q: How can I make my basement feel less like a basement?
A: Use bright, light colors, add layered lighting, and incorporate décor like mirrors and greenery. Include area rugs and textured furniture for warmth.
Q: What flooring works best for finished basements?
A: Vinyl plank, tile, or epoxy coatings are ideal. They’re moisture-resistant and provide a clean, finished look that’s easy to maintain.
Q: Can I build a bar or bathroom in my basement without a permit?
A: Typically, plumbing or structural changes require construction permits. Check local building codes before starting — it’s a good idea to consult professionals for safety.
Q: What’s the best lighting for a basement?
A: Recessed lighting, wall sconces, and smart LED strips work well together. Try mixing task lighting (for reading or working) with soft accent lighting for ambiance.
Q: How can I keep my finished basement dry and comfortable?
A: Install a vapor barrier, use a dehumidifier, and maintain your sump pump regularly. Proper waterproofing prevents moisture issues and potential damage.
Final Thoughts
Your finished basement is a blank canvas — a place to create comfort, entertainment, or productivity below ground. Whether you’re dreaming of a bar, an office, or a golf simulator, these basement DIY ideas can help you personalize your space without breaking your budget.
Need help getting your basement ready before you decorate?
Start with our DIY Basement Finishing Guide for all the foundational steps, from framing to waterproofing.
With some planning and creativity, your basement can truly become a better place to live, relax, and unwind.

Pingback: DIY Basement Floor Epoxy Coating for Concrete Floors - Basement Repair Guide