
Last updated: January 2026 — reviewed for current products and best practices.
Painting your basement walls can transform a dark, damp space into a cleaner, brighter environment. But concrete basement walls require special paint due to moisture and masonry surface challenges. Using the best paint for concrete basement walls (including block basement walls) will waterproof and beautify your basement while preventing issues like peeling, mold, and efflorescence. In this comprehensive guide, we’ll explain why basement walls need specific paint, compare masonry paint, epoxy paint, and other options, and walk you through a DIY painting process. We’ll also answer common questions and recommend proven paint options and explain where each works best to help you achieve a long-lasting, mold-resistant finish. Let’s get started on making those basement walls dry, safe, and attractive!
Before choosing paint, it’s critical to understand how moisture affects basement walls. Damp concrete, high basement humidity, or recently wet walls can cause even the best masonry paint to fail. If you’re unsure whether your walls are ready to paint, start with our guides on painting damp basement walls, how long basement walls should dry before painting, and the ideal basement humidity level. Proper preparation is the key to a paint job that actually lasts.
Quick navigation: Wall type | Paint types | When not to paint | How to paint | Top picks
Why Basement Walls Need Special Paint
Basement foundation walls (whether poured concrete or cinder block) are below-grade surfaces that are prone to moisture. Ordinary interior paint isn’t designed to handle damp concrete. In fact, painting basement walls without addressing moisture can backfire – you might trap water vapor behind the paint, causing blistering or peeling paint, mold growth, or even structural damage over time. Many so-called “waterproof paints” only create a surface film; they don’t stop water leaks if moisture is actively seeping through the wall. For this reason, you must choose paints made for masonry surfaces and, most importantly, fix any water problems before painting. Moisture is one of the biggest reasons basement paint jobs fail. Even if walls look dry, moisture vapor can still push through concrete and break paint adhesion over time. In fact, painting basement walls while they’re still damp almost always leads to peeling, bubbling, and mold growth—regardless of the product used.
Check for Moisture First: Before painting, inspect your basement for signs of water issues. Look for damp spots, trickling water, efflorescence (white powdery residue), or musty odors. If you’re not sure whether moisture is still present, a simple moisture meter for concrete walls can help confirm whether the surface is dry enough to paint. These inexpensive tools remove guesswork and can prevent premature paint failure. If you find any, address the source – improve drainage, repair cracks, install a sump pump or interior drain as needed – before applying paint. According to the experts at University of Minnesota Extension, finishing or painting a basement without solving moisture problems can worsen health issues (mold) and lead to significant damage. In other words, paint is not a waterproofing solution for major leaks. However, if your basement walls are only mildly damp or have minor seepage, using a masonry waterproofing paint can help seal the pores of the concrete and stop minor moisture intrusion (up to a point).
Benefits of Painting Basement Walls: Once moisture is under control, painting the walls has benefits beyond looks. It can seal old concrete to reduce dust, brighten the space (especially with light colors), and even provide a layer of mildew resistance if you use the right product. The key is to use a paint formulated for concrete that can handle the alkalinity and porosity of basement walls. Regular wall paint may peel off or allow moisture through, whereas a masonry coating will adhere better and flex with the concrete as it expands and contracts. In the next section, we’ll explore the best types of paint for concrete basement walls and which is right for your needs.
Block vs Poured Concrete vs Cinder Block: Does Wall Type Change the Best Paint?
Yes — the type of basement wall matters because it changes how porous the surface is and how much moisture vapor can move through it. The “best paint” for a smooth poured wall is not always the best paint for a highly porous block wall with dozens of mortar joints.
Poured Concrete Walls
Poured concrete is typically denser and smoother than block. That can be good for water resistance, but it also means paint adhesion depends heavily on surface prep. If the wall is very smooth, you may need light etching or aggressive cleaning so a masonry coating can grab the surface. On poured walls with minor dampness, a masonry waterproofing paint (like Drylok / KILZ Basement & Masonry) is usually the safest choice because it’s designed for below-grade concrete.
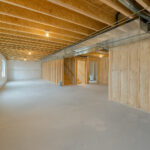
Cinder Block / CMU Block Walls
Cinder block (CMU) walls are much more porous and have many joints — which means they can wick moisture and allow vapor movement more easily. Block walls also have more texture and pinholes, so coverage matters: you’ll typically need a thicker coating (or an additional coat) to properly seal the surface. In many basements, a block filler / masonry sealer step is what separates a paint job that lasts from one that starts peeling in 6–12 months.
Stone, Brick, or Rubble Foundations
These foundations are irregular and often have mortar gaps or uneven surfaces. Paint can work for cosmetic improvement, but waterproofing coatings tend to fail if water is actively coming through. In these cases, moisture management (drainage, interior/exterior waterproofing) usually matters more than the brand of paint.
Bottom line: The more porous and joint-heavy the wall (block/stone), the more you should lean toward a thick masonry waterproofing paint and careful prep. Smooth poured walls can accept masonry coatings well, but only if the surface is clean and properly prepped for adhesion.
Does Basement Humidity Affect Paint Performance?
Yes — basement humidity is one of the biggest reasons concrete wall paint fails early. When indoor humidity stays high, moisture vapor constantly pushes through porous concrete. That pressure can weaken adhesion and lead to blistering, peeling, bubbling, and chalky residue (efflorescence) showing through the paint.
Humidity also makes mold and mildew more likely. Even if the paint itself contains mildewcides, high relative humidity can still create a musty basement and encourage growth on nearby materials like wood framing, cardboard, stored fabrics, or drywall. In other words: the wall coating can look “fine” while the basement still feels damp and smells off.
For best results, aim to keep basement relative humidity in the 40–50% range year-round (and avoid regularly exceeding ~55%). And if you’re finishing the basement, make sure you choose the right method for insulating basement walls — the wrong insulation approach can trap moisture and cause paint and framing problems later. If you’re not sure where your basement sits, start by checking the Best Basement Humidity Level guide so you know what number to target and when it becomes a problem.
If your humidity is running high, it’s worth fixing that before you paint — otherwise you may be repainting sooner than you should. For practical, homeowner-friendly fixes (from ventilation to dehumidifiers to addressing moisture sources), follow our step-by-step guide: How to Lower Basement Humidity.
Best Types of Paint for Concrete Basement Walls
When choosing paint for a concrete or cinder block basement wall, you have a few main options. The best paint for your situation depends on whether your goal is pure waterproofing, durability, or just a cosmetic refresh on dry walls. Here are the top types of basement wall paint and how they compare:
Masonry Waterproofing Paint (Elastomeric Paint)
Masonry paint (also known as elastomeric wall coating) is specifically designed for brick, stucco, concrete, and masonry surfaces. It’s a thick acrylic latex paint that contains binders that expand and contract with the concrete, which helps prevent cracking or peeling. This flexibility makes elastomeric masonry paint an excellent choice for basement walls – it can bridge tiny hairline cracks and create a water-resistant film on the surface. Most masonry waterproofing paint products (e.g. Drylok, KILZ Basement & Masonry Waterproofer) are water-based, low-odor, and mold-resistant. They are applied in 2 thick coats to seal porous concrete.
Advantages of masonry waterproof paint include: it’s waterproof (rated to withstand some hydrostatic pressure from water pushing in), yet many are breathable enough to let vapor out so moisture isn’t trapped in the wall. For example, Drylok Extreme is a popular waterproof masonry paint that can hold back up to 15 psi of water pressure (equivalent to a 33-foot high wall of water) when applied correctly. These paints also contain mildewcides to inhibit mold on the paint film. Keep in mind, masonry waterproofers work best for minor dampness or occasional seepage; they won’t stop serious leaks or flooding. But as a preventive measure, they can keep your basement drier and more comfortable. Overall, painting concrete is best done with masonry paint due to its flexibility and strong adhesion on concrete basement walls. This type of paint is available in limited colors (usually white or gray bases that can be tinted to pastel shades), so color choice might be constrained unless you topcoat it with a latex paint of your color choice (which some people do after sealing the wall).
Epoxy Paint (2-Part Epoxy Coatings)
Epoxy paint is another good choice for concrete basement walls in certain cases. Epoxy coatings are extremely durable and waterproof once cured. They usually come as a two-part kit (resin + hardener) that you mix and apply to the wall. Epoxy paint creates a non-porous surface that resists water, chemicals, and abrasion. You’ll often see epoxy systems used on basement floors and garage floors because of their toughness and resistance to foot traffic and wear. For walls, epoxy can certainly provide a waterproof barrier – it can even be applied over an existing latex masonry paint to add more protection.
However, there are a few downsides to epoxy on walls: it’s typically more expensive than masonry paint, and application is a bit more involved (proper mixing, pot life, etc.). Epoxy also does not breathe, which means if moisture does get behind it, it could eventually cause the coating to peel or blister (in climates with humid summers and cold winters, vapor drive through the wall can be an issue). Additionally, epoxies tend to have strong fumes during application, so ventilation and respiratory protection are important. In summary, epoxy paint provides excellent waterproofing and durability, but due to its cost and lack of vapor permeability, it’s often used for floors or as a topcoat rather than the first line of defense on bare basement walls. If you have a dry basement and want a super durable finish (say, for a home gym area or workshop), epoxy on the walls is an option. But if your basement has seasonal dampness, a breathable elastomeric masonry paint is usually a better option to avoid trapping moisture.
Acrylic Latex Paint (Interior Wall Paint)
Standard latex paint (acrylic interior paint) is the most affordable and comes in any color – but it’s generally not recommended on raw basement concrete unless certain conditions are met. Regular latex is not waterproof, and on unsealed concrete it will allow moisture to pass through and can peel off if the wall is even slightly damp. That said, if your basement walls are bone-dry (e.g. an older basement that’s been waterproofed from the outside or above-grade interior concrete walls), you can use a high-quality acrylic latex wall paint. The key is proper priming: bare concrete or block should first be coated with a masonry primer or block filler. The primer will seal the porous surface and help the latex topcoat bond better. Using a regular interior paint without primer on concrete will result in poor adhesion.
Latex paint is sometimes used as a topcoat over a masonry sealer. For example, some homeowners apply Drylok Extreme (which is white) to seal the wall, then paint over it with a latex paint in the color of their choice. This approach gives you the waterproofing of Drylok plus the aesthetic freedom of normal paint. If you choose to use just latex paint alone, expect to repaint every few years – Home Painters with years of experience note that latex may need recoating about every 3–5 years on concrete. Also, avoid oil-based paint on basement masonry; the alkalinity of concrete can cause oil paints to saponify (essentially, the paint can chemically react and “soap out”), leading to rapid paint failure. In fact, an oil paint containing linseed oil can be literally eaten away by an alkaline concrete wall. Modern acrylic latex paints are alkaline-resistant and far more flexible, so stick with latex or specialty masonry coatings for best results.
Pro Tip: Whether you choose elastomeric masonry paint or epoxy, look for products with a high alkali-resistant rating (AR) for concrete. This helps prevent issues like efflorescence (mineral salts) from bleeding through and discoloring your paint. Most masonry-specific paints are formulated to handle the high pH of concrete. Always read the label – it will usually say if it’s suitable for concrete and masonry and if a primer is required.
A 1-gallon can of Drylok Extreme Masonry Waterproofer. Masonry waterproofing paints like Drylok are designed to seal basement walls, stop minor leaks, and resist mold and mildew.
Interior Waterproof Paint vs Masonry Paint vs Latex: What’s the Real Difference?
If you’re skimming and just want a quick answer, here’s how to choose the right paint without overthinking it.
| If your basement walls are… | Use this |
|---|---|
| Occasionally damp or below grade | Masonry waterproofing paint |
| Completely dry, cosmetic upgrade | Standard masonry paint or latex (primed) |
| Dry but needs maximum durability | Epoxy coating |
Masonry Waterproofing Paint (Best for most basements)
This is the go-to category for below-grade walls with occasional dampness. It’s thick, made for masonry, and designed to seal pores and resist minor hydrostatic pressure. This is the safest choice if you’re not 100% sure the walls will stay dry year-round.
Standard Masonry Paint (Best for dry basements)
Regular masonry paint is made for concrete/block surfaces, but it’s not always rated to hold back water pressure the way “waterproofing” products are. If your basement is truly dry and you mainly want a clean look and less dust, masonry paint can work well — especially with the right primer.
Latex Interior Wall Paint (Only for bone-dry + properly primed walls)
Latex interior paint is flexible and comes in any color, but it’s not designed for below-grade moisture. If there’s any vapor drive through the wall, latex can blister or peel. Latex makes the most sense when you’ve already sealed the wall with a masonry waterproofer (as a base coat) and you want a custom color on top.
Quick rule: If the basement has ever smelled musty or shown damp spots, start with masonry waterproofing paint. If it’s truly dry and you want the best finish options, you can seal first and then topcoat with latex.
When Painting Basement Walls Is a Bad Idea (Efflorescence & Hydrostatic Pressure)
Painting basement walls is only a good idea when moisture is under control. If water is actively pushing through the wall, paint can fail quickly — and in some cases it can make the problem harder to diagnose later.
1) Heavy Efflorescence (White, powdery salt deposits)
Efflorescence is a sign that moisture is moving through the wall and carrying minerals to the surface. You can scrub it off, but if it keeps coming back, it usually means water pressure or moisture vapor is still present. Waterproofing paint may help in mild cases, but persistent efflorescence often points to a drainage issue that needs to be solved first.
2) Active Leaks or Seepage After Rain
If you see wet streaks, trickling water, or damp patches that appear after storms, paint is not the first fix. You need to address the source of water (grading, downspouts, cracks, drainage systems). Paint can be a finishing step — not the primary waterproofing system.
3) Hydrostatic Pressure (Water pushing from outside toward the basement)
Hydrostatic pressure happens when saturated soil pushes water toward the foundation. In these situations, even “waterproof” paints can eventually blister if the pressure is strong or constant. If you suspect hydrostatic pressure, focus on drainage first (gutters, downspout extensions, grading, interior perimeter drains).
4) Crumbling or Powdery Concrete (Paint won’t bond)
If the surface is flaking, chalky, or crumbling, paint will fail because it can’t bond to unstable material. Fix the concrete first so the coating has a solid surface to adhere to.
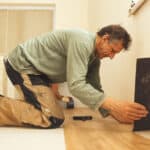
How to Paint Concrete Basement Walls (Step-by-Step)
Once you’ve picked the type of paint for your project, it’s time to get to work! Painting basement walls is a DIY-friendly task, but proper preparation is critical for success. Below is a step-by-step guide to achieving the best results:
- Check for Moisture & Leaks: Thoroughly inspect your basement walls for any dampness, active leaks, or water stains. If you find wet spots or dripping water, address that first – paint will not stop active water leaks. Ensure gutters and downspouts direct water away from your foundation and consider exterior waterproofing or interior drainage for serious issues. If water backs up near a floor drain or you notice standing water after laundry or storms, start here: clogged basement drain symptoms and fixes. Only proceed to painting once the walls are dry (you may need to wait a few days of dry weather). A simple test is taping a sheet of foil to the wall for 24 hours; if moisture forms underneath, the wall is still too damp to paint. Tip: If you’re planning a full renovation after painting, now is a good time to consider installing any needed waterproofing or drainage. (For more guidance on basement leak solutions, see signs you need basement waterproofing.)
- Clean and Prepare the Walls: Preparation is key on concrete. Start by scrubbing the walls to remove dirt, dust, efflorescence, and any loose paint. Use a wire brush or stiff bristle brush to remove flaking paint or white powdery salt deposits. A wire brush for concrete prep makes it much easier to remove efflorescence, flaking paint, and loose surface material before painting. If you see any mold, kill it with a bleach solution or mold cleaner and let dry. For smooth poured concrete walls, you might need to etch them lightly with an etching solution (muriatic acid or a safer concrete etch product) – this opens up the surface for better paint adhesion. Rinse off any cleaning agents and let the walls dry completely. Also, protect the area: mask off floors, trim, or anything you don’t want paint on with painter’s tape and drop cloths. Good surface prep will ensure the paint bonds well and lasts longer.
- Patch Cracks and Holes: Before painting, repair any cracks or gaps in the walls. If the concrete is flaking or powdery in spots, fix that first — here’s our guide on crumbling concrete basement floor so your paint or sealer actually bonds. Use a hydraulic cement or concrete patching compound to fill cracks, especially ones that go all the way through the wall. Hydraulic cement expands as it cures and can help stop minor active leaks through cracks. Also fill any small holes or pits in the concrete using a masonry patch or spackle for masonry. Smooth out the patches and allow them to fully cure as per the product instructions (often 24 hours). This step creates a sound, uniform surface for painting and prevents water from seeping in through defects. Remember: if cracks show significant shifting or you have wall bowing, you may have a structural issue – painting is not a fix for that! Address structural repairs separately if needed.
- Prime the Walls (if needed): Many basement concrete paints are self-priming, but in some cases using a primer is beneficial. Check your paint’s instructions: products like Drylok or other masonry waterproofing paint generally do not require a separate primer – they go directly on the bare masonry (in fact, priming can reduce their ability to penetrate the concrete). However, if you plan to use a standard latex paint, apply a masonry primer first. A masonry block filler primer helps seal porous concrete and cinder block walls, improving paint adhesion and reducing the number of topcoats needed. A good masonry block filler primer is especially useful on cinder block walls – it will fill the block’s porous surface, requiring fewer topcoats and improving adhesion. Also prime if you have any stains on the wall (like old mildew or rust stains) that might bleed through; use a stain-blocking primer in those spots. Follow the primer’s drying time – usually a couple of hours – before moving on to paint.
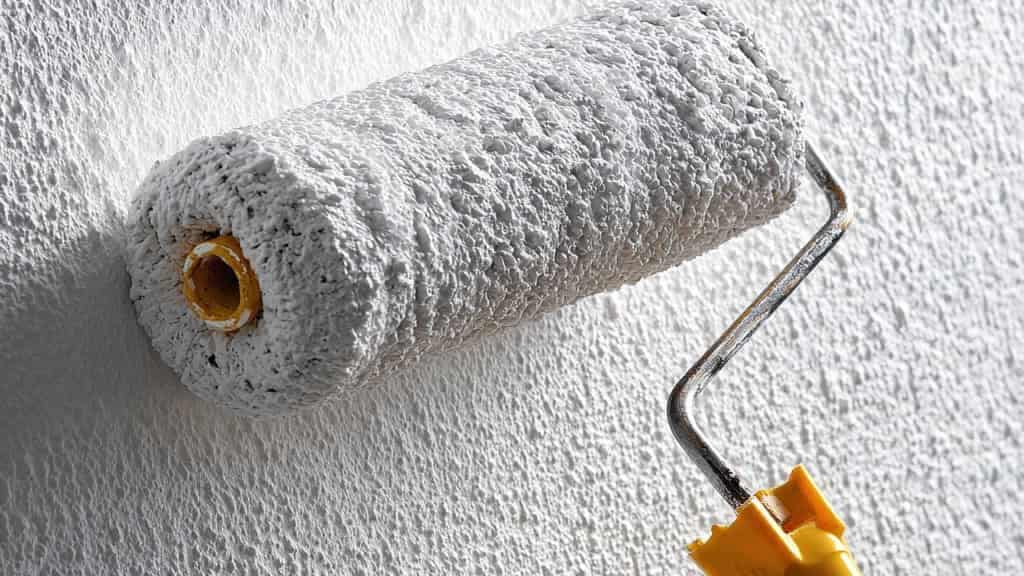
- Paint the Basement Walls: Now for the main event – painting! Stir your paint thoroughly. For waterproofing masonry paint, you might need to apply the first coat to dampened walls (some products like Drylok recommend dampening the wall or thinning the first coat slightly with water for better penetration – check the label). Using a brush, cut in along edges, corners, and around pipes or windows. Masonry paint is thick, so a nylon/bristle brush works well to force it into crevices of the concrete. Next, use a roller with a 1/2″ to 3/4″ nap (for rough surfaces) to roll the paint on the wall. Roll in sections (say a 3-4 ft wide strip from top to bottom), and backroll over the area to ensure even coverage. Work the paint into the surface – you want to fill all the tiny pores. Apply generously but avoid overly thick drips. Most basement wall paints will require two coats for best performance. Allow the first coat to dry per instructions (typically 4+ hours or even overnight). Then apply the second coat in the same manner, using a brush for touch-ups and roller for broad areas. The second coat will give you a solid, even color and maximize the waterproof seal. Make sure to ventilate the area while painting (open windows, use fans); even low-odor latex can build up smell in an enclosed basement.
- Dry & Inspect: After the final coat, let the paint dry completely. This may take 24 to 48 hours for full cure (and longer for epoxies). Avoid touching or moving items against the walls until the paint is cured to avoid marring it. Once dry, inspect your work. Look for any thin spots or pinholes you might have missed. If you find any, do touch-ups as needed. Clean your brushes and rollers (if latex paint was used, soap and warm water works; for epoxies or oil-based products, follow the recommended cleaner). Congratulations – your basement walls should now look much brighter and be more resistant to moisture penetration. Enjoy the improved space! If you plan to finish the basement with framing and drywall now that the walls are sealed, be sure to check out our guide on DIY basement finishing for next steps on building out walls and adding basement insulation. And if adding insulation directly to those painted walls, see our DIY basement insulation article for tips on doing it safely and effectively without trapping moisture.
(By painting your basement walls properly, you’ve taken a big step toward a drier, healthier home. Keep an eye on your walls over time; if you ever notice new dampness or paint bubbling, investigate the cause – you may need to improve drainage or recoat after several years. But with the right paint and prep, you can expect a long service life from your new basement wall paint job.)
Best Paint Products for Basement Walls (Top Picks)
When it comes to specific products, here are some top-rated paints for concrete basement walls that homeowners and pros often recommend. These options have proven performance in sealing walls and preventing moisture issues:
Quick Picks (Based on Availability & Moisture Conditions):
• Best Overall (Editorial Pick): Drylok Extreme Masonry Waterproofer
• Best Budget Option (widely available): KILZ Basement & Masonry Waterproofer
• Best for Severe Moisture (online and in-store): Rust-Oleum Watertite
If you want a safe default: most homeowners with minor dampness are best served by a masonry waterproofing paint like Drylok or KILZ. They’re forgiving to apply and designed specifically for below-grade concrete.
| Product | Best for | Wall type | Key tradeoff |
|---|---|---|---|
| Drylok Extreme | Most basements with minor dampness | Poured + block | Thick to apply; limited colors |
| KILZ Basement & Masonry | Budget-friendly sealing + refresh | Poured + block | May need extra coat on porous block |
| Rust-Oleum Watertite | Very smooth finish + strong barrier | Poured (best) + block | Less breathable than some latex waterproofers |
| Behr DryPlus | Convenience pickup + mild dampness | Poured + block | Often thinner; coverage varies by wall porosity |
- UGL Drylok Extreme Masonry Waterproofer (Latex) – This is one of the best waterproofing paints for basement walls, widely used for decades. Drylok Extreme is a latex-based masonry paint that can withstand 15 psi of water pressure and comes with a 15-year waterproofing guarantee. It contains an antimicrobial to prevent mold growth on the dry paint film. Drylok is applied in two coats and can be tinted to light colors. It’s a breathable coating (perm rating around 12), meaning it lets water vapor escape while blocking liquid water – a big plus for basement applications. You can find Drylok Extreme in gallon cans (covers ~75-100 sq ft per gallon). It’s a thick paint; expect to do some pushing to get it into pores. Many homeowners report excellent results using Drylok to cure that slight basement dampness. (One handy tip from experienced DIYers: if you want a custom color, apply white Drylok first for waterproofing, then topcoat with a normal latex paint of your color choice.) Drylok Extreme is readily available at many home centers, and availability online can vary by retailer and seller.
- KILZ Basement & Masonry Waterproofer (Latex) – Another popular product, KILZ Basement & Masonry Waterproofing Paint is a water-based paint designed to seal porous concrete and masonry. It’s similar in concept to Drylok. KILZ masonry waterproofer can be applied to interior or exterior masonry, above or below grade. It’s claimed to withstand up to 12 psi of water pressure. Like Drylok, it requires two coats and helps block efflorescence. Users like its smooth matte finish and low odor. It comes in white (tintable). If you have previously painted walls, KILZ Basement Waterproofer can be used over them (clean and scrape loose paint first). This paint is also available on Amazon and often comes in 1-gallon or 5-gallon sizes for bigger basements. It’s a great option if you prefer the KILZ brand or find it on sale. Note: Be sure not to confuse this with regular KILZ primers – the Basement & Masonry Waterproofer is a specialty product for waterproofing walls.
- Rust-Oleum Watertite Polyurethane Waterproofing Paint – Rust-Oleum’s Watertite is a less-known but effective waterproof masonry paint. It’s a oil-modified urethane formula (low odor) that can stop 15 psi of water pressure and even claims to stop radon gas penetration. It has a mold inhibitor that prevents mold on the paint film for up to 5 years. Watertite is usually white (tintable) and promises a very smooth, easy-to-clean finish. Because it’s a urethane blend, it has excellent adhesion and durability. This could be a good choice if you want something other than the latex options. Cleanup is with soap and water. It’s also sold in gallons and 5-gallons. Some painters prefer Watertite for its smoother finish compared to Drylok’s sandy texture. It’s another high-quality product to consider in the waterproof paint category.
- Behr DryPlus Basement & Masonry Waterproofer – Behr (Home Depot’s brand) offers DryPlus, a waterproofing paint for basement walls. It’s an acrylic formula that resists up to 10 psi of water pressure. It’s tintable to off-white and pastel colors. DryPlus rolls on with a low sheen and is mold-resistant. Coverage is about 75-100 sq ft/gal. It’s a newer contender but backed by Behr’s reputation. DIYers have reported it’s a bit thinner than Drylok, making it easier to apply, but possibly needing an extra coat in very porous block. If you are a Behr fan and want convenience of picking it up at Home Depot, DryPlus will do the job on mild moisture issues.
- Ames Blue Max Liquid Rubber – This is a specialty product: basically a liquid rubber waterproof coating that you can paint on walls. Blue Max is ultra thick and flexible, bridging cracks up to 1/8”. It’s great for extreme waterproofing needs (like very old leaky stone foundations). It dries to a rubbery blue or white layer. While it’s overkill for most, we mention it for those severe cases where you want something heavy-duty. It’s non-toxic and can be top-coated with another paint if desired. Available online, it’s more expensive per gallon but can stop significant water intrusion. Use this only if typical waterproof paints aren’t enough, as part of a larger waterproofing strategy.
If you’re looking to purchase these paints online, some popular options are easy to find on Amazon — like KILZ Basement & Masonry Waterproofing Paint and Rust-Oleum Watertite. For basement floors (covered in the FAQ), products like the Rust-Oleum EpoxyShield Basement Floor Kit are also available on Amazon and provide a durable epoxy finish for concrete floors. Using trusted brands will help you get a longer-lasting result — and avoid having to redo the job later. If you’re planning to coat the slab, our DIY basement floor epoxy coating guide covers prep, moisture checks, and application step-by-step.
After painting your basement walls, you might be interested in further basement improvements. For example, if you plan to frame out and finish your basement walls, check out our guide on DIY basement finishing for step-by-step advice. And if you’re considering insulating those basement walls for better energy efficiency, see our DIY basement insulation article to learn about the best practices (like using foam board against the concrete). These related guides will help you take your basement project to the next level safely and effectively.
FAQ: Painting Concrete Basement Walls
Can I use regular interior paint on concrete basement walls?
It’s possible to use standard interior wall paint (latex) on concrete, but it’s not ideal unless the walls are completely dry and have been properly primed. Regular paint is not designed to stop moisture – it will not waterproof the walls and may peel or blister if there’s any dampness behind it. If your basement walls have absolutely no moisture issues, you could apply a masonry bonding primer and then a high-quality acrylic latex paint topcoat. However, for most basements, it’s better to use a masonry waterproofing paint or concrete-specific paint for longer-lasting results. Standard paint just won’t hold up well on bare, porous concrete, especially below grade.
Do I need to prime basement walls before painting?
Yes, priming is recommended in many cases. If you’re using a dedicated waterproof masonry paint (like Drylok or similar), you typically do not need a separate primer – those products are formulated to go directly on masonry. But if you’re using a normal latex paint or even a masonry topcoat that doesn’t explicitly say “self-priming,” then use a masonry primer. Priming will seal the porous surface and ensure the paint sticks. It’s especially important on cinder block walls – use a block filler primer to fill all the pinholes and pores in the block. Also prime any areas with remaining efflorescence or stains (a stain-blocking primer can prevent those from bleeding through your finish). In short, when in doubt, prime – it can only help your paint job last longer.
What is the best waterproof paint for basement walls?
The best paint for sealing basement walls is a quality masonry waterproofing paint. Two leading options are Drylok Extreme and KILZ Basement & Masonry Waterproofer, which are latex-based, easy to apply, and effective at stopping minor water seepage. Both are highly rated and come with long warranties for waterproofing. Other top picks include Rust-Oleum Watertite and Behr’s DryPlus, which also create a protective barrier on interior concrete. These products all work in a similar way – filling the pores of the concrete and forming a water-resistant coating. Remember, no paint can magically fix major foundation leaks, but for typical basement dampness, a waterproofing paint is the best choice. Look for one that specifically says it’s for basement walls and lists a psi rating for water pressure. Brands that have a proven track record in this niche are your safest bet (Drylok, KILZ, etc.).
Will waterproof paint stop leaks or moisture coming through my basement wall?
Waterproof paint can help with minor moisture, but it’s not a cure-all for serious leaks. These paints will seal the surface and can block moisture vapor and even modest amounts of water seepage. For example, Drylok claims to hold back 10-15 psi of water pressure on a sound wall. In practice, this means if you have a little moisture weeping through porous concrete or slight dampness, waterproof paint will likely stop it. However, if you have active water leaks (like water trickling or patches of wet wall after rain), paint alone usually won’t solve the problem. The water will eventually find a way, or build up enough pressure to peel the paint. Likewise, if moisture is trapped in the wall from outside, hydrostatic pressure can cause even the best paint to blister over time. The bottom line: Use waterproof paint as part of your strategy for a dry basement, but also address drainage (gutters, grading) and consider exterior or interior waterproofing methods for serious water issues. Think of the paint as a final line of defense for dampness, not the primary fix for major leaks.
How often should I repaint my basement walls?
This depends on the type of paint used. High-quality masonry waterproofing paints can last a long time – often 10–15 years or more – before needing recoat, as long as they were applied properly and no new water issues arise. For instance, Drylok has a 15-year warranty, so you shouldn’t need to repaint until nearing that timeframe (barring unusual conditions). Standard latex paint on basement walls will need more frequent maintenance, perhaps every 3–5 years, because it’s not as durable in a high-moisture environment. You might see some efflorescence or peeling in that time frame if moisture comes through. Keep an eye on your painted walls; if you notice fading, chalking, or peeling, it’s time to repaint. Always prep the surface again before recoating – clean off any powdery residue so the new paint adheres. As a tip, if you have leftover paint, store it for touch-ups. But if you’ve done the job with a true basement wall paint, you’ll likely enjoy many years of a clean, dry look before you even think about repainting.
What about painting basement floors? Can I use the same paint on the floor?
Painting basement floors is a slightly different challenge because floors endure foot traffic, abrasion, and sometimes hot tire pickup (if it’s a drive-in area). The paints we’ve discussed for walls are not ideal for floors; they’re formulated mainly for vertical surfaces and water resistance, not wear resistance. For concrete basement floors, the best choices are epoxy coatings or dedicated concrete floor paint. Epoxy floor kits (like Rust-Oleum EpoxyShield or Quikrete Epoxy Garage Floor kits) are popular – they create a very durable, thick coating that can handle traffic and resist oil and stains. Another option is concrete floor paint (a one-part epoxy-fortified acrylic), such as Drylok Concrete Floor Paint or KILZ Concrete & Garage Floor Paint. These are easier to apply than 2-part epoxies (no mixing required) and still provide a tough surface. For example, Drylok Concrete Floor Paint is latex-based and is tough enough for high-traffic areas, plus it doesn’t require primer and has low odor. It’s great for basement floors used as laundry areas or home gyms. Always clean and etch your floor before painting for best adhesion. So, in summary: use a floor-specific product for floors – wall paint on a floor will wear out quickly. The good news is many of the same brands have companion floor paints, and they often come in various colors to give your basement a nice finished look.
Will painting my basement walls help with mold or musty smells?
Painting alone is not a guaranteed fix for mold or odors, but it can contribute when combined with moisture control. If you have existing mold on the walls, you must kill and remove it before painting – paint should never go over active mold colonies. Once the walls are clean and dry, applying a masonry paint with a mildewcide can help inhibit mold growth on the paint surface (these paints are often labeled “mold & mildew resistant”). A mold-resistant paint won’t magically make mold go away in the basement if there’s ongoing humidity or water, but it gives you a bit of extra protection. By sealing the porous concrete, you also reduce that musty smell that comes from moisture and mildew in the walls. Many people find that after painting with Drylok or similar, their basement smells fresher because the damp concrete is sealed off. Important: Mold grows where there is moisture and organic material. The paints we recommend are inorganic and waterproof, so they don’t feed mold – in fact, painting can deny mold a damp surface to cling to. But you should still use a dehumidifier in your basement and keep humidity below ~50% to prevent mold elsewhere (like on wood or fabrics). In short, painting your walls as part of an overall moisture control strategy will help with mold and odors, but don’t rely on paint alone if you have serious mold issues (solve the moisture source and remove moldy materials first).
Should I fix basement humidity before painting concrete walls?
Yes — you should always fix basement humidity before painting concrete walls. High humidity is one of the most common reasons basement paint fails prematurely. Even the best masonry or waterproofing paints can blister, peel, or bubble if excess moisture vapor is pushing through the concrete from behind.
Concrete basement walls are naturally porous, which means they absorb and release moisture depending on indoor humidity levels. If relative humidity stays above 50–55%, moisture vapor pressure can build up behind the paint, leading to adhesion problems, efflorescence stains, and mold growth over time. Paint is designed to resist moisture on the surface — it is not a substitute for proper humidity control.
Before painting, make sure your basement humidity is within the recommended 40–50% range. This often means running a dehumidifier, improving ventilation, sealing minor air leaks, or addressing drainage issues around the foundation. Fixing humidity first ensures the paint bonds correctly, cures properly, and lasts for years instead of months. In short, controlling basement humidity is a critical first step to a successful and long-lasting basement wall paint job.
Basement Wall Paint Summary
Painting concrete basement walls is a smart, DIY-friendly way to improve your basement’s dryness and appearance. By choosing a quality masonry waterproofing paint, preparing the surface diligently, and applying it correctly, you can seal out minor moisture and prevent mold, all while brightening up your space. We compared the main paint types – elastomeric masonry paint for flexibility and waterproofing, epoxy paint for maximum durability, and standard latex for cosmetic applications – so you can pick what suits your needs. Remember that while these paints work well against dampness, they are not a substitute for proper waterproofing if you have major water intrusion. Always address the root causes of basement moisture (drainage, cracks, etc.) for the best outcome. With the walls painted, you’ll have a cleaner, safer environment for your family – no more dusty, musty concrete. You might even find yourself spending more time in your basement now that it feels like an extension of your living area! Learn more about keeping your basement dry and problem-free by exploring our other expert guides on basement repair and waterproofing. Here’s to a dry, beautiful basement for years to come!
Pingback: Best Dehumidifier for Allergies (2025) | Improve Indoor Air Quality & Reduce Mold
Pingback: Basement Waterproofing: Warning Signs to Watch For
Pingback: Average Cost to Finish a Basement DIY (2026 Homeowner Guide)
Pingback: How to Lower Basement Humidity (Causes & Fixes)
Pingback: Best Basement Humidity Level (2026 Guide)
Pingback: How to Fix a Clogged Basement Drain Fast (Step-by-Step)
Pingback: Can You Paint Basement Walls If They’re Damp?
Pingback: How Long Should Basement Walls Dry Before Painting?