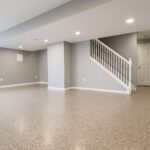

Epoxy floor coatings have long been used to transform drab garage floors into durable, attractive surfaces – and the same technique can elevate a basement. In fact, an epoxy coating can turn a cold, gray basement slab into a polished, waterproof barrier that protects the concrete and resists mold in damp environments. Epoxy bonds strongly to concrete for a hard-wearing finish that can last many years with minimal maintenance. However, achieving professional-quality results with a DIY epoxy floor requires careful preparation and attention to detail. Below, we outline the essential dos and don’ts to help you avoid common pitfalls and get the best outcome on your basement (or any concrete) floor.
Top “Do’s” for a Successful DIY Epoxy Floor
- Do Thoroughly Prepare the Concrete Surface: A successful epoxy floor always starts with meticulous surface prep. Remove all dust, dirt, grease, and old paint by scraping and degreasing the concrete as needed.. It’s often recommended to acid etch or mechanically grind the floor to create a slight texture that the epoxy can “grip” to, and to patch any cracks or holes beforehand. Skipping these prep steps is a recipe for disaster – the vast majority of epoxy floor failures (peeling, bubbling, etc.) trace back to inadequate prep, making proper preparation a non-negotiable requirement.
- Do Ensure the Concrete is Dry and Cured: Basements are prone to moisture, so testing for a dry slab is critical. Perform a simple moisture test (for example, taping a plastic sheet to the floor for 24 hours to see if water condenses underneath) to confirm there’s no excess moisture that could prevent the epoxy from adhering. If there are moisture issues, address them first – ignoring damp concrete can lead to delamination, bubbling, or mold under the epoxy later on. Also, never coat newly poured concrete too soon. Fresh concrete needs to cure for at least 30 days before epoxy application, and any existing slab must be completely clean and dry. Applying epoxy to a wet or uncured floor will almost certainly result in adhesion failure and damage to both the epoxy and the concrete.
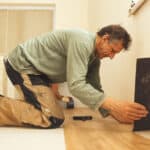
- Do Gather the Right Tools and Safety Gear Ahead of Time: Taking on an epoxy floor DIY means you’ll need the proper equipment and protective gear on hand. For example, you should have cleaning agents (detergent or degreaser), an etching solution or concrete grinder, mixing tools (bucket, drill with mixing bit), application tools like rollers and squeegees, and optional decorative elements (like color flakes). Don’t forget personal protective equipment: wear gloves, eye protection, and especially a respirator mask to guard against concrete dust and epoxy fumes. It’s wise to plan this out before starting so you’re not scrambling mid-project. (Keep in mind that renting or buying specialized tools like grinders can add a few hundred dollars to your project cost, but it’s still cheaper than fixing a failed floor later.) Ensuring you have all needed supplies and safety gear ready will make the process smoother and safer.
- Do Follow Product Instructions and Mix Epoxy Properly: Epoxy floor kits typically come in two parts (resin and hardener) that must be mixed in the exact ratio specified by the manufacturer. Carefully measure and thoroughly mix the components as instructed – this is crucial for the epoxy to cure correctly and achieve full strength. Never “eyeball” the mixture or deviate from the guidelines. Improper mixing (wrong ratios or inadequate stirring) can lead to soft spots, tacky areas, or epoxy that never fully hardens. Also, be mindful of the pot life (working time) of the mixed epoxy; only mix what you can apply within that time frame to avoid the batch hardening in your bucket. In short, treat the manufacturer’s directions as gospel to avoid avoidable mistakes.
- Do Work in the Right Conditions (Temperature, Humidity, Ventilation): Epoxy is sensitive to environmental conditions while it cures. Check the recommended temperature range for your product (often around 60–85 °F is ideal) and avoid applying it if your basement is too cold or damp. Low temperatures can slow or prevent proper curing, while high humidity can cause a cloudy finish. Make sure to ventilate the area well during application and curing – open windows, use fans or an exhaust setup to keep air moving. Good airflow not only helps disperse fumes but also aids the chemical curing process, preventing solvent entrapment and bubbles in the finish. In fact, failing to account for factors like temperature, humidity, and ventilation can easily botch the project. Plan to apply the epoxy during a stretch of mild, dry weather, and give the floor plenty of time to cure undisturbed according to the product’s instructions (usually at least 24–48 hours before light foot traffic and longer for heavy use).
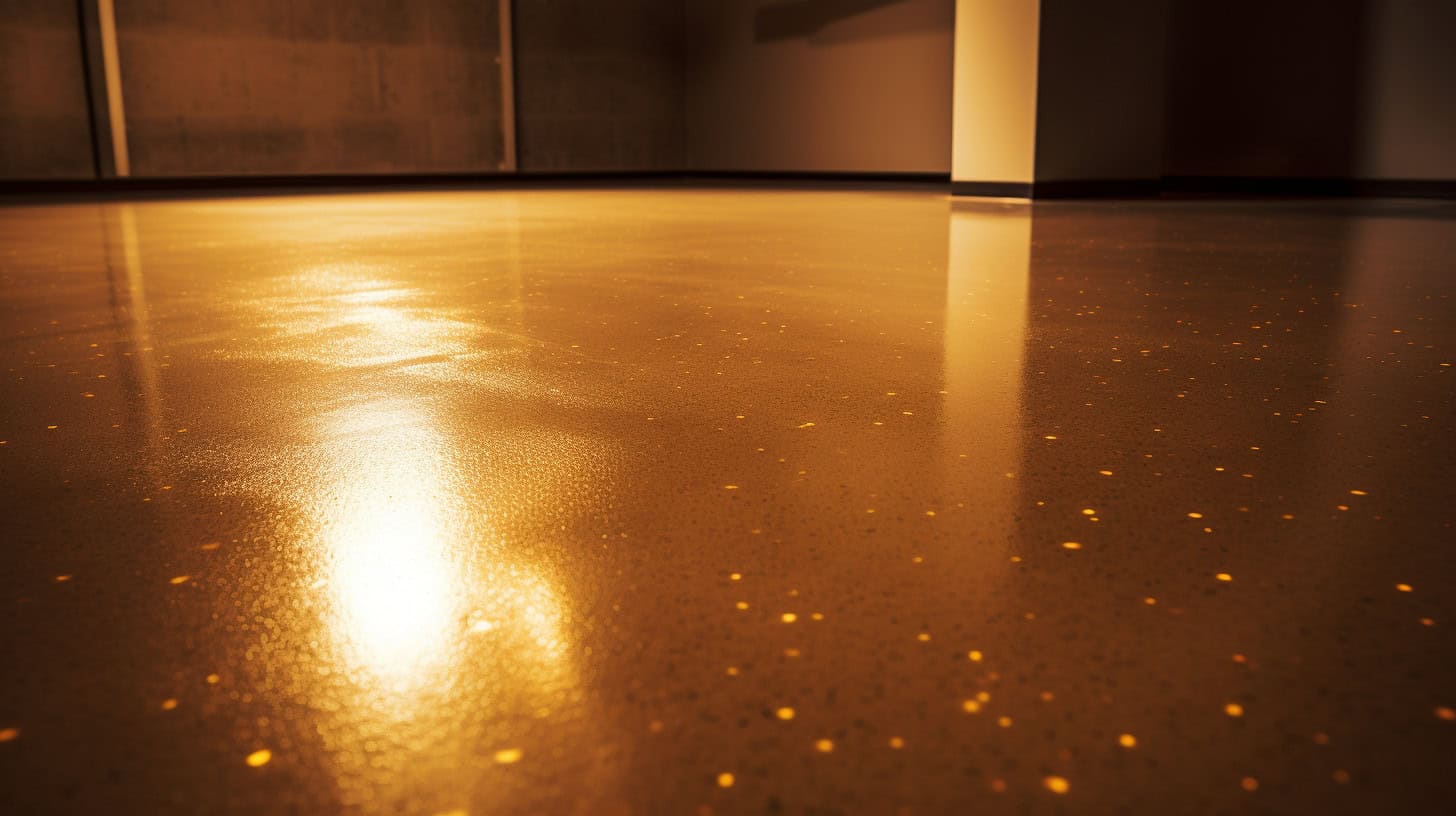
- Do Use a Primer (and Consider a Topcoat) for Best Results: Don’t skip the primer if your epoxy kit or system recommends one. A primer coat is typically a thin epoxy or other bonding agent applied to the prepared concrete before the colored epoxy. It soaks into the concrete’s pores and promotes strong adhesion of the subsequent epoxy layers. Primer also helps seal the concrete to prevent air bubbles from migrating up into the epoxy coating – this is especially important on porous basement floors. After your colored epoxy base coat is down, adding a clear topcoat is highly advisable (many kits include this). The topcoat is a transparent protective layer that gives extra resistance to wear, chemicals, and UV exposure. It provides a polished look (available in glossy or matte) and significantly increases the floor’s longevity and scratch resistance. While you might be eager to wrap up the project once the base coat is done, taking the extra step to apply a topcoat will pay off with a more durable and professional-looking finish.
- Do Choose the Appropriate Epoxy Product for Your Needs: Not all epoxy floor kits are created equal. Water-based epoxy kits sold at hardware stores are popular for DIYers because they are relatively user-friendly and have no harsh solvent fumes – but they typically contain a high percentage of water (sometimes 50% or more) and thus cure into a thinner, less rugged coating. In contrast, professional or “100% solids” epoxies (and newer polyurea/polyaspartic coatings) are much thicker and more durable, but they can be trickier to apply and often set very fast. When selecting a DIY epoxy kit, consider the use of your floor: For a light-duty area or a quick aesthetic upgrade, a water-based epoxy might suffice. If you need a tougher, high-performance floor (for example, in a garage or workshop with heavy traffic), look for a high-solids epoxy kit or a commercial-grade product. It may cost more and require more diligence in application, but it will create a more resilient finish. In any case, stick to well-reviewed products, and when in doubt, consult the manufacturer or supplier for recommendations on primer, topcoat, and any compatible color flakes or anti-slip additives for your chosen system.
- Do Plan for Care and Maintenance of the New Floor: Once your epoxy floor has cured, maintain it properly to maximize its lifespan. Routine cleaning is simple: sweep or vacuum regularly to remove abrasive dirt, and mop as needed with a gentle cleaner (even just water with a bit of ammonia works). Avoid harsh chemicals or heavy scrubbing machinery that could dull or scratch the epoxy top layer. It’s a good idea to use felt pads under furniture and place welcome mats or rugs at entryways (especially in garages or exterior doors leading to the epoxy floor) to catch grit and moisture before it gets on the epoxy. By caring for the surface – and promptly wiping up chemical spills or oil leaks – you’ll keep that glossy floor looking new. A well-installed and maintained epoxy floor can serve you for many years before any touch-ups or recoat might be needed.
Common “Don’ts” (Mistakes to Avoid)
- Don’t Skimp on Surface Preparation: As emphasized above, poor prep is the number one cause of DIY epoxy failures. Never shortcut this stage by skipping the deep cleaning, ignoring leftover oil stains, or forgoing the recommended concrete profiling (etching/grinding). Inadequate surface prep will compromise the epoxy’s adhesion and longevity. For example, if the concrete is too smooth or still dirty, the epoxy may not bond well and could peel or flake within months. So resist the temptation to rush into painting – invest the necessary time and effort into prepping the concrete properly.
- Don’t Ignore Moisture Issues: Moisture is a silent epoxy killer, particularly on basement floors. If your concrete slab has a moisture problem (whether due to vapor coming through from the ground, high humidity, or past water leaks), simply painting epoxy over it won’t end well. Trapping moisture beneath an epoxy coating can lead to all sorts of troubles down the line – including **delamination (the epoxy lifting off), bubbles/blisters in the coating, or even mold growth underneath. Always test for moisture and address it before applying epoxy. This could mean sealing the concrete with a moisture-mitigating primer, installing a vapor barrier, improving basement ventilation, or in severe cases, opting for professional waterproofing solutions. Epoxy needs a dry substrate, so don’t proceed until you’re sure the conditions are suitable.
- Don’t Apply Epoxy to New or Damp Concrete: Painting a basement that was just poured or still drying out? Stop – epoxy should not be applied on new concrete that hasn’t fully cured. Fresh concrete contains a lot of water which needs time to evaporate. Applying epoxy too early will likely result in adhesion failure and cracking as that moisture tries to escape. Likewise, if you washed or etched the floor, ensure it’s bone dry before coating (usually you should wait overnight or longer after rinsing an etch). A good rule of thumb is the 30-day cure time for new slabs. Also, avoid epoxy projects right after heavy rain if your basement slab tends to wick moisture. Essentially, don’t paint until the concrete is truly dry – it’s worth delaying the project a bit rather than having your epoxy floor peel up because the slab wasn’t ready.
- Don’t Underestimate the Time and Effort Involved: Installing an epoxy floor is not a quick Saturday afternoon paint job. A full DIY epoxy project involves multiple steps (cleaning, etching/grinding, cleaning again, priming, mixing, painting, possibly flaking, topcoating, and curing) spread over a couple of days at minimum. Rushing through any of these steps will hurt the final result. Take your time – rushing the process can lead to errors, uneven coverage, and subpar results. Plan out the project timeline and be prepared to dedicate a weekend (or several days) to do it right. It’s also physically demanding – from scrubbing floors to spreading epoxy – so don’t hesitate to recruit a helper. The key is to not hurry any step: careful, methodical work yields that smooth, professional-looking finish in the end.
- Don’t Mix Epoxy Components Haphazardly: We stressed this in the “do” section, but it bears repeating as a “don’t” – never mix epoxy resin and hardener by guesswork or “feel.” The chemical reaction that hardens epoxy requires the correct proportions and thorough blending.
**Improper mixing can result in a coating that never fully cures or has weak spots that fail under use. Additionally, don’t mix up more epoxy at once than you can apply within the working time; if you try to stretch a batch beyond its pot life, it can thicken or harden in the container. Follow the product guidelines for batch size and mixing time. If you have a large area, it’s often better to mix in smaller batches sequentially rather than one huge batch that might harden before you finish rolling it out. In short, be precise and attentive during mixing – this isn’t the time for improvisation. - Don’t Neglect Safety Precautions: DIY epoxy kits are chemicals, and applying them can pose hazards if you’re careless. Never skip personal protection – you absolutely should wear safety glasses, gloves, and a proper respirator when working with epoxy and cleaners. Make sure there is good ventilation; working in a closed, unventilated basement with solvent-based epoxy, for instance, could lead to a buildup of fumes that are both unhealthy and flammable. Proper ventilation and caution during installation will prevent health risks from inhaling solvent fumes and ensure a safer environment for you and your family. Also, keep children and pets away from the work area and wet epoxy. Epoxy can be very slick before it cures, so wear slip-resistant shoes (or spiked cleats made for walking on wet epoxy) to avoid accidents while rolling it on. In summary, treat this like the serious home improvement project it is: protect yourself and work safely at every step.
- Don’t Hesitate to Seek Professional Help if Needed: While this guide is for a DIY approach, it’s worth noting that not every situation is DIY-friendly. If you have a particularly large basement, major moisture problems, or if the idea of acid etching and handling chemicals makes you uncomfortable, consider consulting a professional flooring installer. Hiring a pro will increase the cost, but you benefit from their industrial-grade materials and expertise – a professionally installed epoxy floor can last 10–20 years in excellent condition. Even if you’re doing it yourself, you might consult an expert for advice on products or techniques for your specific situation. The goal is to end up with a floor you’re happy with; sometimes spending a bit on professional help (even if just for tricky parts like surface prep) can save you from costly do-overs. Remember, a DIY epoxy floor is very doable, but knowing your limits is important too.
Epoxy Concrete Floor DIY – Frequently Asked Questions
What is the best temperature for applying epoxy floor coating in a basement?
The ideal temperature range for applying epoxy is usually between 60°F and 85°F, depending on the product. Applying epoxy in temperatures below this can prevent proper curing, while excessive heat or humidity may cause bubbling or hazing. Always check your specific kit’s label for recommended environmental conditions.
Can I epoxy over a painted or sealed basement floor?
No, epoxy should not be applied over painted or sealed concrete unless the surface is first fully stripped or mechanically ground to bare concrete. Any remaining paint or sealant can prevent proper adhesion, leading to premature peeling or flaking. A clean, etched, or ground surface is essential for long-term performance.
How long does it take for epoxy floor coating to cure?
Cure time depends on the product and conditions, but most epoxy floors require at least 24–48 hours for foot traffic and up to 7 days for full chemical and abrasion resistance. Some fast-curing kits may allow earlier use, but curing times may extend in cooler or damp basement environments.
Is epoxy safe to use in a residential basement?
Yes, epoxy can be safe in basements when used with proper ventilation and protective gear. Choose low-VOC or water-based options for indoor use. Always wear a respirator and ensure airflow during and after application. Avoid solvent-heavy products in confined areas without professional-level exhaust systems.
Can I apply epoxy myself or should I hire a professional?
Intermediate DIYers can successfully install epoxy flooring with proper prep and planning. However, professionals are recommended for large floors, high-traffic areas, or slabs with moisture problems. If you’re unsure about surface prep or product choice, professional help can prevent costly mistakes and ensure long-term durability.
By keeping these do’s and don’ts in mind, you can avoid the most common pitfalls that plague DIY epoxy floor projects. When done correctly, an epoxy-coated concrete floor will not only brighten up and waterproof your basement, but also stand up to heavy use without peeling or cracking. With thorough preparation, the right materials, and a bit of patience, your basement floor can look as sleek and durable as a professional installation – at a fraction of the cost – giving you a space that is both functional and attractive for years to come. Full a full step-by-step DIY Basement Floor Epoxy guide look to our article on the subject.