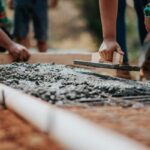
Grading the soil around your house might not be the most glamorous home project, but it’s one of the best ways to prevent water damage and protect your home’s foundation. If rainwater or melting snow melts toward your foundation instead of away, you could face basement flooding, foundation structural issues, or even landscaping erosion. In this friendly guide, we’ll explain what soil type is best for foundation grading and how a gentle slope around your home can save you from costly repairs down the road. We’ll also cover DIY tips, yard drainage solutions, and maintenance practices to ensure proper drainage for the longevity of your home. Let’s dive in and get your house on solid (and dry) ground!
Why Proper Foundation Grading Matters
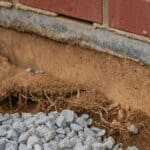
Every homeowner should understand the importance of proper grading around the foundation. Without a proper slope, rainwater can pool next to your house, leading to a host of problems. Poor drainage near the foundation often results in excess water seeping into the basement or crawl space, causing moisture problems like mold or rot. Over time, constant water exposure can compromise your foundation’s structural integrity and lead to foundation cracks (learn more in our guide on vertical vs horizontal foundation cracks). According to drainage experts, if runoff and grading aren’t managed, you risk increased flooding and erosion on your property. In short, drainage issues are not just annoyances – they can threaten your home’s stability and value.
Think of your roof: you wouldn’t let it leak. Likewise, the ground around your home is the “roof” for your foundation, and it needs to shed water effectively. Heavy rains or rapid spring snow melts can dump thousands of gallons of water around your house. If the ground level around your foundation is flat or – worse – slopes inward, all that water has nowhere to go but down along your basement walls. This can cause soil erosion and hydraulic pressure on the foundation, leading to cracks or leaks. Over time, unchecked water pooling can even erode the soil supporting your footings, resulting in an unstable soil base. Proper grading ensures water has a clear path to flow away from the house, protecting your stable foundation and landscaping.
Proper slope is key. Experts generally recommend a desired slope of about 5% away from the foundation – that’s roughly 6 inches of drop over the first 10 feet. In fact, the Milwaukee Metropolitan Sewerage District suggests the ground should drop about one inch per foot for the first 5–10 feet around the house. This gentle but proper grade uses gravity to direct water away. If you have a flat lot or low spots where water lingers, regrading those low areas can make a huge difference. Good grading also complements other drainage measures like gutters and French drains. By taking care of the slope around your home now, you’ll avoid risk of damage later – preventing things like cracked driveways, a wet basement, or settling walls that lead to costly repairs.
Finally, remember that water only runs downhill. It might sound obvious, but it’s worth noting: if your yard is improperly graded, water will find its way to unwanted places. This can include your neighbor’s property, which is something to avoid. A well-graded yard not only protects your home but is also considerate of natural drainage patterns in your local landscape. The goal is to manage runoff across your entire property so that even during heavy storms, water drains in a controlled manner without causing erosion problems or pooling. A little effort in grading now can save you from a multitude of headaches and such issues in the future, keeping your home safe and dry.
Understanding Soil Types and Drainage
Not all soil is created equal when it comes to drainage and foundation grading. The soil type you’re dealing with will affect how water moves (or doesn’t move) through the ground. Soil is composed of three main particles: sand, silt, and clay. Sandy soil has large particles and lots of air space, so water zips through it quickly. In contrast, heavy clay soil has very fine particles that pack tightly, resulting in poor drainage – water moves through clay at a snail’s pace and often puddles on the surface. Most soils are somewhere in between these extremes. Ideally, the best soil for drainage is a loam (a balanced mix of sand, silt, and clay) that retains some moisture but still lets excess water escape.
If your yard has higher clay content, you’ll notice it holds water longer. When soil stays saturated, it can’t support loads well and may expand, potentially heaving against your foundation (those significant volume changes in clay during wet/dry cycles are a big factor in foundation issues). On the other hand, soil that’s too sandy might drain fast but isn’t great for erosion control – it can wash away during a storm, taking your grading efforts with it. For optimal results, you want a Goldilocks blend: not too porous, not too dense. A soil quality that is firm enough to hold a slope but allows adequate drainage is ideal. Many experts recommend a silty clay loam as the right soil mix for grading, as it contains enough clay to hold shape and enough silt/sand to permit water flow.
Soil organic matter and organic content also play a role. Organic material (like compost or leaf mold) increases a soil’s ability to hold water and improves structure by binding particles into crumbs. In a garden, adding compost can fix drainage issues in clay by improving porosity. However, around your foundation you actually don’t want soil that’s overly rich in organics. Why? Highly organic soils (like pure compost or rich topsoil) can be too absorbent – they act like a sponge, holding water right next to your house. They also tend to settle more over time as organic matter decomposes, which can ruin your slope. A little organic content is fine to help with plant growth, but the soil immediately against your foundation should be more mineral (think dirt, not fluffy garden soil). Dense composition soils like clay can actually serve a purpose by shedding water away from the foundation, as long as the surface is graded correctly.
One way to gauge your soil’s drainage is by doing a percolation test. Dig a hole about 12 inches deep, fill it with water, and see how fast it drains. If water takes more than 8 hours to drain, you likely have poor drainage due to either soil compaction or heavy clay. In such cases, aside from regrading, you might improve the topsoil layer with some sand or compost to open up those tight soil pores. Just be cautious about mixing a very permeable soil right next to the foundation – you don’t want to create a situation where water easily flows down along the foundation wall. The ideal scenario is a top layer of modestly permeable soil over a harder, clay-rich base that directs water outward. We’ll talk more about layering soil in the next section.
Finally, be aware of soil erosion potential. If your regraded slope is too steep or composed of loose material, heavy rain could wash it away. Steep slopes may require special measures like terracing, mulching, or a retaining wall. Planting grass or other groundcover on a slope helps hold the soil together with roots – nature’s reinforcement against erosion. In fact, using native plants suited to wet or dry areas can help manage water and stabilize the soil. Good drainage isn’t just about the soil itself, but how you manage that soil with vegetation and maintenance. A healthy soil with a bit of organic matter will form nice clumps or “aggregates” that resist washing away. The bottom line: know your soil type, improve it if needed, and choose the ideal soil mixture that will support a gentle slope and handle water responsibly.
Choosing the Best Soil for Foundation Grading
So, what is the best soil for foundation grading? In simple terms, you want fill dirt that packs well and directs water away, topped with a layer of soil that can support turf or plants. You might be tempted to grab bags of “topsoil” from the home improvement store, but bagged topsoil is not the best choice for grading around your house. Bagged topsoil is often a mix high in compost or peat (lots of organic matter) – great for a garden bed, but not ideal against your foundation. That high organic content makes it light and fluffy, meaning it will settle significantly after you place it. It can also hold a ton of moisture right where you don’t want it. Instead, the preferred choice is usually bulk screened topsoil from a local supplier or garden center. Locally sourced topsoil (often a native silty clay loam) will better match your yard’s soil and compacts into a firm, semi-permeable layer. It’s typically cheaper by volume as well. This new soil can be delivered by the cubic yard and is great for grading work.
When we talk about “fill” around a house, we usually mean subsoil material with a decent amount of clay (or at least not overly sandy). If you have excavated amount of soil from another part of your yard (or leftover from construction), that might work as fill as long as it’s clean (free of a lot of debris or mulch). In many cases, fill dirt from other sites is used for large scale grading. Just be cautious: if you import fill dirt, make sure it’s similar in composition to your native soil and doesn’t contain contaminants. For most homeowners doing a small grading touch-up, buying a few yards of screened topsoil mix is easiest. It’s basically the right soil blend ready to go.
What about using gravel or stone? Some people wonder if putting river rock or gravel next to the foundation will help drainage. In practice, a layer of gravel alone isn’t a yard drainage solution – it doesn’t slope, it just lets water pass through quickly. If you have gravel right against the foundation without proper grading, water will go straight down along the foundation (not good). However, gravel can be used in addition to soil grading. For example, after grading the soil you might have a 2-3 inch layer of decorative gravel on top for landscaping, or use gravel to fill a shallow trench beyond the grading to act as a drainage swale. The key is that the top of the soil underneath is still sloping correctly. Gravel is also used in French drains or perforated pipe systems, which we’ll cover later as a supplemental solution. But by itself, gravel is not a substitute for soil when grading around a house.
Here’s a good approach for layering the soil around your foundation for optimal results:
- Base fill: If you need to build up a lot of height (several inches or more), use a dense fill dirt or clay-heavy soil in layers. Compact each layer as you go (more on compaction soon). This fill should rise up to within a few inches of the final grade level you want.
- Top layer: For the last few inches of topsoil, use a nutrient-rich soil that can support grass or other foundation planting. This might be a loamy topsoil mix. Aim for about 4–6 inches of this top layer to sustain plant life. It will also help absorb some water but since it’s over a pitched, compacted base, excess water will run off.
- Surface cover: Once graded, you’ll want to establish vegetation (like grass seed or sod) or use materials like mulch or stone to protect the surface. Vegetation is great because grass roots will hold the soil and the turf will take up some water, preventing surface runoff from causing soil erosion. Just keep mulch or plant bases a few inches away from the foundation itself to avoid pest and rot issues.
One more tip on soil choice: avoid soils that are exclusively clay or exclusively sand. Pure clay could be too impermeable – while it blocks water (acting like an impermeable barrier), it may cause water to simply pond at the surface or run off without soaking any up, possibly overwhelming other areas. Pure sand or gravel, conversely, is too permeable and won’t hold a grade easily (plus it allows water to drain straight down). A mix, like the aforementioned silty clay loam, is the preferred choice because it will settle into a firm state but still be somewhat semi-permeable to allow good drainage of surface water. Also, remember to keep the graded soil below the siding of your house. You should maintain at least about 4 inches of foundation exposed between the soil and the siding. Soil (and any mulch or grass) should not touch wooden parts of the house – that prevents rot and insect issues. If building up soil makes it too high against your siding, you may need to adjust things (for instance, raise window wells or remove some soil a bit further out to maintain the slope drop-off).
By choosing the proper fill and topsoil, you’re setting yourself up for best results in foundation grading. The ideal soil will create a stable foundation for your yard surface, support greenery, and channel water away from your home. Next, let’s look at how to actually do the grading work as a DIY project.
DIY Grading Around Your House: Step-by-Step
Grading your yard for better drainage can absolutely be a DIY project for the determined homeowner. It’s a physically demanding job (you’ll be moving a lot of dirt), but it’s straightforward in concept. Always remember: safety first and plan before you dig. Here’s how to tackle a DIY grading project around your foundation:
Step 1: Planning and Preparation
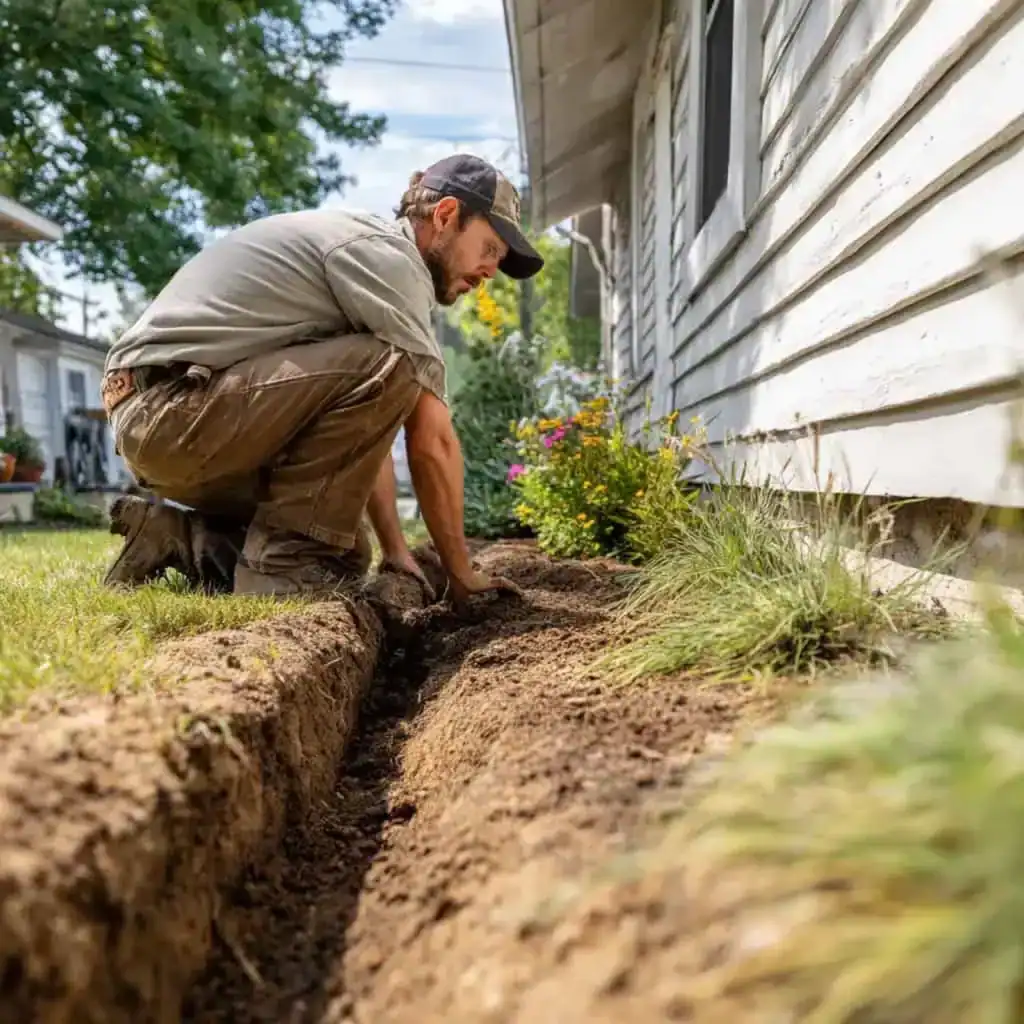
The first step is to assess the current grading and identify problem areas. Walk around your house during or after a good rain – where does the water go? Do you have low spots where puddles form or water seeps along the foundation? Note these trouble zones. Also, look for signs of past issues: water stains on the foundation wall, eroded mulch, or muddy areas. Sketch a quick map of your house and yard, marking where you need to add soil to create a gentle slope.
Before you put a shovel in the ground, call your utility companies (or the local “Call 811” service in the US) to mark any utility lines in the yard. This is critical – you don’t want to hit electrical, gas, or water lines while digging. Many yards have buried cables or pipes, especially near the house (think utility lines for power, internet, or sprinkler systems). It’s better to know their locations so you can work carefully around them. Hitting a line could turn your DIY weekend into a larger project with unintended outages or repairs!
Next, gather any necessary permits or check local regulations if you’re doing a major regrade. Usually, small projects are fine, but if you’re moving a significant volume of earth or altering drainage near property lines, ensure you’re in the clear with local codes. Also consider talking to neighbors if grading close to the property boundary – good communication can prevent disputes, especially if your changes might affect runoff onto their property.
Finally, mark the area you plan to regrade. Using some brightly colored spray paint on the ground can outline the extent of the fill or the new contour line where the slope should end. You might spray an outline showing where the new soil will taper off into the existing lawn. If you need to keep a consistent slope height, you could put small stakes in the ground and mark the desired height on them (for example, a stake 10 feet out from the house marked 6 inches lower than the stake at the foundation indicates a 6″ drop – the desired slope). Proper planning and marking will make it easier when you start moving soil so you don’t dump too much or too little in any spot.
Step 2: Tools and Materials You’ll Need
You don’t need heavy construction equipment for a minor regrading, but the right tools will make the job easier. Here are some useful tools and materials for grading (and yes, these can be budget-friendly DIY grading investments):
- Grading rake – A wide grading rake (landscape rake) is perfect for spreading soil and getting a smooth even grade. It’s wider and has tougher tines than a garden rake, allowing you to pull large amounts of soil and level it out.
- Shovel and wheelbarrow – Good old basics. You’ll use a shovel to dig and move soil, and a wheelbarrow to transport the new fill around. A pointed shovel works for breaking up soil, and a flat shovel is handy for scooping and leveling.
- Hand tamper or compactor – To properly settle the soil, a hand tamper (a heavy flat metal plate on a rod) can be used to pound the soil down. For bigger areas or for larger projects, you might rent a small plate compactor to make quick work of firming up the soil layers.
- Bulk fill dirt and topsoil – As discussed in the previous section, you’ll need a supply of soil. Calculate roughly how much you need (length × width × depth of area to fill, converted to cubic yards). Having slightly more than needed is better than not enough. Order some bulk fill dirt (for volume) and topsoil (for the top layer) from a local supplier.
- Soil test kit (optional) – A soil test kit can be handy if you want to check the pH or basic composition of your soil, especially if you plan to plant grass or landscaping afterward. It’s not critical for the grading itself, but understanding your soil’s fertility can guide what soil amendments or fertilizers to add when replanting the area.
- Level – A carpenter’s level (at least 2-4 feet long) or even a string level will help you check the slope. You can lay a straight board or a 2×4 from the foundation outward and place a level on it to measure drop. Or use a line level on a string stretched between a stake at the house and a stake 10 feet out.
- Work gloves and boots – Don’t forget personal comfort and safety. You’ll be digging and hauling, so protect your hands and feet.
Having these tools ready will set you up for an efficient grading process. Now let’s get to the actual work of shaping the land.
Step 3: Establish the Proper Slope
Now comes the fun (or at least the dirty) part – creating that proper slope away from your house. Start at the foundation and work outward. If there’s any old landscaping or obstacles against the house (like shrubs you plan to remove, or thick mulch or stones), clear those out first so you have a bare working surface.
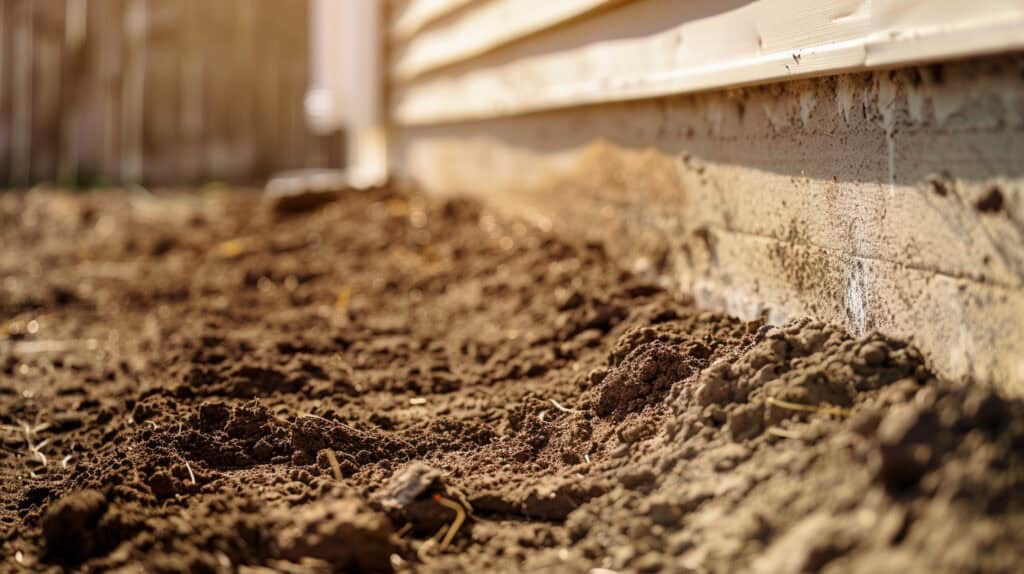
Begin placing your fill soil next to the foundation wall. As you add soil, shape it so it begins higher at the foundation and slopes downward. A good rule of thumb is the 1 inch drop per foot guideline – for example, if you’re working 8 feet out from the house, the soil at 8 feet out should be roughly 8 inches lower than at the foundation. Use your level and straightedge to check the grade as you go. It doesn’t have to be exact, but aim for that ballpark. Remember the earlier advice: keep the soil from covering too much of the foundation. Make sure you still see those few inches of foundation wall above the soil line for safety.
A homeowner uses a level to measure the slope of soil away from the foundation. Ensuring the ground falls at least 1 inch per foot in the first several feet creates a reliable gentle slope for proper drainage.
Work in sections along the house, rather than dumping all the soil in one pile. Spread the soil with your grading rake, periodically checking that you’re achieving a consistent slope and that there are no uneven surfaces or dips. It may help to slightly mound the soil directly against the foundation and then taper it out smoothly. If you have basement windows or window wells, be cautious not to block them. You might need to install or adjust window wells if adding a lot of soil (they should stick up above the soil grade by a couple of inches to prevent runoff from pouring in).
As you form the slope, also consider where the water will go after it runs off those first 5-10 feet. You don’t want to solve one problem and create another puddle farther out. Ideally, the water should continue to move away from the house and toward the street, a storm drain, or another lower area of your property. If the land flattens out after 10 feet, that’s usually okay because most of the water will have dispersed by then. But if you have another house foundation or structure downhill, ensure there’s a clear path for water that won’t cause harm. In some cases, you might integrate a shallow swale (a broad, shallow ditch) at the end of your slope to channel water along the property line or to a rain garden.
While shaping the grade, watch out for any backfilled areas that might settle later. Foundations often have disturbed soil around them from when the house was built. These areas can settle over years, which is why you might be regrading in the first place (the previous owners of the home might not have done this, or time has caused the soil to sink). To counteract future settling, slightly over-fill and compact the soil (coming up next in Step 4).
Take your time with this step – getting the slope right is the heart of the project. It might look a bit like a small berm or ramp sloping down from your house. That’s okay, because once we dress it with topsoil and grass, it will blend in. The goal is that if you roll a ball (or better yet, observe water flow) it moves definitively away from the foundation.
Step 4: Compact and Settle the Soil
Once the soil is roughly in place and sloped, it’s crucial to compact it. If you skip this, the soil compacts itself over time (likely unevenly) and your nice slope could develop sagging low spots next to the foundation after a few heavy rains. Using your hand tamper or plate compactor, tamp down the fill soil in layers. A good method is to add soil in 2-3 inch layers, wet it lightly with a hose (damp soil compacts better than bone-dry soil), and then tamp it. The moisture helps the particles settle and fill voids. Be careful not to soak it – you just want it a bit damp, not muddy.
After compacting the fill dirt, add your topsoil layer (those final few inches for growing grass). Rake it out smoothly, maintaining the slope. This top layer can be a little looser to allow for seeding, but you still should pat it down gently with the back of a rake or a light pass of the tamper. Leave the surface soil loose enough for seed contact but not fluffy mounds that will wash away. At the edges of your work area, feather the new soil into the old ground to avoid an abrupt step or cliff. A gradual transition prevents water from simply stopping at the edge of the new grade and puddling there.
Now is a good time to step back and look at the overall grading. Does it look natural? Is the slope even? Check that you haven’t accidentally created unintended high spots or divots. Use your level or even a long straight board to spot-check for a proper grade. The ground should steadily decline from the foundation outward with no sections that dip inward toward the house. If something’s off, now is the time to adjust by adding or removing soil and re-compacting.
After shaping and compacting, let the soil settle. If you can, leave the regraded area alone for a day or two (or even a week) before final landscaping. Natural settling will occur, especially if it rains. You might even purposely water the area with a sprinkler to simulate rain – not too heavy as to cause washout, but enough to help the soil settle more. Any spots that settle lower can be topped up with a bit more soil and re-leveled. This extra step can ensure optimal results once you finish the project.
Step 5: Replant and Restore the Area
With the grading done and the soil in place, it’s time to cover that bare earth. Planting grass or other plant life on the newly graded area isn’t just for looks – it’s an important part of preventing soil erosion and managing water. Spread grass seed over the topsoil (choose a seed that matches your existing lawn or a fast-germinating mix for quick cover). Lightly rake the seeds in, and cover with a thin layer of straw mulch or biodegradable mulch blanket to keep seeds moist and protect from erosion. Alternatively, you can lay sod for instant coverage if the area is not too large and your budget allows.
Water the new grass seed/sod appropriately in the coming weeks to establish a healthy root system. A good root network will help maintain the slope by holding soil in place when heavy rains come. Avoid directing sprinklers so much at the foundation that water pools; water just enough for the grass. If it’s late fall or a bad time to plant, you might use an erosion control fabric or even temporarily cover the soil with mulch to get through a season, then plant in better conditions. The key is not to leave raw soil exposed long-term.
For aesthetics and function, you can also incorporate some foundation planting (shrubs, groundcovers) a few feet out from the foundation once the grading is set. Just be mindful: don’t plant things that require heavy watering right next to the house, and don’t pile mulch up against the foundation. Keep a gap between plant beds and the foundation wall. If you do plant near the house, choose hardy plants that tolerate the sometimes drier, fast-draining soil on a slope (or wetter soil if you have a clay base that holds moisture). Also consider using native plants that are adapted to your local rainfall and soil conditions – they can help manage water better and are usually low maintenance.
Finally, clean up and ensure that any excess soil or materials are properly disposed of. If you have leftover soil, you might use it to fill other low spots in the yard or create some raised beds (just not piled against the house!). Stand back and admire the graded area – it might not look dramatically different to an untrained eye, but you can take pride in knowing your yard now has correct grading. The next time it rains, you’ll likely see a big improvement as the water flows away from your home, just as intended.
Beyond Grading: Additional Drainage Solutions
Grading the soil is the first and most important line of defense against water problems, but some situations call for extra measures. If you’ve done what you can with correct grading and still encounter drainage issues, consider these yard drainage solutions to further protect your home:
- Gutters and downspouts – Ensure your roof drainage is working hand-in-hand with your grading. Your gutter downspouts should discharge water at least a few feet away from the foundation onto the sloped areas or into an extension or drain pipe. If downspouts dump water right at the corner of your house, no amount of grading will fully save you. You can add extenders or underground drain lines to carry water to a safe distance. This helps direct water well beyond the foundation.
- French drains – A French drain is a gravel-filled trench with a perforated pipe that intercepts and redirects water. If you have a stubborn area where water collects (like at the bottom of a slope or along the foundation of a basement that’s partially below grade), installing a French drain can whisk water away to a discharge point. French drains are especially useful if you have a specific project area that remains soggy because of poor drainage even after grading. They do require some digging and usually fabric + gravel + pipe, but can solve water pooling by giving water an easy underground path out.
- Swales and berms – These are landscape features to control surface water. A swale is a shallow channel that guides water, and a berm is a raised mound that blocks or redirects water. If your property is large or has a complex shape, you can sculpt the land to channel runoff along desired routes (keeping it away from the house or other sensitive areas). Just be careful not to push water toward a neighbor or onto a septic field, etc., creating such issues elsewhere.
- Retaining walls and terraces – If you live on a hill or have steep slopes, a stepped approach might work best. A retaining wall can hold back soil and create flat terraces that each catch and slow down water. Terraced grading is common in hilly terrain to prevent rapid runoff. Retaining walls must be built properly to include drainage (weep holes or gravel backfill) so they don’t become dams that trap water.
- Dry wells or soakaways – These are underground gravel pits or pre-fab structures buried in the ground that collect and slowly release water. If you have a spot that you can’t easily drain to daylight, you might channel water into a dry well. The water then percolates into the surrounding soil. This is more of a larger project and usually a supplement to grading when you have no slope to send water.
- Rain gardens and plant solutions – A rain garden is a planned low spot planted with water-loving plants, designed to temporarily hold and absorb runoff. If a corner of your yard always gets water, turning it into a rain garden can be a beautiful, eco-friendly solution. Use deep-rooted native plants that thrive in wet conditions to help water soak in. Similarly, planting trees or shrubs downhill can drink up water and slow runoff. Just keep heavy landscaping a bit away from the foundation to maintain airflow and avoid roots against the foundation wall.
When adding any drainage solution, think holistically about your property’s natural drainage patterns. Water that leaves your property should ideally flow into appropriate areas like street drains, dry creeks, or dispersal areas with vegetation, not straight onto someone else’s land. Sometimes, solving a yard drainage problem is a complex task – it could require multiple approaches (for example, retaining wall plus French drain plus regrading). If it feels overwhelming, don’t hesitate to get professional help. There are professional landscaping projects firms and waterproofing specialists who tackle these problems daily.
Also, consider checking resources from trusted authorities on drainage. The EPA reminds us that stormwater runoff from homes carries not just water but also things like sediment and pollutants into waterways. Managing runoff responsibly on your property helps the broader community too. Oklahoma State University’s extension suggests a variety of fixes (ditches, French drains, culverts, etc.) for urban drainage problems and emphasizes not to create bigger issues for downhill neighbors. Always aim for a solution that benefits your property without undermining another’s. With the right combination of grading and drainage solutions, you can handle even challenging water problems and enjoy a dry, safe home environment.
Maintaining Your Foundation Grading
Congratulations – you’ve regraded around your house and maybe added other drainage improvements. But your job isn’t done forever. Regular maintenance is crucial to ensure your proper drainage continues working year after year. Here are some maintenance tips to protect that structural integrity you’ve worked hard to secure:
- Inspect annually: At least once or twice a year (often best in spring and fall), take a walk around the house. Look at the soil grading and see if there are any new low spots forming next to the foundation. Soil can settle, especially if there was a lot of rain or if the soil was disturbed by things like animals or foot traffic. If you find any depressions, add a bit more fill and tamp it down to keep the slope. Also, ensure the soil hasn’t heaped up against the siding due to wind or other factors – maintain that clearance of a few inches below siding and keep the top of the soil below the foundation line.
- Watch the water: Pay attention during heavy rains. Where does the water flow? If you notice any water pooling near the foundation (where before it was fine), that’s a red flag. It could mean your grade was flattened by erosion or maybe a drainage system like a downspout extension came loose. Fix issues promptly – it’s easier to touch up grading or reattach a downspout than to deal with water in the basement. Also check after winter; melting snow piles can sometimes reveal grading insufficiencies if water ends up against the house.
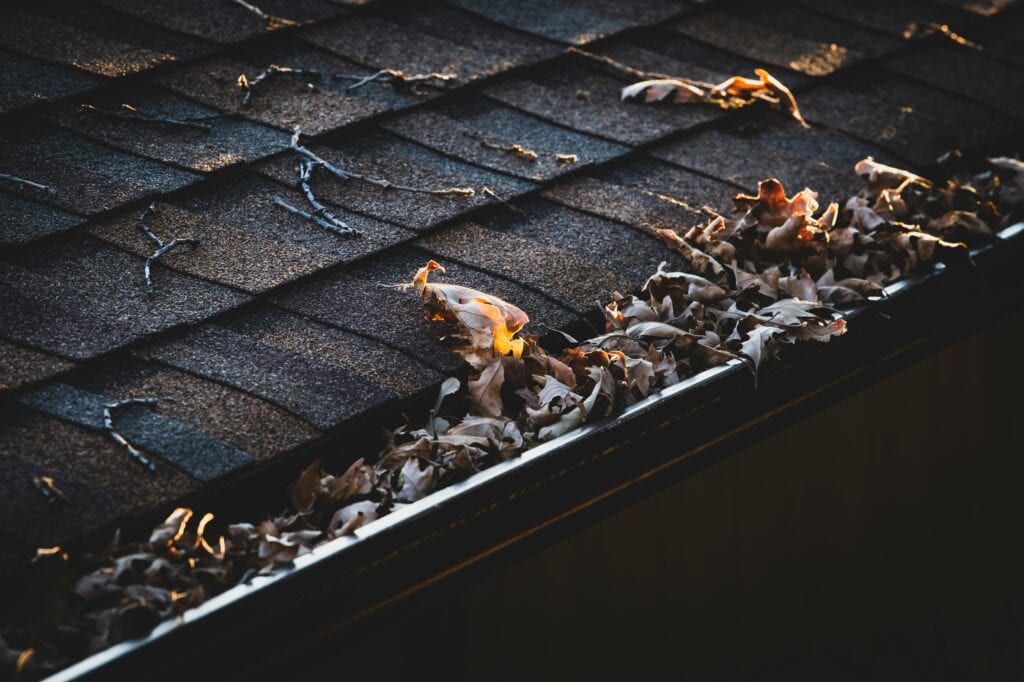
- Gutters and downspouts upkeep: Keep your gutters clean and in good repair. Clogged gutters will overflow and dump water right next to your foundation, defeating your grading efforts. Make sure downspouts are still directing water to the right place – sometimes extensions get knocked off by mowers or kids, etc. A little regular maintenance here goes a long way in preventing excess water by the foundation.
- Landscaping considerations: If you add or change landscaping, keep drainage in mind. For instance, if you put in a flower bed along the house, don’t build up the soil or edging in a way that forms a dam against your house. Likewise, be cautious with foundation planting (shrubs, hedges) – they should not block water flow or require constant watering that saturates the soil. Mulch in beds should be kept below the siding and not allowed to pile up too high (mulch can also direct water if it’s mounded).
- Mulch and soil adjustment: Over time, organic mulches break down into soil and can inadvertently raise the grade. Every couple of years, you might need to remove some old mulch or soil that accumulates and refresh it. Ensure that doing so doesn’t alter the slope direction. If you notice soil washing away in spots (maybe you see exposed roots or gravel), that indicates an erosion problem – you may need to plant thicker groundcover or add erosion fabric or rocks to stabilize that area.
- Check for signs of trouble: Inside your basement or crawl space, keep an eye (and nose) out for any signs of moisture – damp smells, efflorescence on walls, new cracks, etc. These could hint that your outside grading or drainage needs attention again. Catching a small leak early might just mean regrading a tiny section outside before it becomes a big leak. Also keep an eye on foundation cracks – if you see new ones or expansion of old ones, it might be water-related pressure (or other issues). If in doubt, consult a professional. (Also see our article on concrete slab vs crawl space construction for how different foundation types handle moisture.)
- Prepare for seasons: Before winter, ensure the grading is still correct so that when snow melts, it flows away. In spring, after the thaw, check that nothing has shifted. When doing any yard projects, remember the grading plan – for example, if you’re installing a new patio or walkway, make sure it doesn’t negatively affect the slope (patios should also pitch away from the house).
Maintaining your yard’s grading is mostly a matter of periodic checks and minor touch-ups. The soil around your home is part of a living ecosystem – it settles, it moves with freeze-thaw cycles, and it can change with time. The USDA NRCS notes that disturbances like filling and grading can reduce soil quality and affect runoff, so maintaining or improving that soil with care (like adding a bit of compost on the surface for grass health, without compromising the grade) can actually enhance its performance over time. A healthy lawn on a slope can absorb a lot of water before it runs off, especially if the soil underneath has decent structure. Remember, soil quality and soil health count too, according to the University of Maryland – soil isn’t just dirt, it’s a medium that can absorb and hold rainwater when in good shape. Taking care of it means it will take care of your home.
If despite your best efforts, you find that water problems persist or the grading issue is beyond a DIY fix (say, your whole yard is improperly pitched and needs heavy regrading), it might be time to consult professionals.
When to Call in Professional Help

While many grading projects are within the DIY scope, some situations warrant bringing in a professional landscaper or drainage contractor. If you’re facing a complex task or a potentially risky one, don’t hesitate to get professional help. Here are scenarios where calling a pro makes sense:
- Extensive regrading needed: If your entire entire property or a large portion of it has drainage problems, a landscaping contractor with grading equipment can re-contour the land much faster and more effectively than you and a shovel. They can also accurately calculate the amount of soil needed and often have access to better pricing on materials. For larger projects, the efficiency and proper tooling (like mini-excavators, skid steers, laser levels) can ensure a smooth result.
- Structural water issues: If water issues have already caused foundation structural issues (like major cracks, a shifting foundation, or chronic basement flooding), you should involve a foundation specialist or engineer. Grading will help, but you may also need interior waterproofing, foundation underpinning, or other structural remedies. A professional can assess if you need solutions beyond surface grading, such as French drains tied to a sump pump, retaining structures, or soil stabilization for unstable soil.
- Challenging terrain: Homes on hills, near lakes, or in flood-prone areas can be tricky. Professionals can devise a drainage plan that might include rain gardens, catch basins, drainage systems, or tie into municipal storm drains if allowed. If your house is at the bottom of a slope catching everyone else’s runoff, a pro’s advice is invaluable. They can also ensure you’re not violating any local codes or impacting wetlands, etc.
- Permit and code navigation: For big earth-moving jobs, pros can handle permitting and are familiar with local regulations (for example, some municipalities have rules about altering grade or require approval for changes that affect water flow). They can also plan to avoid any underground surprises by coordinating with utilities – though you should always call 811 regardless, pros will too.
- Landscaping design: Maybe you want to both fix drainage and improve your yard’s look. Landscape architects or designers can create a plan that integrates grading with beautiful landscaping – perhaps a dry creek bed that’s functional and pretty, or a series of stone wall garden beds that terrace a slope and also serve as planters. These experts ensure form meets function so you get optimal results that increase your home’s value and curb appeal.
- Time and labor: Let’s face it – moving a bunch of dirt is hard work. If you don’t have the time, physical ability, or simply don’t want to do it, hire someone. There’s no shame in getting help, especially when the stakes (protecting your home) are high. A professional landscaper or contractor will likely get it done in a fraction of the time you’d take, and they’ll know to check the fine details like the proper slope, compaction, and tying the new grading into existing landscape features smoothly.
- Verification and peace of mind: If you did the DIY grading but aren’t entirely sure it’s sufficient, you could consult a pro to double-check your work. Some might offer an inspection and suggest tweaks. For example, if you’re worried about structural integrity of an older foundation, an expert can provide guidance on whether your exterior grading is enough or if additional drainage (like footing drains) is needed.
Professional help can come from different sources: landscapers, excavation contractors, waterproofing/foundation specialists, or civil engineers for drainage design. When selecting someone, look for those with good experience in yard drainage solutions or grading specifically. Ask for references or examples of past work – a professional landscaper who specializes in grading will have before-and-after photos of solving drainage issues.As the OSU Extension notes, qualified contractors will also inform you about maintenance needed to keep the drainage fixes working. That’s a sign of a good pro – they won’t just dump soil and leave; they’ll ensure you know how to maintain the solution. Even if you spend some money now on hiring experts, you could be saving a lot more by preventing water damage and preserving the longevity of your home. It’s all about weighing the complexity and risk of your situation against your own skills and tools. When in doubt, bring in the pros and sleep easier next time the storm clouds roll in.
FAQ – Best Soil for Foundation Grading
What is the best soil for grading around a house foundation?
The best soil for grading around a foundation is a silty clay loam or similar fill dirt that compacts well and sheds water. You want soil with enough clay content to be semi-impermeable so water flows away, but still some sand or silt for adequate drainage. Locally sourced screened topsoil (often a native clay loam) is better than bagged topsoil, which can be too high in organic matter. The soil should be firm enough to hold a gentle slope and not settle too much over time. Often, a layer of clay-rich fill is placed first, then a few inches of topsoil are added on top for vegetation.
How much slope should the ground have away from my foundation?
Aim for a slope of about 1 inch per foot for the first 5–10 feet away from your foundation. This equals roughly a 5–10% grade. For example, at 10 feet out, the ground should be about 6–10 inches lower than at the foundation. This proper slope ensures rainwater and melting snow flow away from the house. If that exact slope isn’t possible, create as much slope as you can—never let the ground slope toward the foundation.
Can I use topsoil for foundation grading or should I use fill dirt?
It’s best to use fill dirt or clay-based soil for the bulk of foundation grading, then top it with a few inches of topsoil. Pure topsoil (especially bagged mixes high in compost) is not ideal as primary fill because it’s light, fluffy, and retains too much water. It also settles over time. Instead, use compactable soil (low organic content) to build the slope, then 4–6 inches of quality topsoil on top for grass and plants. This provides a stable base and healthy growing layer.
What tools do I need to grade around my house myself?
For a DIY grading project, you’ll need:
A shovel (for digging and moving soil)
A wheelbarrow to haul dirt
A grading rake (for leveling and smoothing)
A hand tamper or plate compactor for firming soil layers
A long level or string level to check the slope
Wooden stakes and spray paint to mark the desired slope
Always remember to call 811 to mark any utility lines before digging.
How can I improve drainage if grading isn’t enough?
If you’ve already regraded but still have drainage issues, try these yard drainage solutions:
Extend gutters and downspouts farther from the house.
Install a French drain to collect and redirect water.
Create swales or berms to channel runoff.
Add a retaining wall on steep slopes to slow water flow.
Plant a rain garden in soggy areas to absorb excess water.
Often, combining grading with other measures (like drains and gutter fixes) provides the best results.
Will regrading my yard help prevent basement flooding?
Yes, regrading is one of the most effective ways to prevent basement flooding. By creating a slope that directs water away, you reduce the pressure and moisture around your basement walls. This lowers the chance of leaks and moisture problems. For extra protection, pair proper grading with functional gutters, downspouts, and possibly foundation drains or a sump pump if needed.
When should I hire a professional for drainage and grading issues?
Call a professional landscaper or drainage contractor if:
Your entire property needs regrading or heavy equipment.
You have complex terrain (hills, flat lots, limited outflow).
There are structural issues or recurring basement flooding.
You need help designing for natural drainage patterns.
Local rules require engineered drainage systems.
Professionals ensure proper grade, prevent risk of damage, and help maintain the longevity of your home.
In Closing
Choosing the best soil for foundation grading is one of the simplest and most effective ways to protect your home from drainage issues, basement flooding, and long-term structural damage. By using a clay-loam mix, maintaining a gentle slope, and performing regular maintenance, you can ensure water flows away from your home instead of toward it. Pairing proper grading with good yard drainage solutions—like French drains, extended downspouts, or well-designed retaining walls—creates a system that keeps your foundation dry and secure through heavy rains and changing seasons. Whether you handle the project as a DIY grading job or hire a professional landscaper, understanding soil behavior and drainage principles will help you achieve optimal results and preserve the longevity of your home.