
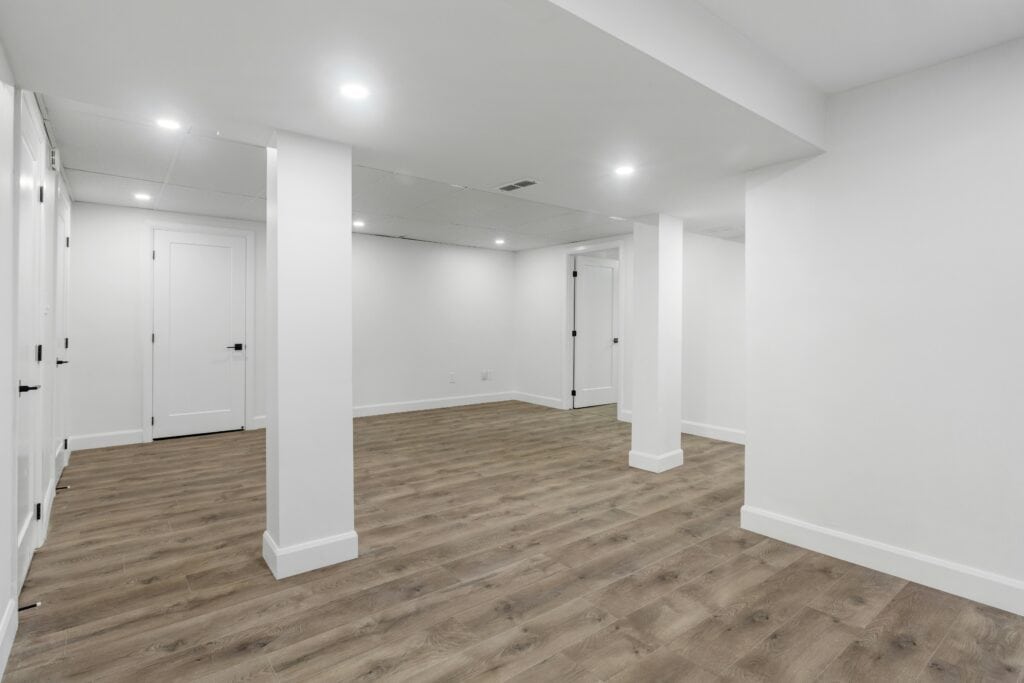
DIY basement finishing is one of the most rewarding home improvement projects for a handy homeowner. By transforming an unfinished basement into livable space, you can significantly increase your home’s usable square footage and even boost resale value (finishing a basement can return up to 70% of its cost in home value). This friendly, step-by-step guide will walk intermediate DIYers through the entire process – from early planning and framing to diy basement ceilings, flooring, and final touches. We’ll also discuss the average cost to finish a basement diy, important code and safety considerations, and common mistakes to avoid. Grab your tools and let’s get started turning that bare basement into your new favorite place!
Planning
Every successful project begins with a solid plan. Planning your basement finish involves deciding on layout, uses, and addressing any pre-construction issues:
- Define the Purpose: Decide how you want to use the new space. Will it be a family room, home theater, guest room, home office, or game room? Determining the primary function helps guide your design and needs. For example, a home theater might require extra sound insulation and dimmable lighting, while an in-law guest suite might need a bathroom and egress window. You can also partition the basement into multiple areas (e.g. a living space plus a basement bathroom or laundry area) to maximize functionality.
- Moisture Check: Before any construction, make sure your basement is dry. Basements are prone to moisture issues, so inspect for leaks, condensation, or past water damage. If you have excess moisture, address it now – fix plumbing leaks, improve exterior drainage, and consider installing a sump pump or interior drainage system if flooding is a concern. Waterproofing isn’t optional; standing water can lead to mold, pest infestations, and even structural damage. Many experts recommend starting with sealing and waterproofing to keep the space dry before you build anything else. Test for moisture by taping a square of plastic to the concrete floor and wall; after 24-48 hours, check if condensation has formed under it. If it has, you’ll need to take additional steps to moisture control (like a vapor barrier or sealant) before finishing.
- Layout & Design: Sketch a floor plan of your basement with measurements. Note existing features like support columns, furnace, water heater, windows, and pipes. Plan around these “fixed” elements, since moving major systems (like HVAC or plumbing lines) can be costly or impractical. It’s often better to design your walls and rooms to accommodate them (for example, build a closet around the water heater, or create soffits to hide low ducts). Ensure your plan includes required clearances for hallways and stairs. If you plan to add a wet bar or bathroom, situate it near existing plumbing lines if possible to simplify the plumbing work. Also decide on storage: you might want to reserve an unfinished corner or closet for seasonal storage or a workshop.
- Local Building Codes: Early in planning, research local building codes and permit requirements. Construction permits are typically required for finishing a basement, since you are adding livable space with electrical, and possibly plumbing. As a rule of thumb, any work that involves new plumbing, wiring, or structural changes will need permits. Getting the proper permits and inspections not only keeps your project legal, it ensures the work meets safety standards. Skipping permits is a big no-no – unpermitted work can lead to fines, problems selling your home, or even being forced to tear out work. So, factor permit costs and approval time into your plan. Permit fees can range from around $1,200 to $2,000 depending on your location and scope, and inspections will be needed at various stages (framing, electrical, plumbing, final).
- Egress and Safety: If you intend to add a bedroom or other sleeping area in the basement, code will require an emergency escape route. This usually means installing an egress window (a large window well that someone can climb out of) or a door to the outside. Building codes typically mandate at least one egress window or exterior door in a finished basement for fire safety. Plan for this early, as cutting a new window opening in the foundation is a significant task. Egress windows must meet size requirements (for example, a minimum net clear opening around 5.7 sq. ft., at least 20 in. wide and 24 in. high) to qualify. If you already have small basement windows, you may need to enlarge one to meet these standards if a bedroom is part of your plan. Also consider safety devices like smoke detectors and carbon monoxide detectors – these should be installed in finished basements per code.
- Budgeting: Outline your budget for the project. Major expenses will include framing lumber, insulation, drywall, flooring, ceiling materials, fixtures, paint, and labor costs (if hiring out any work). The overall cost can vary widely based on the size and level of finish. Professionally finishing a basement averages about $32,000 in the U.S., with a typical range of $15,000 to $75,000 according to HomeAdvisor. Doing it yourself can cut costs significantly since you’ll save on labor (which is roughly 20% of the total cost). Some determined DIYers manage to finish a basement for as low as \$10k-\$15k in materials, especially if the space is modest and they use cost-effective options. When budgeting, include a contingency (around 10-15%) for surprises – like an unexpected need for a sump pump or additional electrical work. By planning your budget and getting quotes for any parts you won’t DIY, you can avoid running out of funds mid-project.
- Timeline: Be realistic about the time frame. A professional crew might finish a basement in 4-8 weeks, but a DIY diy project on evenings and weekends will take longer – possibly several months. Identify which tasks you can tackle yourself and which might require help. For instance, you might DIY the framing and painting but hire an electrician for the wiring or a pro for taping/mudding drywall if you’re not comfortable. Lining up any needed professional help at the right stages will prevent delays. Don’t forget to account for inspection scheduling, material deliveries, and the inevitable hiccups (like that one weird pipe in the way that takes extra time to box around). Patience and planning go hand in hand!
With a clear plan addressing design, waterproofing, code requirements, and budget, you’re ready to move on to gathering materials and prepping for construction.
Materials & Tools Checklist

Before you swing a hammer, make sure you have all necessary materials and tools on hand. Being well-prepared will save countless trips to the hardware store and keep your project running smoothly. Below is a checklist of materials and tools you’ll likely need for a DIY basement finishing project:
Materials:
- Framing Lumber: 2×4 studs for walls (use pressure-treated lumber for any bottom plate that will contact concrete). Don’t forget 2x4s or 2x6s for partition walls, plus extra for blocking or soffits.
- Fasteners & Adhesives: Framing nails or screws, concrete screws or masonry nails (for anchoring walls to the concrete floor and walls), construction adhesive (for foam board or subfloors), and drywall screws.
- Insulation: Rolls or batts of fiberglass insulation for walls (e.g. R-13 or R-19 for basement walls) and possibly for between ceiling joists (for sound dampening). Rigid foam board insulation is also an option for foundation walls – it can serve as a vapor barrier and added R-value. Tip: Don’t forget to insulate the rim joists at the top of foundation walls to seal air leaks.
- Moisture Barrier: Plastic sheeting (6-mil poly) to lay under any subfloor or behind insulation if needed for moisture control. Also, foam sill sealer to place under wall bottom plates as a gasket.
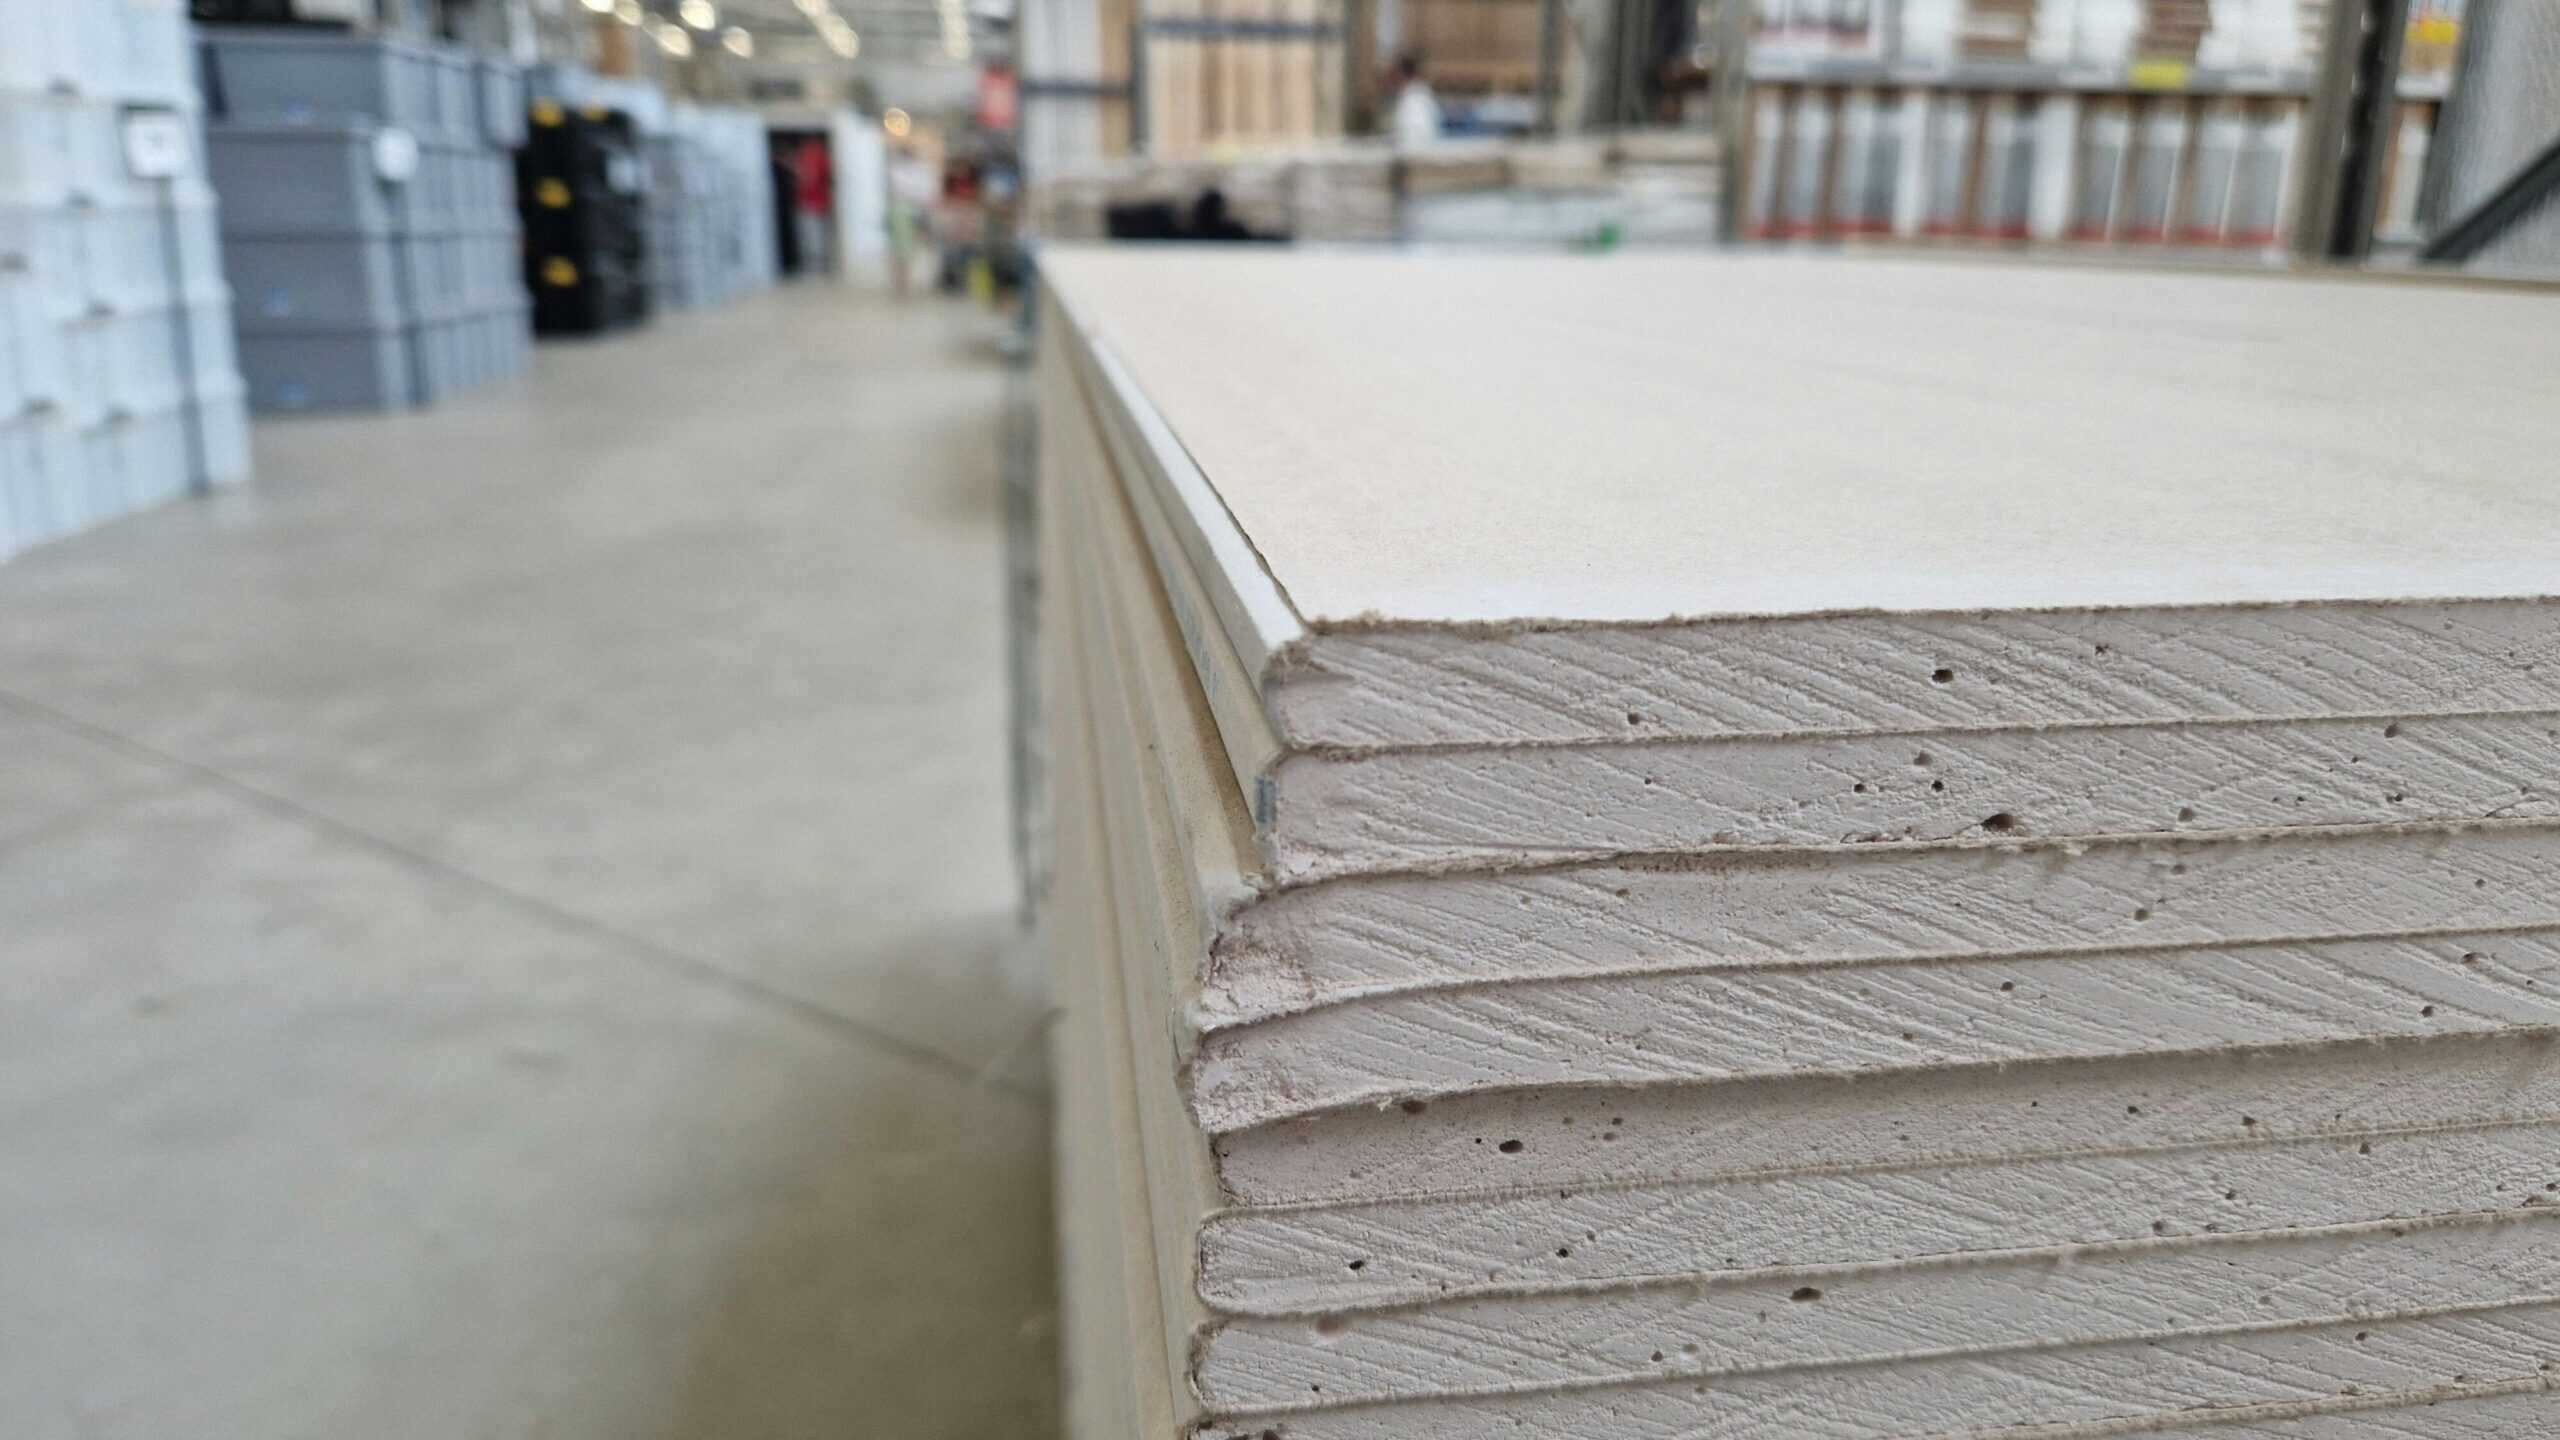
- Drywall & Finishing Supplies: 1/2-inch drywall sheets (moisture-resistant “green board” or similar is a good choice for basements), joint tape, joint compound (drywall mud), and corner bead for corners.
- Ceiling Materials: If doing a drop ceiling, you’ll need the suspension grid kit and ceiling panels. If doing a drywall ceiling, account for drywall for the ceiling and additional joint compound. For an open ceiling (exposed joists), you might use paint to finish it off instead of materials to cover it.
- Flooring: Your flooring of choice – commonly luxury vinyl plank (LVP) or vinyl tiles for basements due to their water-resistance. Other options include ceramic tile, engineered wood, laminate, or carpet (carpet squares are a DIY-friendly option). Also include underlayment or subfloor panels (like DRIcore or foam underlayment) if your design calls for it.
- Doors & Trim: Any interior doors for rooms (and door hardware), plus baseboard molding, window casing, and trim to finish the space. Don’t forget lumber for any built-ins or shelving you plan to add.
- Paint & Primer: Quality primer (especially for fresh drywall and any masonry walls) and interior paint for walls and ceilings. Choose a light color paint for most areas to make the basement feel more open and bright, as basements have less natural light. Also consider a mold-resistant paint or additive for peace of mind in a basement environment.
Tools:
- Measuring & Marking: 25-ft measuring tape, carpenter’s pencil, and chalk line (for snapping straight layout lines on floors and ceilings – you’ll use chalk lines to mark where walls will go on the concrete floor). A laser level or plumb bob is also handy for aligning framing from floor to ceiling.
- Cutting Tools: Circular saw or miter saw for cutting lumber. (Using a miter saw – like a DEWALT 12-inch compound miter saw found on Amazon – makes cutting studs and trimming moldings much more precise and efficient.) Also, a utility knife with plenty of blades for cutting drywall and insulation, and a drywall saw or oscillating tool for cutting openings in drywall.
- Hammer and Drill: A sturdy hammer (or even better, a pneumatic framing nailer if you have access to one) for framing work. A power drill/driver is essential – preferably a cordless drill (like this DeWalt 20V Max cordless drill found on Amazon) for drilling pilot holes and driving screws. If you need to fasten into concrete for bottom plates or furring strips, you may also need a hammer drill or a powder-actuated nail gun (Ramset) for concrete nails.
- Fastening & Wrench Tools: Screwdriver set, pry bar, adjustable wrench, and pliers. Socket set if you need to tighten bolts (sometimes used for sill plates or attaching metal post bases). A caulking gun will be useful for adhesives and sealants (like subfloor adhesive or fire-blocking caulk).
- Electrical & Plumbing Tools (if DIYing those): Wire strippers, voltage tester, and fish tape for running wires. For plumbing, a pipe cutter (for copper or PVC), plumbers’ wrench, and perhaps a crimping tool if using PEX tubing. Even if you plan to have a pro do the final hookups, having basic electrical/plumbing tools helps with any preparatory work you do yourself.
- Drywall Finishing Tools: Drywall T-square (to measure cut lines on drywall), drill bit for drywall screws (with a dimpler or stop), taping knives (a 6-inch and a 12-inch knife for mudding), mud pan, sanding block or pole sander with sandpaper (wear a mask when sanding drywall!). A corner trowel is useful for inside corners. If working alone, you might rent or buy a drywall lift to help raise sheets for the ceiling.
- Ladders and Work Lights: A sturdy step ladder (basements often have 7-8 foot ceilings, so a 6-ft ladder usually works). Also, temporary work lights or clamp lights – basements can be dark to work in, especially before lighting is installed.
- Safety Gear: Always have safety glasses or goggles, work gloves, and a dust mask or respirator (you’ll encounter dust from concrete, sawdust, and drywall compound). Hearing protection is smart when using power saws or hammering a lot. Also keep a first aid kit nearby for minor cuts or scrapes.
- Miscellaneous: 4-foot level (to ensure walls are plumb and level), framing square (for checking right angles), shims (wood shims for adjusting framing or door jambs), shop vacuum (to clean up dust and debris as you go), and lots of drop cloths or plastic sheeting to cover items and flooring during messy work (like drywall sanding or painting).
Having these materials and tools ready will set you up for success. Now, with your plan in place and supplies on hand, it’s time to start building!
Framing
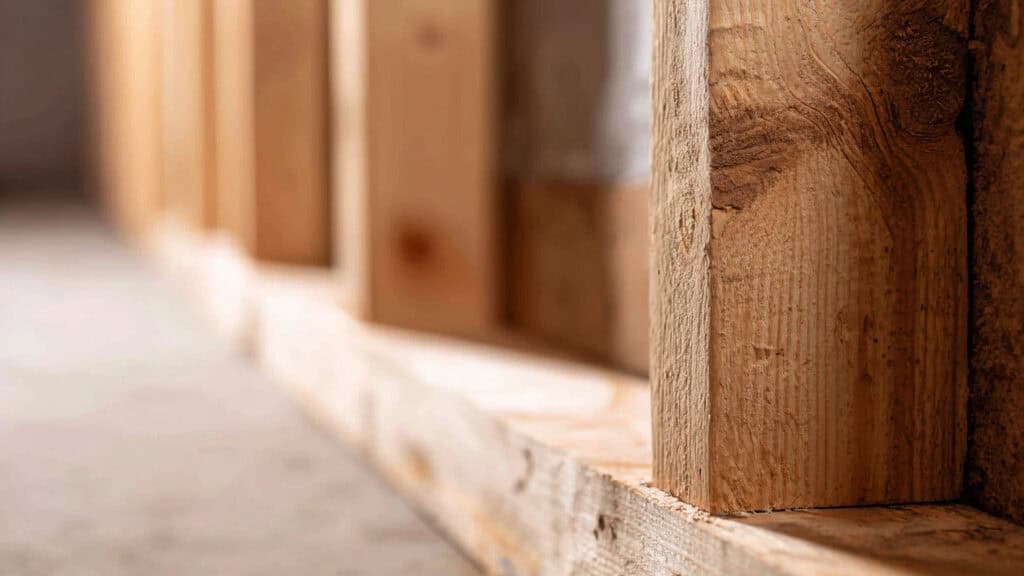
Framing is the first major construction step in finishing a basement. This is where your empty space starts to take shape with actual walls and rooms. If you’re comfortable with basic carpentry, framing walls is quite doable as a DIY task. Here’s how to approach the framing stage:
- Layout the Walls: Begin by marking where your walls will go. Use your floor plan and transfer it to the actual basement by snapping chalk lines on the concrete floor to outline each wall’s position. Double-check measurements so that your planned rooms have the correct dimensions. Mark door openings or any other special frames (like a nook or closet) at this stage too. It’s a good idea to also mark on the joists overhead where walls will meet the ceiling, to ensure they line up vertically with your floor markings.
- Prep the Floor and Ceiling: If your basement floor is uneven, you may need to use shims or a self-leveling compound under walls or subfloor areas. Also, inspect the ceiling joists – you’ll likely be attaching your top plates directly to the joists or blocking between them. Identify any obstacles like low pipes or ducts that you’ll have to build around. For example, HVAC ducts might require you to frame a drop ceiling soffit or a second ceiling beneath them. Plan and frame these lowered areas so they blend in with the rest of the ceiling.
- Build the Walls: Construct each wall one at a time. Walls are typically built with 2×4 studs spaced at 16 inches on center (meaning there is 16″ from the center of one stud to the center of the next – this standard spacing makes installing drywall easier and meets code for most non-load-bearing walls). Start by cutting your top plate and bottom plate pieces to length for a given wall. Lay them on the floor, and mark your stud positions (measuring from one end, mark every 16 inches along the plates, using a square to draw a line across both plates at once – this ensures your studs will line up perfectly). Don’t forget to account for door openings: you’ll need headers (typically doubled-up 2x4s or 2x6s) over doors and additional studs (jack and king studs) around openings for support.
- Pressure-Treated Bottom Plates: For any wall that meets the concrete floor, use pressure-treated lumber for the bottom plate. This wood resists moisture and won’t rot from the slight dampness that can occur on concrete. Lay down a foam gasket or sill sealer under the bottom plate as well to further block moisture and improve insulation. Attach the bottom plate to the concrete with appropriate fasteners – either concrete screws (like Tapcons) drilled into pre-made holes or use a powder-actuated nail gun to drive nails into the concrete. Secure the top plate to the ceiling joists above (or to blocking nailed between joists if the wall doesn’t line up directly under a joist). Use 2×4 “studs” as blocking between joists if needed to have something solid to nail the top plate into.
- Erect Studs: With top and bottom plates in place, install the vertical studs. Cut each stud to the proper height (measure each, as basement floors and joists can vary a bit). They should fit snugly. Tack the stud in at top and bottom with nails or screws through the plates. Ensure each stud is plumb (vertical) using a level before final fastening. Pro tip: if working alone, you can toe-nail (nail at an angle) one end of the stud to hold it, adjust the stud to plumb, then nail through the plate on the other end. Build out all the walls this way. Where walls meet, nail studs together or use special metal connectors. Also install any fire-blocking required (some codes require horizontal blocks midway up the wall or at the top of the wall between studs to slow fire spread – check your local code).
- Frame Around Obstacles: Most basements have some tricky spots – beams, posts, ductwork, or pipes that hang below the ceiling. You’ll need to frame around these to hide them. Build soffits (also called bulkheads) to box in duct runs or pipes: this usually involves horizontal framing that attaches to the joists and then vertical studs down from that to form a lowered hollow box that you can later drywall. Around structural posts, you can build a square column with 2×2 or 2×4 framing that will later be wrapped with drywall or wood trim. It’s a bit like making a narrow wall all around the post.
- Furring and Strapping (if needed): If your foundation walls are irregular or you want a little space, you might choose to fur out the exterior walls instead of full framing. Furring means attaching strips of wood or metal channels directly to the concrete walls, which you can then insulate between and cover with drywall. This saves a few inches of space, but running mechanicals (wires/pipes) is harder in such shallow cavities. Full 2×4 walls are more common because they allow insulation and wiring easily, and they aren’t actually attached to the foundation (aside from the bottom plate anchored to the floor). Typically, leaving a small gap (1/2″ to 1″) between the framed wall and the concrete wall is wise – it prevents any moisture on the concrete from immediately soaking your wall and allows for slight breathing room.
- Doors and Special Framing: Frame openings for doors with proper headers. Don’t forget to account for the thickness of the flooring when determining door rough opening height (if you’re adding thick carpet, for example, leave a little extra gap under the door). If you’re adding any built-in shelves or a recessed entertainment center, frame those areas accordingly now.
After framing, you’ll really see your basement’s rooms and shape. Take a moment to walk through and imagine where everything will go. Double-check that you have space for furniture and that doorways are placed conveniently. Before closing up walls with insulation and drywall, the next step is to handle your utilities – electrical, plumbing, HVAC – while the framing is open and accessible.
Electrical & Plumbing
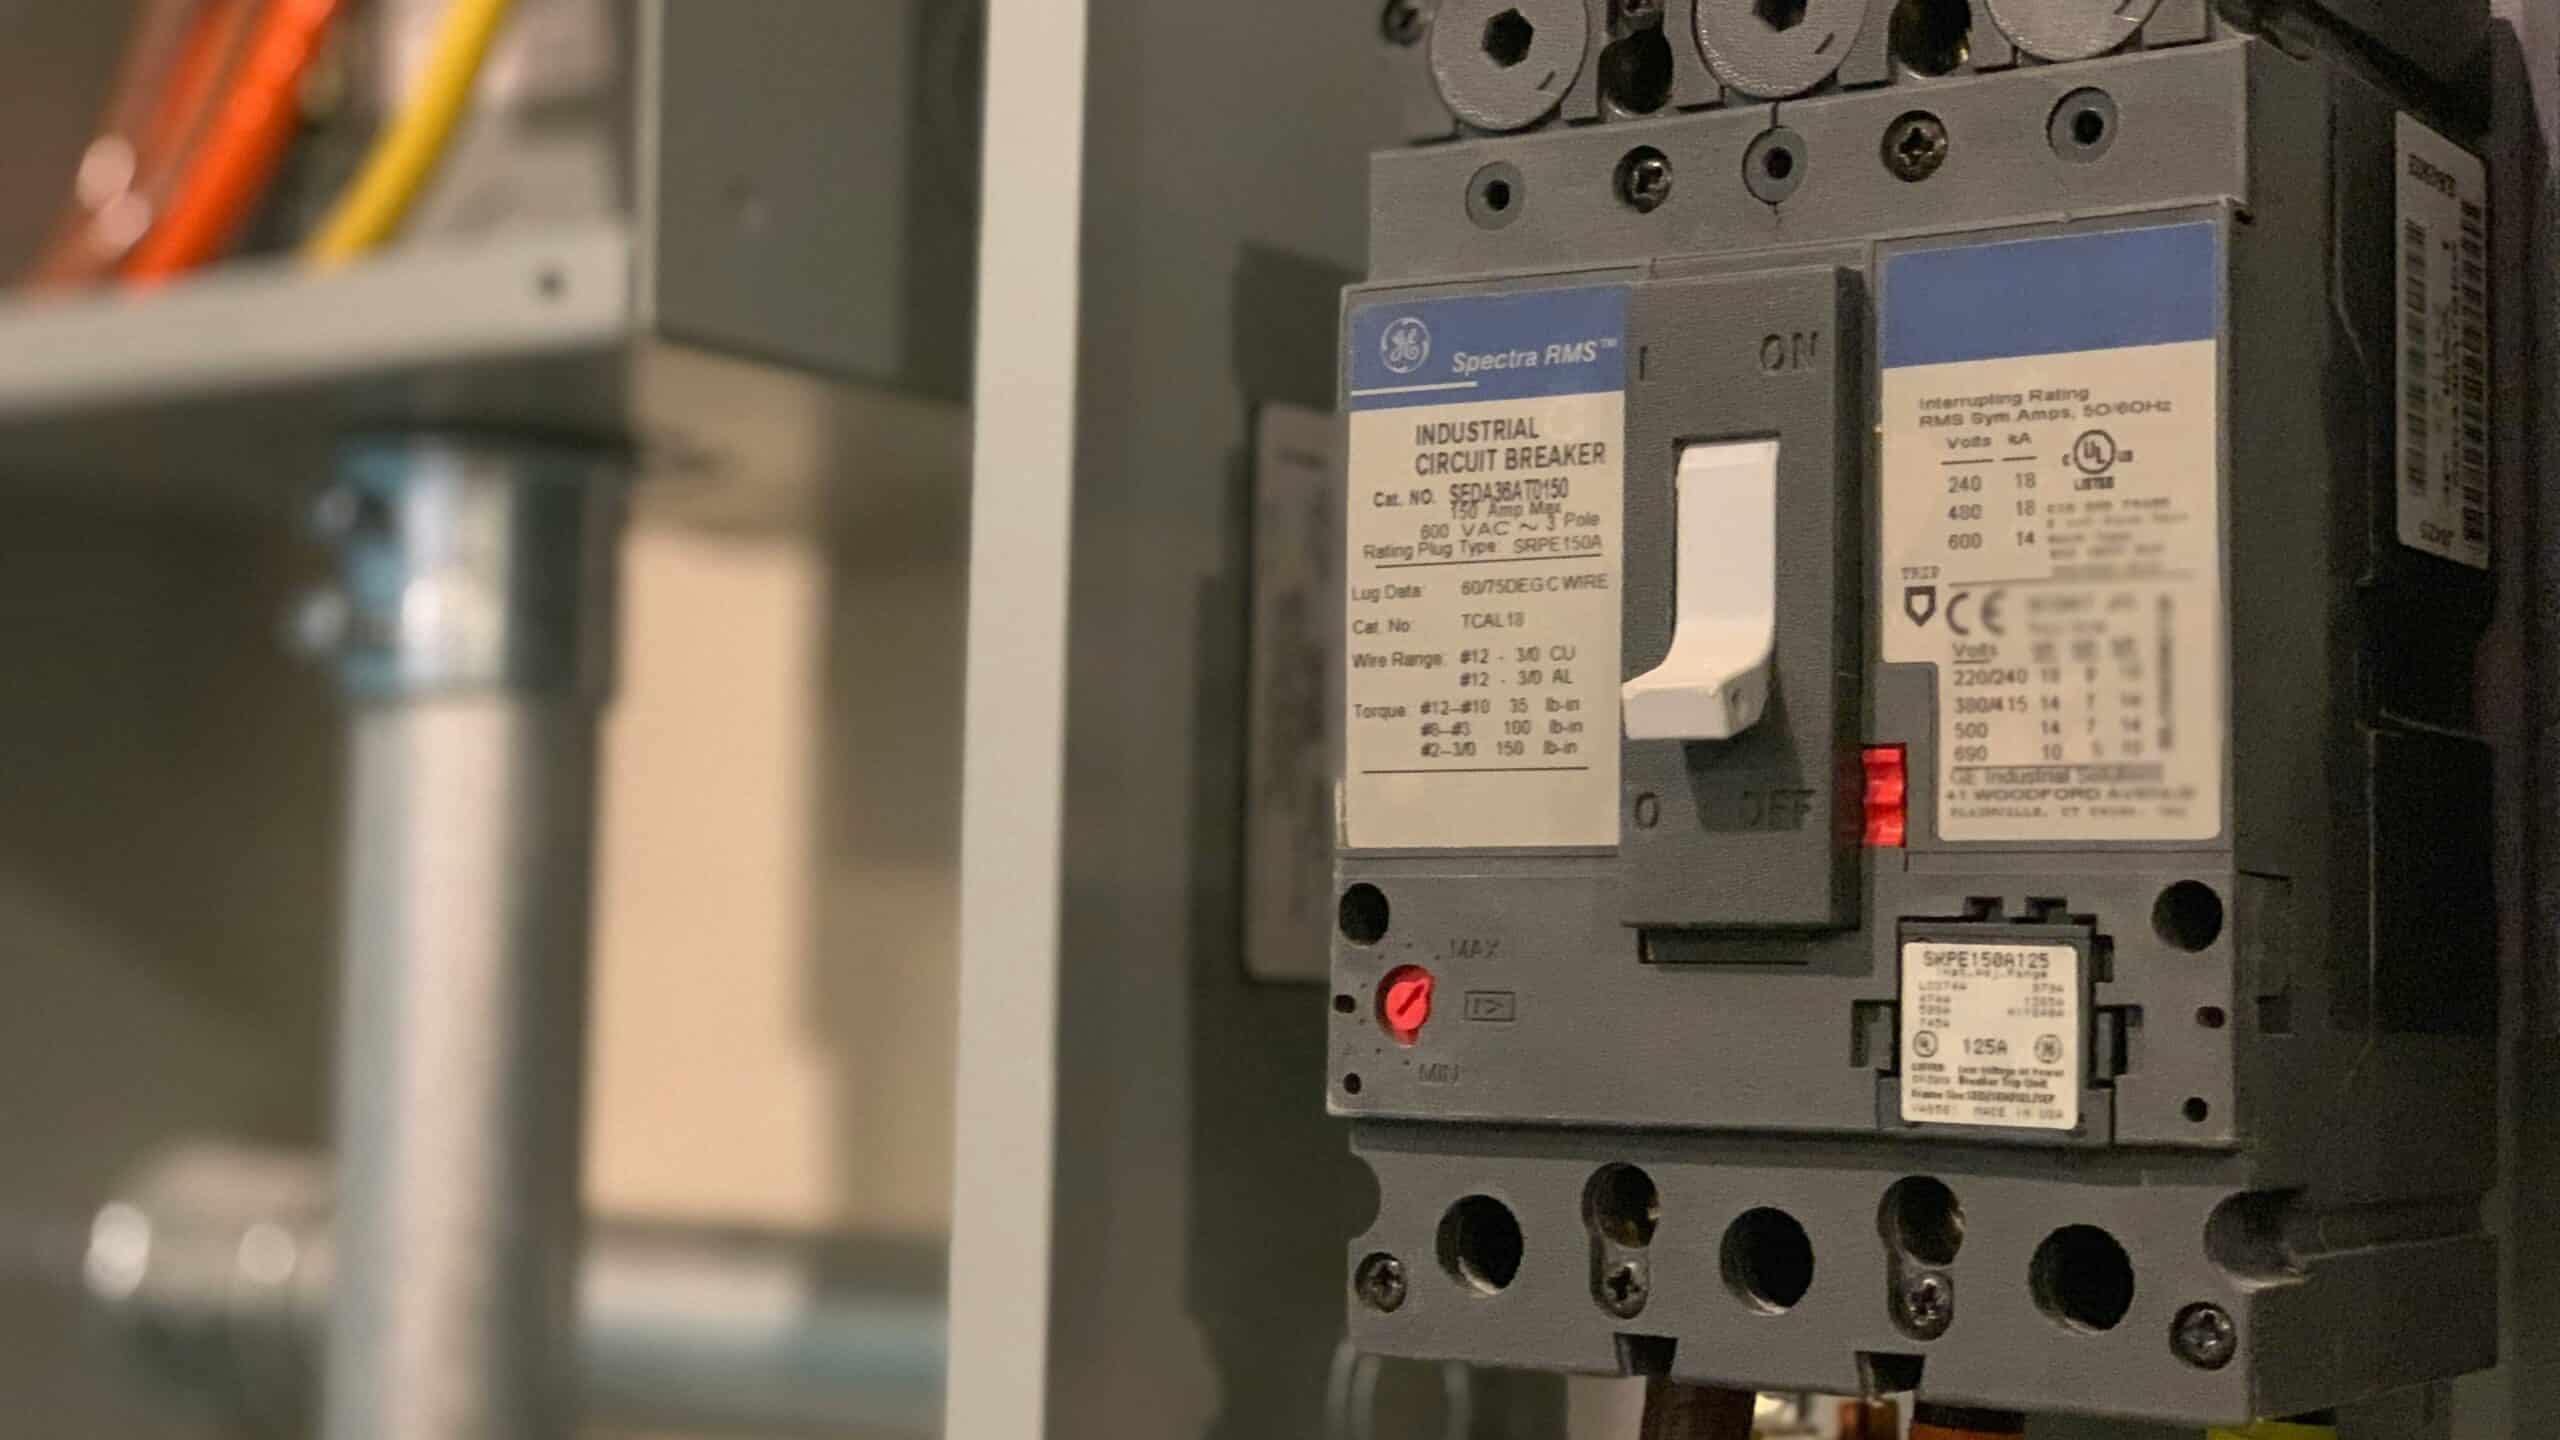
With framing up, it’s time to tackle the mechanical rough-ins behind the walls – namely, electrical & plumbing (and any HVAC changes). This stage is critical for a functional basement, and it’s one area where you may involve licensed pros for safety and code compliance. Here’s what to consider:
- Electrical Wiring: Plan your basement’s electrical layout. Determine how many outlets and light fixtures you need and where to put them. Building code typically requires outlets at least every 12 feet along finished walls (and on any wall section wider than 2 feet). Basements also often require GFCI-protected outlets, especially if there’s a bathroom, wet bar, or any chance of moisture. If you’re comfortable with wiring, you might run circuits from your main panel to serve the basement. This usually means installing new circuit breakers in the panel (if space allows) dedicated to basement outlets, lighting, and any big items (like an electric heater or a sump pump). Important: Turn off power when working and follow electrical codes meticulously – if you’re not experienced, consider hiring a licensed electrician for at least part of the job (like making the final connections or running cable to the panel). Electricians ensure that wire gauge, breaker size, and installation meet safety standards.
- Lighting: Good lighting can make a basement feel much less like a cave. Plan for a mix of general lighting and task lighting. Recessed lights (can lights) are popular in basements because they don’t take headroom. You could install 4″ or 6″ LED recessed lights spaced evenly across the ceiling. As a general guide, one light for roughly every 25-36 square feet keeps things bright (adjust based on your fixtures’ lumen output). If you have areas like a reading nook, bar, or desk, plan for dedicated lighting there (like pendant lights or sconces). Run the electrical wiring for these lights now. Typically you’ll run NM cables (“Romex”) from light to light and to switches. Mark your switch locations on the framing (usually at 42-48″ from floor). This is also the time to run any low-voltage wiring: Ethernet cables, cable TV lines, speaker wires for a surround sound system, or security system cables. It’s easiest to run all these while walls and ceilings are open.
- Plumbing: If your basement will have a basement bathroom or a wet bar/kitchenette, you’ll need to rough-in plumbing. This can be the trickiest part of a basement reno because adding drains in a basement might involve breaking up the concrete slab to tie into the main drain line (unless your basement was pre-plumbed with stub-outs). If adding a full bathroom, ideally there are roughed-in pipes. If not, you might consider options like a macerating (upflush) toilet system to avoid busting the slab. For sinks, you’ll need venting and traps according to code. Many DIYers will do simple plumbing tasks in PEX (flexible plastic water lines that are relatively easy to run), but for anything involving the main stack or complicated drainage, it’s wise to get a plumber’s input. At the very least, consult on where and how to tap into existing lines. Running water supply lines for a sink or bar is often easier than drain lines – PEX tubing can be fished through joists and walls with fewer connections. Remember to include a plumbing vent (which might need to run up and tie into the house vent system or go out the roof) – an often-overlooked but required component for proper drainage.
- HVAC: How will you heat and cool the new space? Many basements tie into the house’s existing HVAC system. This could mean extending ductwork from your furnace to supply air to the basement rooms and adding cold air return vents low on the walls. If you have forced air heat, consult an HVAC pro to see if your furnace can handle the additional square footage – you may need a booster fan or just some creative duct runs. Alternatively, some people use electric baseboard heaters or a mini-split HVAC unit for the basement. Plan and install any ductwork or vent registers now, before walls are closed up. If you’re framing around ducts (soffits), make sure to cut in openings for vent covers where needed.
- Permits & Inspections: Both electrical and plumbing rough-ins will typically require an inspection before you cover them with drywall. If you pulled permits (which you should for these trades), an inspector will need to see the wiring and piping in place. So, once you finish running all the wires (and have them hanging out at outlets, switches, and fixture boxes) and have all plumbing pipes run (with appropriate slope for drains, vents installed, and water lines capped off), you’ll schedule inspections. Passing inspection ensures everything is safe and up to code.
- Special Considerations: Basements often contain some of the house’s main utility equipment (water heaters, furnaces, electrical panels, etc.). You must maintain access to these. Do not enclose your electrical panel behind drywall without an access door; code requires clear access (usually a 30″ wide clear area). Similarly, if your furnace or boiler is in the basement, you may frame a utility room around it, but that room needs proper ventilation (some furnaces require louvered doors for combustion air) and adequate space for servicing the unit. Plan to install smoke alarms (hardwired with battery backup, interconnected with the rest of the house system) and carbon monoxide detectors in the basement. Many codes require a smoke detector in each bedroom and in common areas. You can wire these into your electrical plan.
In summary, this stage is about making your basement functional and safe. It’s perfectly fine (even expected) to get professional help here if you’re not already skilled in these trades. You might do the framing and maybe run speaker wires yourself, but hire an electrician or plumber for the complex stuff. Many DIY enthusiasts do a hybrid approach: you do the labor of drilling holes in studs and running the cables/pipes, but under the guidance of a licensed pro who will do final connections and ensure it meets code. Once electrical and plumbing rough-ins are done and approved, you can move on to insulation and closing up those walls!
Insulation
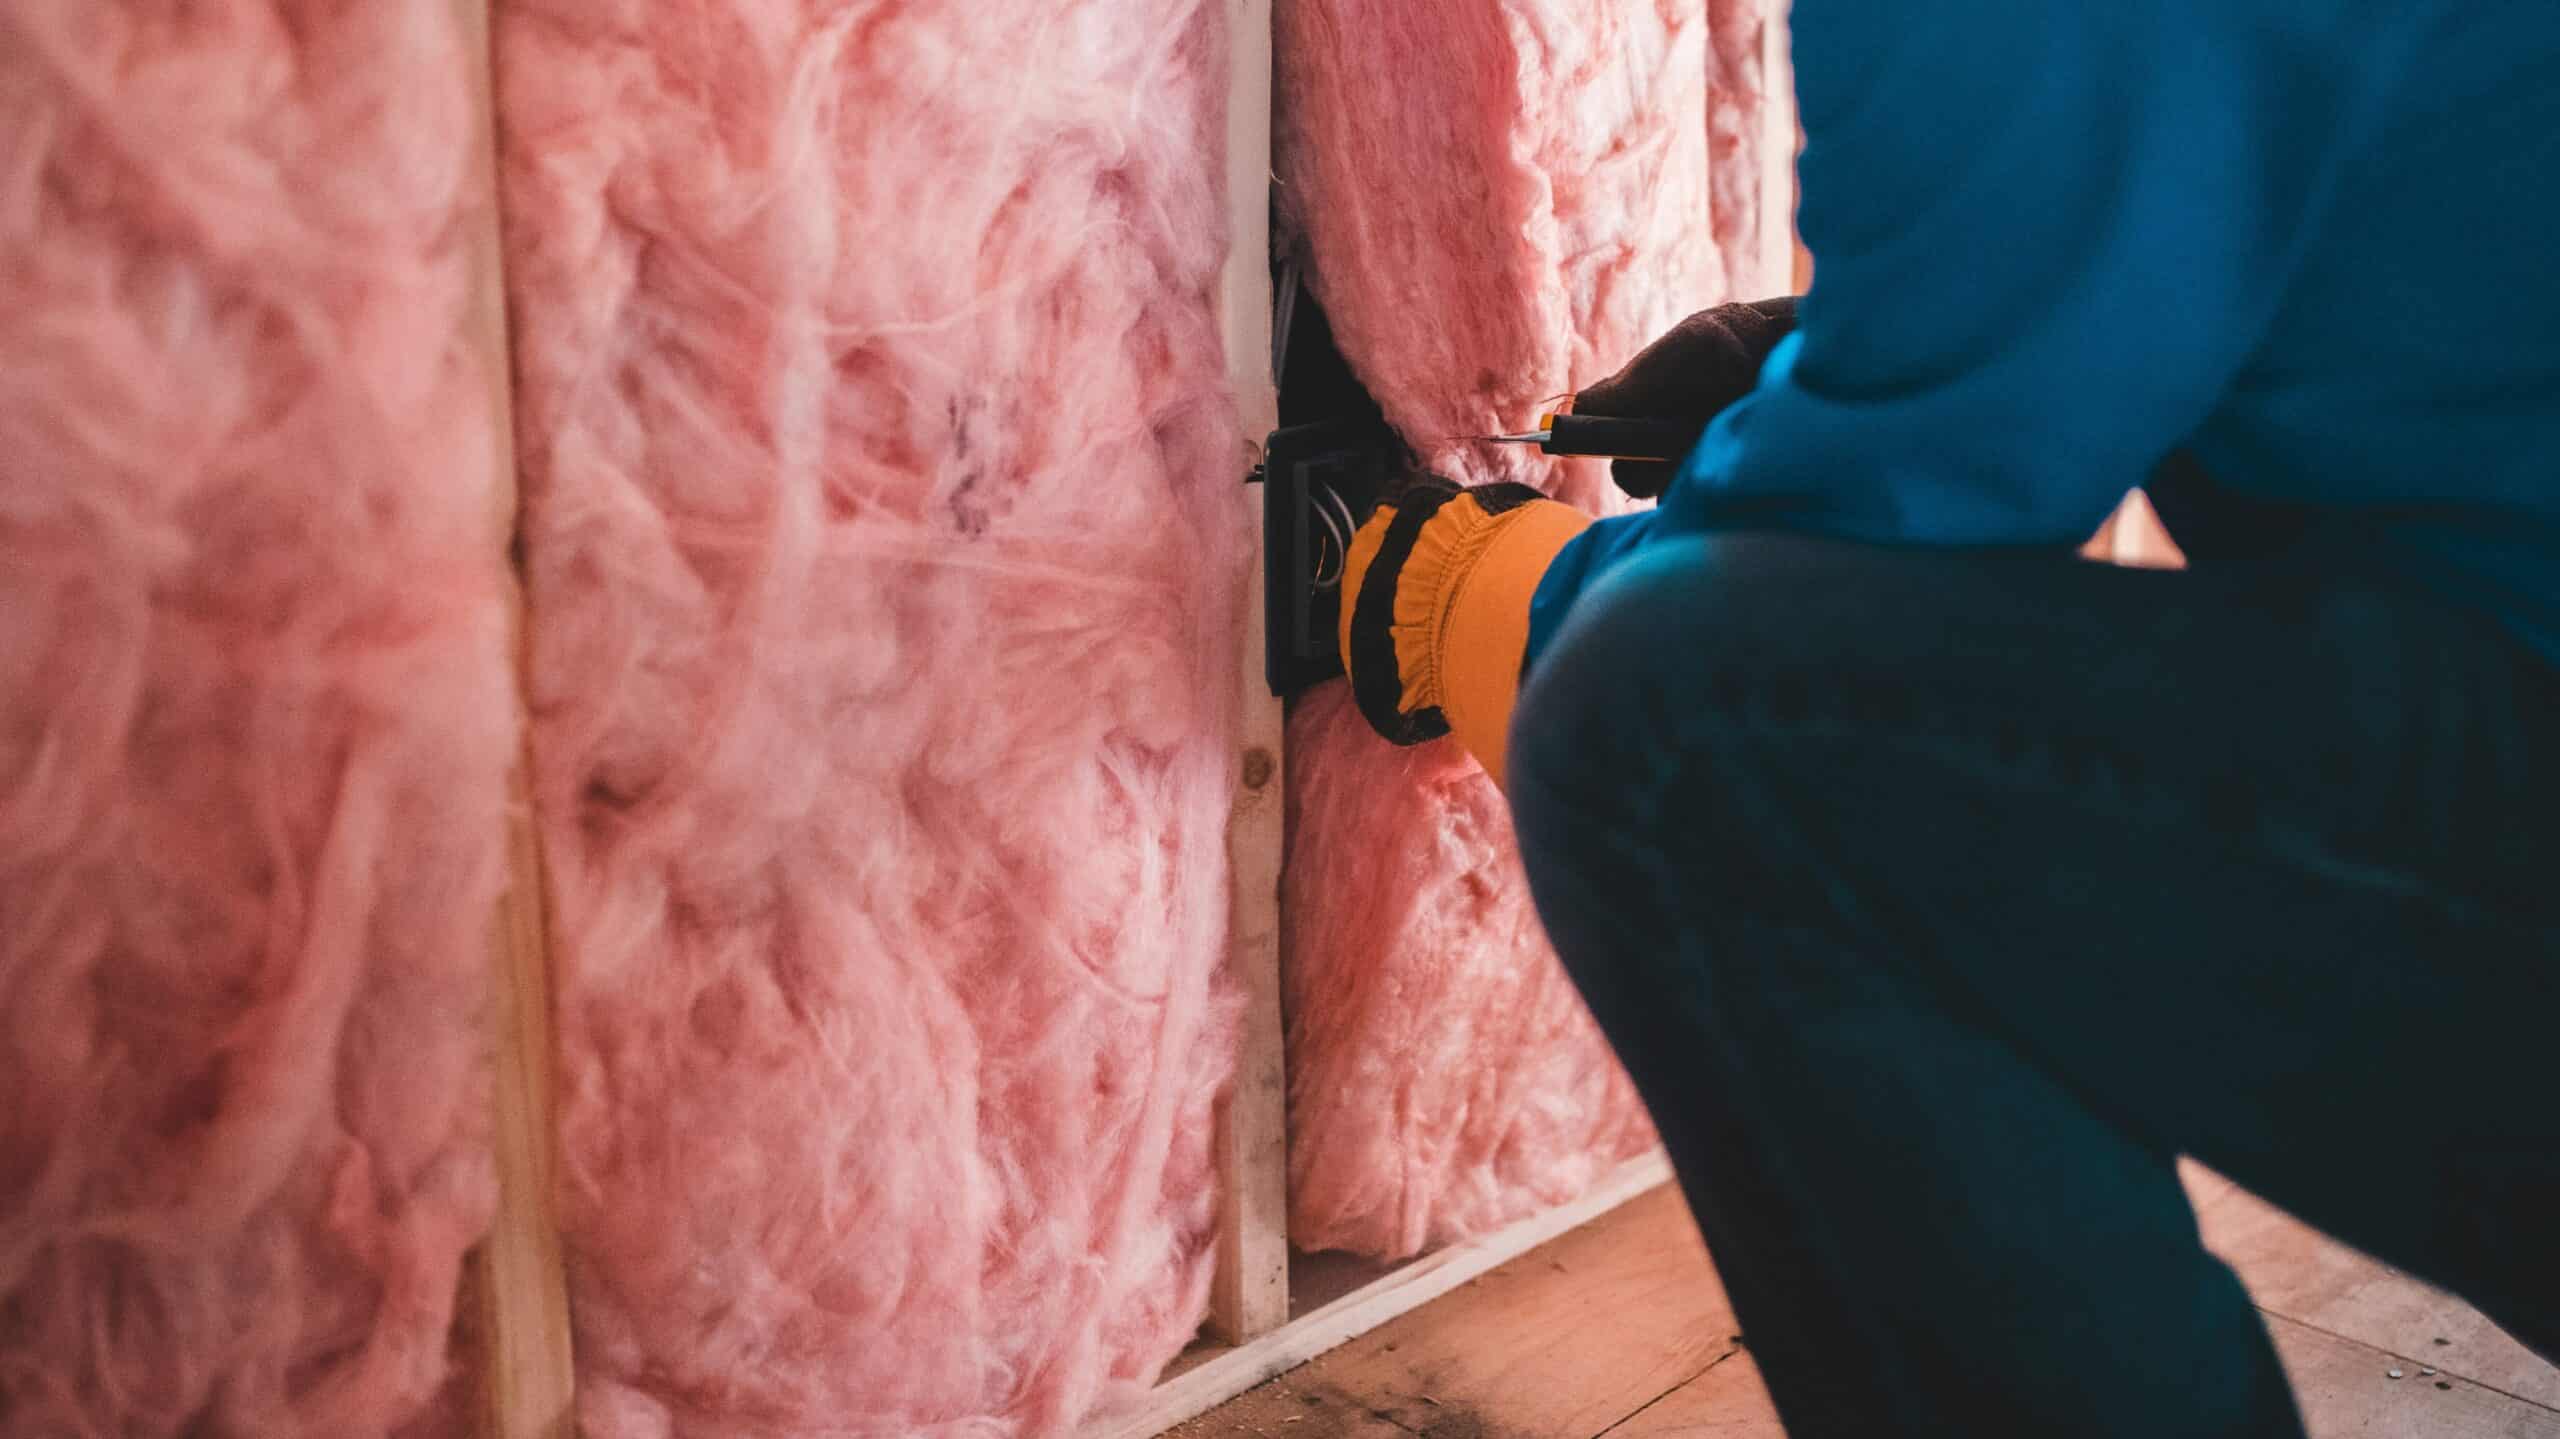
Insulating your basement is crucial for comfort and energy efficiency. Basements can be chilly since a lot of heat can escape through concrete walls and uninsulated rim joists. A well-insulated basement will feel cozy and help lower utility bills. In this insulation phase, you’ll seal up the framed walls and perhaps the ceiling with insulation materials:
- Wall Insulation: The most common approach is to use fiberglass batts or rolls fitted between the studs of your newly framed walls. For example, R-13 or R-15 fiberglass insulation fits well in a 2×4 wall cavity and is often used for basement walls. Another approach (or addition) is using rigid foam insulation against the concrete foundation. Some DIYers attach foam boards (like 1 or 2-inch extruded polystyrene panels) directly to the concrete wall (using adhesive or special fasteners), then build the 2×4 wall in front of it. This can boost the R-value and also acts as a moisture barrier if seams are taped. Tip: If you use fiberglass batts, do not place them directly against a damp concrete wall – it’s best there’s a vapor barrier or some separation (you can use foam board behind, or ensure your concrete wall was waterproofed/sealed). Properly insulating basement walls can make a huge difference – in fact, heat loss through uninsulated basement walls can account for up to one-third of a home’s total heat loss! So, this is a step worth doing right.
- Rim Joist Insulation: The rim joist (the outer band joist above the foundation wall) is a notorious spot for air leaks. It’s basically the perimeter where your house framing meets the foundation. You’ll want to insulate these cavities as well. You can cut small rectangles of rigid foam board to fit between each floor joist against the rim joist, then seal the edges with spray foam or caulk – this creates a nice air seal. Alternatively, use pieces of fiberglass insulation stuffed into each cavity (though not as air-tight). Many pros now use spray foam insulation in rim joists because it seals and insulates in one step (this might be a job to hire out, or you can use DIY spray foam kits carefully). Don’t overlook this area; otherwise, in winter you’ll feel drafts along the basement ceiling edges.
- Vapor Barrier: Depending on your local climate and building codes, you may need a vapor barrier on the warm side of the insulation. In colder climates, this often means a plastic sheet over the interior side of the stud walls after insulating (before drywall) to prevent moist indoor air from reaching the cold concrete and condensing. However, building science opinions vary – some prefer vapor-permeable materials to let the wall dry if moisture does get in. A common approach: if you used foil-faced or plastic-faced insulation or foam, that often serves as a vapor retarder. Check your local requirements. If using a poly vapor barrier, you would staple it across the studs over the insulation now.
- Sound Insulation (Optional): If you plan a home theater or just want peace and quiet between floors, consider insulating the basement ceiling. Standard fiberglass batts can reduce sound transmission a bit. There are also rock wool insulation products made for sound dampening that you could place between floor joists. Another sound strategy is using resilient channels on the ceiling when you drywall, to decouple the drywall from joists – but that’s in the drywall stage. For now, you can at least stuff insulation up there which will help with both sound and a bit of temperature control for the floor above.
- Insulate Doors/Windows: If your basement has any windows (especially an egress window), ensure to spray foam or caulk around the window frame to seal gaps before you install drywall trim. An exterior basement door should also be insulated or at least weather-stripped properly. You want the new space to be as air-tight as you can make it (while still allowing intentional ventilation) to keep it cozy and free of drafts.
At this point, your walls should have that “fluffy” look with all the insulation in place. The basement is on its way to feeling like part of the home. If you want more detailed guidance specifically on insulating, be sure to check out DIY Basement Insulation: How to Insulate Your Unfinished Basement (a dedicated guide on basement insulation techniques). Also, look to EnergyStar for additional basement insulation information. With insulation done, you’re ready to close up the walls and ceiling with drywall and finish surfaces!
Drywall & Finishes
Now the basement really starts looking like living space. Drywall (also known as sheetrock) will cover your framed walls and provide a smooth surface for paint. Along with drywall comes the detail work of taping, mudding, and sanding – and then finishes like trim. Let’s break down this stage:
- Hanging Drywall: Start with the ceiling (if you’re installing a drywall ceiling). It’s often easiest to do ceilings first. Use a helper or a drywall lift to hold 4×8 (or 4×12) sheets of drywall up to the joists. Secure them with drywall screws into the framing (joists for ceilings, studs for walls). Screws should be sunk slightly below the surface of the paper without breaking through it. Place screws about every 8-12 inches along framing. For walls, work from top down, attaching sheets horizontally is common (less linear feet of seams that way). Stagger the joints between rows like bricks. Make cutouts for electrical boxes or recessed lights as you hang each sheet (a rotary cut-out tool or drywall saw helps here).
- Mudding and Taping: Once all drywall sheets are up, it’s time to finish the joints. Apply drywall joint compound (mud) over the seams between sheets, then press paper or fiberglass joint tape into the mud and scrape it flat. This first coat (tape coat) embeds the tape. After it dries, apply additional coats of mud with wider knives (an 8-inch knife, then a 12-inch knife) to feather out the seams and make them disappear into the wall. Corners are trickier – use an inside corner trowel for inward corners, and for outside corners, install corner bead (usually metal or plastic strip) on each external corner and cover it with mud. It typically takes 2-3 coats of mud, with drying time in between, to get a nicely blended seam. In between coats, lightly sand any high spots. After the final coat, do a thorough sanding of all joints for a smooth finish. This process can be dusty – wear a mask and seal off other areas of the house as needed.
- Finishing Touches on Walls: Once sanding is done, you’re ready to prime and paint the drywall (that’s covered in the next section). Before that, ensure you’ve cut out any holes for fixtures (lights, outlets, etc.) and they are accessible. Also, now is the time to install any fixed features that go behind trim. For example, if you are doing any built-in cabinets or an entertainment center that needs to be recessed, you would have framed and drywalled around those.
- Floor Base & Trim: After the walls are painted (typically painting is easier before installing baseboards, to avoid getting paint on them), you will install baseboard moldings along the floors and case moldings around doors. In this Drywall & Finishes stage, you might pre-cut and paint your trim pieces. A miter saw helps get clean 45° cuts for corners. Use a nail gun or hammer to attach baseboards to the wall (into studs). Caulk the top of baseboards and corners for a seamless look, and touch up paint. If your basement has support columns you framed out, those will get wrapped (often with drywall or wood trim) and finished with molding at top and bottom to look like decorative columns.
- Doors: Hang any interior doors after painting as well. Since you framed the rough openings earlier, now you install pre-hung doors or build door jambs, shim them plumb, nail them into place, and add trim around them. Don’t forget to also trim out any windows (with wood casing or drywall returns and then casing) for a polished appearance.
- Other Finishes: This category includes any other non-structural elements to complete the look. For instance, if you planned a home theater and want to put acoustic panels or special wall treatments, you would add those now. If you’re installing things like a fireplace unit or surround in the basement, that finishing work would happen after drywall as well (with appropriate heat-resistant materials if applicable). The final touches are coming up in a later section, but essentially, once drywall is done you’re moving from heavy construction to the cosmetic phase.
Drywalling can be a bit of an art – if you haven’t done it before, don’t be discouraged if the mudding isn’t perfect on first try. You can always sand a bit more, or worst case, apply a textured paint or wallpaper to hide imperfections! Remember, any blemishes will be less noticeable once the room is furnished and proper lighting is in place. With walls and ceilings now solid and smooth, let’s talk about one area we skipped here: the ceiling options, since you might not be drywalling your ceiling at all.
Ceilings
Choosing what to do with your ceiling is a big part of basement finishing, and it’s something that can be tailored to your needs. There are a few popular diy basement ceilings approaches, each with pros and cons:
- Drop Ceiling (Suspended Ceiling): This is a very common basement solution. A drop ceiling uses a metal grid that hangs a few inches below the joists, and lightweight panels (tiles) are placed in the grid. The advantages: it provides easy access to pipes, wires, and ductwork later – you can simply push up a panel to peek or repair above. It also allows you to cover everything up without the mess of drywalling overhead. Modern drop-ceiling panels come in many designs (not just the old office-style ones; there are textured and even faux-wood designs). Installation is DIY-friendly: you’ll hang wall molding around the perimeter, then suspend the grid tees and cross tees, cutting panels to fit edges. One consideration is height – a drop ceiling will reduce headroom a bit (usually you lose at least 3-6 inches). If your basement is a bit low to start (say 7 feet), dropping it further might make it feel cramped. But if you have plenty of height, this is a good choice for practicality.
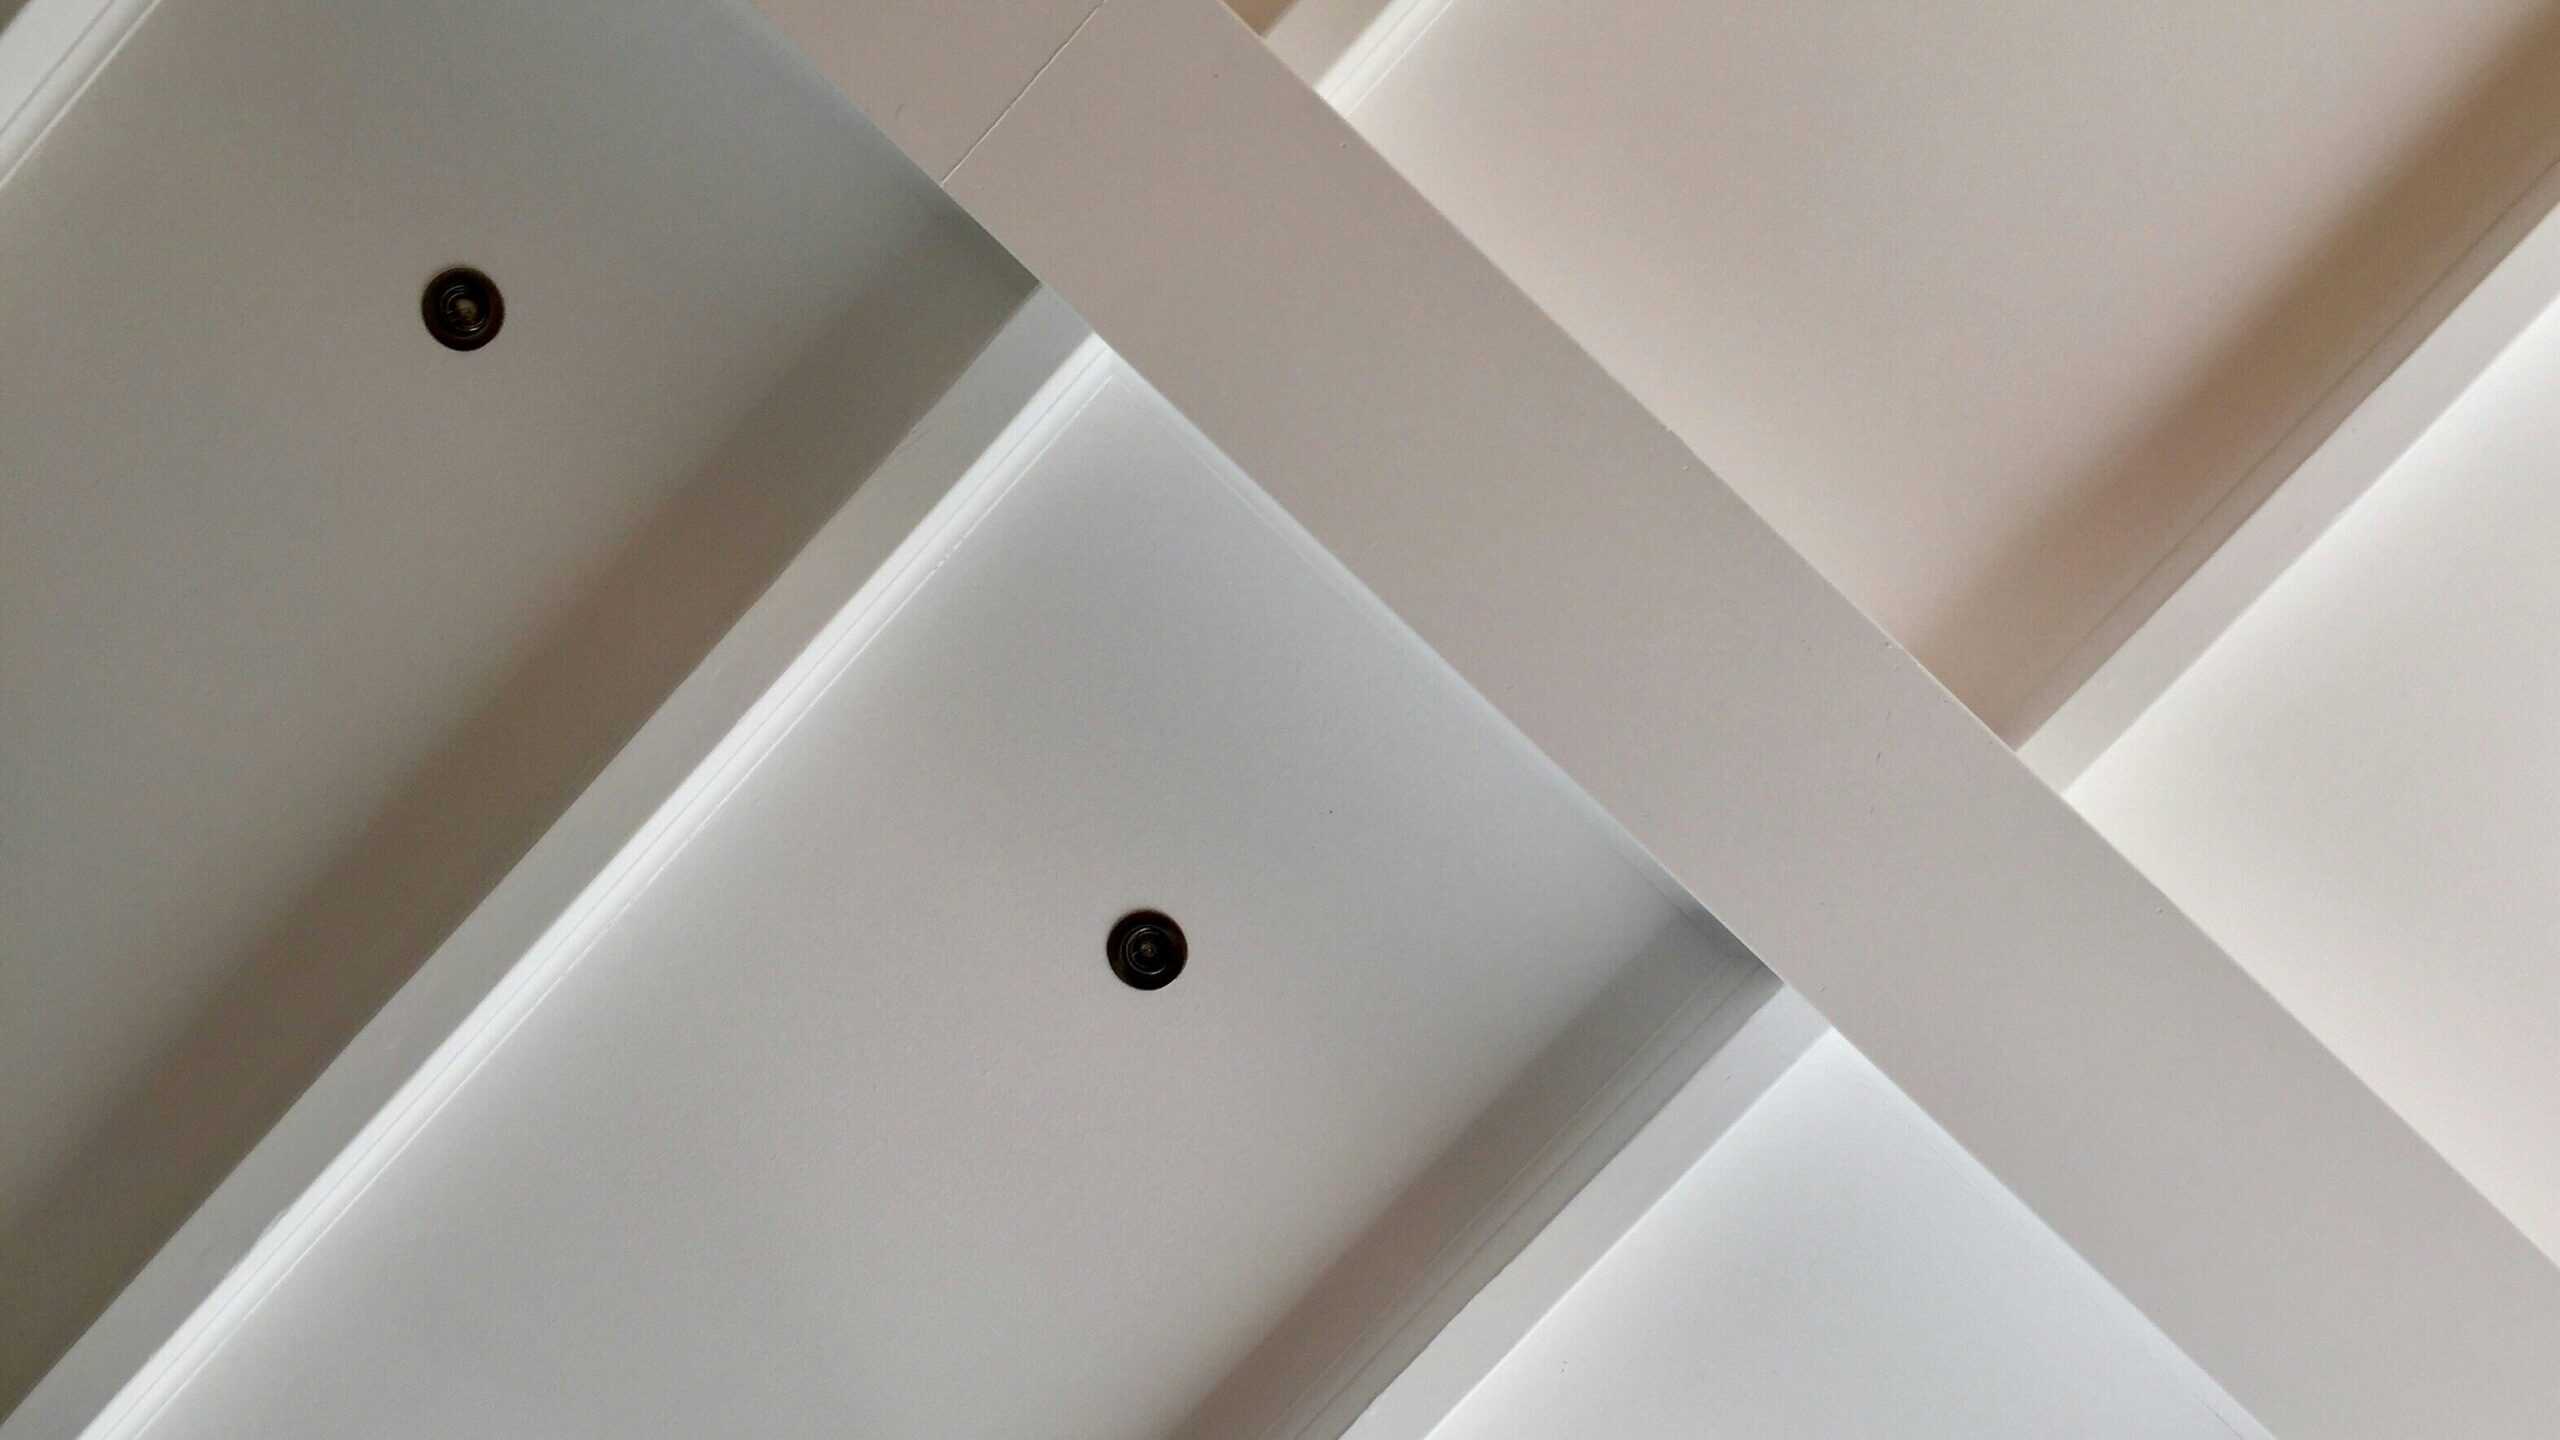
- Drywall Ceiling: If you want a more seamless, traditional look, you can finish the ceiling with drywall attached directly to the joists (as we described earlier for drywalling). This gives you a uniform ceiling like any other room. It can make the space feel a tad taller than a drop ceiling would (since you’re not lowering it). However, any time you need access to a junction box or pipe above, you’d have to cut into the drywall. To mitigate that, plan to install access panels in strategic spots – for example, where a shutoff valve or an electrical junction box is hidden, you can put a removable panel or even a cold-air return vent cover (as a sneaky access door) on the ceiling. Drywall ceilings also transmit sound more than drop ceilings with acoustic panels, so you might want to add sound insulation above as mentioned. If you go this route, the process is simply an extension of your drywall hanging and finishing stage.
- Open Ceiling (Painted Exposed Beams): Some homeowners opt to leave the ceiling exposed – meaning you don’t cover the joists, pipes, and ducts at all, but instead paint them out for an industrial loft vibe. The advantage here is you keep maximum ceiling height and have full access to everything. It can also save money on materials. The key is to make it look intentional: typically, people spray everything flat black (or white) so that the eye isn’t drawn to the individual wires and pipes. Black makes the overhead “disappear” in shadows, which can actually look pretty cool especially if you have a lot of stuff up there. White or a light color can make it brighter but then you see the details more. You’ll want to tidy up what’s there (staple cables neatly, maybe box around the big ducts even if leaving the rest open). Also note, an exposed ceiling doesn’t provide any sound buffering – noise will carry more between floors.
- Specialty Ceilings: There are other creative options too. Some people install wood planks (like a tongue-and-groove pine ceiling or beadboard panels) to give a warm, rustic look. This can be done directly on joists or as part of a drop ceiling system. Another idea: fabric ceilings (stretchy fabric systems) or glue-on tiles. These are less common DIY, but worth mentioning if you want something unique.
- Lighting Integration: Whichever ceiling style you choose, integrate your lighting with it. Drop ceilings can easily accommodate recessed can light fixtures made for drop-in (or you can drop LED panel lights into the grid). With drywall, you cut holes for recessed lights or mount surface lights. With open ceilings, you might hang track lights or industrial-style conduit lighting. Also, consider if you need to access any attic hatches or first-floor plumbing cleanouts – make sure those are reachable with your ceiling choice.
In summary, diy basement ceilings can be approached in multiple ways. If future access and ease are priorities, a drop ceiling shines. If aesthetics and max height are key, drywall or open might be better. Sometimes people even do a combo: drywall in main areas, drop ceiling in a corner where lots of plumbing is (like under a bathroom) for easy access, or open ceiling in one section and drop in another as a design choice. Choose what fits your skill level and desired look. Once the ceiling is sorted out, the next big surface is underfoot – the flooring.
Flooring

Basement flooring needs to be durable and moisture-resistant, as it’s in direct contact with the concrete slab (which can be cold and damp). By now, your walls are finished or ready for paint, so it’s a good time to install the floor. There are numerous flooring options for basements; here’s how to choose and install common ones:
- Prepare the Concrete: Before laying any flooring, inspect your concrete slab. It should be clean, relatively level, and dry. Fill any large cracks or low spots with an appropriate concrete patch or leveling compound. It’s also wise to test for moisture: tape a 2-foot square of plastic to the floor and leave it for a day – if you see condensation, you might need to apply a concrete sealer or consider a vapor barrier underlayment. Also check for any needed floor drains access – if there’s a drain, ensure you don’t cover it up or that you leave an accessible cover.
- Subfloor vs. Direct Flooring: In some cases, you might install a subfloor system first. Products like DRIcore panels or a plastic plastic grid system can be laid on concrete to create a tiny air gap and provide a warmer, drier base for carpet or other flooring. These are great but add cost and a bit of height (typically 3/4″ to 1″ height). If ceiling height is low or moisture isn’t a big issue, you can often install many floorings directly on the concrete with an underlayment.
- Vinyl Plank or Tile: Luxury vinyl plank (LVP) flooring has become a popular choice for basements. It’s waterproof, easy to install (most are click-lock floating floors), and comes in tons of styles that mimic wood or stone. You’ll need a thin foam underlayment in many cases (some planks have it pre-attached). Simply start in one corner and lay planks, clicking edges together, and use spacers at walls for expansion gap. You can cut LVP with a utility knife (score and snap) or a saw. Vinyl tiles (peel-and-stick or click) similarly are straightforward and good for basements. Once finished, run quarter-round molding along the baseboards to cover the expansion gap.
- Carpet: Carpet can make a basement cozy, but be cautious with moisture. If you’re confident your basement is dry, carpet is fine – many people prefer it for warmth and comfort. Carpet tiles are a DIY-friendly option; they’re square pieces that often have peel-and-stick backing or connect by adhesive dots. The advantage is you can replace a tile if it gets stained or wet, rather than the whole carpet. Alternatively, wall-to-wall carpet can be installed over a pad, but that’s trickier for DIY (stretching and seaming carpet usually requires special tools). If you go wall-to-wall, you might have a pro carpet installer do that part. Carpets and pad should be synthetic (not jute backing) to resist mold, and consider using a vapor barrier between pad and concrete if moisture is a concern. Also, avoid carpet in any area that might get wet (like near a basement entry door or laundry area) or use indoor-outdoor carpeting there.
- Ceramic or Porcelain Tile: Tiling a basement floor is a longer-lasting solution that laughs at water. You can lay tile directly on a clean, crack-free concrete slab using thinset mortar. Use a decoupling membrane like DITRA if you’re concerned about small cracks in concrete transferring to tiles. Keep in mind tile will be cold underfoot; you can mitigate that with area rugs or even install an in-floor heating mat before tiling (imagine a toasty warm basement bathroom floor!). Tile is great for basements that might see occasional water because it won’t be damaged. Just be sure to plan a transition strip if the basement connects to a carpeted stair or other flooring at the doorway.
- Engineered Wood or Laminate: Solid hardwood is generally not recommended below grade (moisture and wood don’t mix well long-term). However, engineered hardwood (which is plywood base with a hardwood veneer) can sometimes be used in basements if the area is very dry and you install a subfloor or vapor barrier. Laminate flooring (the snap-together kind that’s basically a picture of wood on fiberboard) is another option; it’s somewhat out of favor now that vinyl has improved, because laminate can swell if it gets wet. If you love the look of wood, go for a high-quality waterproof laminate or an engineered floor that’s rated for basements, and definitely put down a vapor barrier first.
- Painted or Epoxy Floor: If your budget is tight or you’re doing an unfinished workshop area, you could simply paint the concrete or apply an epoxy coating. Epoxy paint kits (often used in garages) can work in basements too – they’ll seal the concrete and make it look cleaner, and you can add color flakes for a decorative touch. This isn’t as warm or comfy as other options, but for a home gym or utility space it might suffice.
- Flooring around Utilities: If you have a furnace or water heater in a corner on the slab, you might leave that area floor as bare concrete (sometimes code wants non-combustible flooring under a furnace, etc., so check that). You can end your flooring at the utility closet with a threshold strip.
When installing any flooring, leave a gap at the perimeter (typically 1/4″) for expansion, which the baseboard or quarter-round will cover. After flooring is in, you can install any remaining trim and transitions. Suddenly, the basement will look like a real part of the house, just needing some paint and decor! Speaking of paint and lighting choices – let’s cover that next.
Painting & Lighting

With walls finished and floors in, the last major steps are painting the space and finalizing the lighting. These are the touches that really bring your basement to life and let you express style and mood.
- Painting Walls and Trim: If you haven’t primed your new drywall yet, start with a good primer coat on all drywall surfaces. Fresh drywall and joint compound absorb paint unevenly, so priming is key for a uniform finish. Once primed, apply your chosen wall paint. As mentioned earlier, lighter colors (think off-whites, light grays, or pastels) can help a basement feel more open and reflect light better, compensating for limited daylight. However, for certain areas like a home theater, you might opt for a darker accent wall or even a deep color scheme to improve the cinematic experience. It’s your call – you can even do a mix (e.g., a fun color in a kids’ play area, but lighter in main areas). Use a roller for large areas and a brush for “cutting in” at edges and corners. Plan on two coats for durability and true color. If you’re painting trim and doors, a semi-gloss white is classic and stands up to scuffs. Pro-tip: Paint the ceiling too – a white ceiling (flat white paint is common for ceilings) will help with brightness. If you did an open ceiling and left pipes exposed, you likely already painted it (usually spray-painted before finishing walls to avoid overspray on them). If not, now’s the time to do so or at least touch up any spots.
- Lighting Setup: By now, your lights are wired, but final installation happens after ceiling/walls are done. If you have recessed lights, go ahead and put in the trims and bulbs (or integrated LED fixtures) and test them. For any hanging lights or fixtures, install them according to instructions (always with power off at the breaker while wiring). Consider putting some lights on dimmer switches – for example, you might want the main rec room lights on a dimmer to adjust the brightness for movie time vs. game night. LED bulbs are recommended for basements because they emit less heat (which is good in smaller enclosed spaces) and use less energy. Choose a light color temperature that you like – soft white (2700-3000K) gives a cozy feel, while daylight (5000K) gives a brighter, whiter light; many basement owners prefer somewhere in between (~4000K) for a balance.
- Adding Lamps & Task Lighting: Overhead lights often aren’t enough to make a basement feel cozy. Floor lamps, table lamps, or wall sconces can add warmth and eliminate any gloomy corners. If you have a reading nook, a standing lamp there is great. If you have a home office area, a good desk lamp is a must. In a basement bar or kitchenette, under-cabinet lights or pendant lights over the counter add a nice touch. These can just plug in or be battery-operated if you didn’t hardwire anything. String lights or LED strips can also create cool effects (like behind a TV unit or along crown molding for ambient uplighting).
- Finishing Electrical Details: Don’t forget to install all your outlet and switch cover plates after painting. Also attach any HVAC vent covers, and if you have baseboard heaters, get those secured and painted if needed. If you installed ceiling fans or other special electrical fixtures, complete those installations now.
- Final Coat & Touch-ups: Basements can be hard to ventilate while painting due to smaller or fewer windows. Use a fan to exhaust paint fumes, and take breaks. Once the main coats are done, check all around for any needed touch-ups. It’s easier to do it now than later when furniture is in. Look for spots like trim corners, around outlet plates, and any tiny drywall dings that can be spackled and painted quickly.
Lighting and color can transform your basement from a plain room to a welcoming living area. After this step, your basement should be essentially finished in terms of construction and decor. All that’s left are the cost considerations of what you’ve done and some final touches and advice to wrap up your DIY journey.
Costs

One big question every DIYer has is: how much will this DIY basement finishing project cost? The average cost to finish a basement diy can vary enormously based on the size of your basement, the complexity of the work, and your finish choices (luxury finishes vs. basic). Let’s break down cost factors and what you might expect:
- Professional vs DIY Cost: As noted earlier, hiring professionals to finish a basement averages around $32,000 nationally. Doing it yourself can dramatically lower that because you’re saving on labor. Labor typically accounts for about 20% (or more) of a full contractor bid. So, in theory, a DIYer might finish a similar basement for perhaps $20,000-$25,000 if they are savvy and do most everything themselves. Some thrifty and skilled DIY folks report spending under $10,000 on materials for a modest basement (especially if no bathroom is added and they use inexpensive materials). Realistically, your mileage may vary. It’s a significant project, so even DIY, plan for several thousands in materials at minimum.
- Cost by Category: Here’s roughly where the money goes in a basement finish:
- Framing Lumber and Supplies: The wood for framing walls, plus nails/screws and maybe tool rentals (like a nail gun) – this could be a few hundred to a couple thousand dollars, depending on how many walls/rooms.
- Electrical and Plumbing: Wires, outlets, switches, electrical panel work, light fixtures, plus any plumbing pipes, fittings, and fixtures (toilet, sink, etc.). Electrical materials might be a few hundred dollars; plumbing could be a couple thousand if adding a bathroom (fixtures like toilets and vanities add cost). If you hire electricians/plumbers for rough-in, add their labor – perhaps $50-$100 per outlet or fixture point as a rough idea.
- Insulation: Fiberglass insulation isn’t too pricey – maybe $0.50 to $1.00 per square foot of wall insulated, plus a bit more if using foam board. This might total a few hundred dollars.
- Drywall and Finishing: Drywall sheets, mud, tape, corner bead – drywall is often around $12-15 per 4×8 sheet for 1/2″, so calculate based on your square footage (a 1,000 sq ft basement might need ~40-50 sheets for walls and ceiling). Including joint compound and renting a drywall lift, etc., this stage might be $500-$1000 in materials. If you hire out the mud/tape, that labor could be another $1,000 or more.
- Ceiling: Drop ceiling systems can cost around $2-3 per sq ft for materials. Drywall ceilings would be counted in the drywall budget. An open ceiling might just cost a couple cans of paint. So, ceiling could range from a few hundred to a couple thousand dollars depending on choice.
- Flooring: This has a big range. You could spend only $200 if you just paint the floor, or $2,000 on nice flooring. For example, 500 sq ft of mid-range vinyl plank might cost around $1,500-$2,000 (material and underlayment). Carpeting might be similar if not using luxury carpet. Tile could cost more in labor if not DIY. So plan accordingly.
- Doors and Trim: Each interior door (pre-hung) might be ~$150-$300. Trim wood, paint, hardware, etc., could add a few hundred more.
- Paint and Miscellaneous: Multiple gallons of paint and primer – maybe $200-$400 depending on brand and area. Miscellaneous items (caulk, adhesives, saw blades, screws, outlet covers, thermostat, etc.) also add up – always budget a few hundred for these little things.
- Unexpected Costs: Even DIY projects have surprise expenses. Examples: You open a wall and find a crack in the foundation that needs sealing. Or your old water heater in the corner dies mid-project and you have to replace it (not strictly a basement finishing cost, but it happens!). Or maybe you decide halfway to add a built-in electric fireplace or upgrade your staircase railing – adding to cost. Having a contingency fund of at least 10% of your budget helps absorb these surprises.
- Savings Tips: To keep costs down, do as much yourself as you confidently can, but know when to call in pros to avoid costly mistakes. Shop around for materials; often big box stores have sales on flooring or fixtures. You can save money by choosing mid-grade finishes – e.g., instead of solid hardwood cabinets for a bar, use a painted MDF which is cheaper. Using paint creatively can also save (an accent wall with a bold color or stencil can add character without extra construction). Additionally, finishing the basement in phases can spread out costs – you might do the main room first, and leave the bathroom or bar rough-in to finish later when budget allows.
- Return on Investment: While you’re mostly doing this for the added living space, it’s nice to know it adds to home value too. Finishing a basement has around a 70% ROI (return on investment) on average. That means if you spend $20k, your home value might increase by ~$14k. Not bad, and meanwhile you get to enjoy the space. However, an improperly done basement (or unpermitted one) can actually hurt value, so quality and following code matters.
In essence, the cost of a DIY basement finish will depend on your choices. It can be a relatively affordable way to gain a lot of space if you’re thrifty, or it can approach a new-car price tag if you go high-end on everything. The good news: doing it yourself, you have control over spending and can make adjustments as needed. Next up, let’s look at some pitfalls so you can avoid costly mistakes altogether.
Mistakes to Avoid

Finishing a basement is a big project, and even experienced DIYers can hit some snags. Here are some common mistakes to avoid, so you can learn from others’ “oops” moments instead of your own:
- Skipping Permits and Inspections: “It’s my house, I don’t need a permit, right?” Wrong. Not getting a building permit for basement work is one of the biggest mistakes. We know, dealing with the city and paperwork isn’t fun, but it’s absolutely necessary when adding livable space. If you skip permits, you risk serious repercussions – authorities can issue stop-work orders, levy fines, and even require you to tear out completed work. Also, unpermitted work can create insurance hassles or scuttle a future home sale. It’s just not worth it. Do it by the book: apply for permits and get the required inspections. That way you ensure everything is safe and up to code and you have peace of mind (sleeping easier in that new basement bedroom knowing it meets egress requirements, for example).
- Ignoring Moisture and Waterproofing: Basements and water have a long, troubled history. One major mistake is to assume your basement is “dry enough” and barrel ahead with framing and drywall, only to have mold show up later. Before finishing, address any water issues – even minor dampness. This might involve sealing walls, improving exterior grading, adding gutter downspout extensions, installing a sump pump, etc. Also consider a dehumidifier for ongoing moisture control. Remember the EPA’s advice: moisture control is key to mold control. If you do end up with a small leak or spill, clean and dry it quickly (within 24-48 hours) to prevent mold growth. Build in some protection, like moisture-resistant drywall or a slight gap between framing and foundation wall, especially if your area is prone to humidity. Bottom line: don’t finish a wet basement – fix the wetness first.
- Poor Space Planning: It’s easy to get carried away putting up walls and creating rooms, but a common mistake is ending up with a chopped-up or awkward layout. Avoid tiny, maze-like rooms (unless you have a specific reason, open concept usually feels better in basements). Also beware of creating dead-ends or inaccessible areas. Plan traffic flow: e.g., don’t box your furnace into a corner without a door – you should have a clear path to the utility area. Think about furniture placement when framing walls; a pillar or too many doors on a wall can make it hard to place a couch or a bed. A comprehensive plan on paper (or using software) before you start framing helps prevent the “ugh, I wish I had placed that wall 2 feet over” moments.
- Underestimating Time and Effort: Enthusiasm is great, but realism is crucial. Some DIYers think they can knock out a full basement reno in a few weekends after work – then find themselves overwhelmed. This is an extensive project with many steps that can each be time-consuming (drywall mudding and sanding alone can stretch over many days). Be patient and don’t rush through tasks like electrical or taping, which require care. Also, know your limits – if you’re exhausted or stuck, it’s better to pause or get help than to make a critical mistake. Expect the project to take longer than you initially think, especially if you’re working solo or only in spare hours. And that’s okay!
- Cutting Corners on Quality: You’re trying to save money DIYing, but skimping on certain things can backfire. Example: using regular drywall on an exterior basement wall that occasionally gets damp – it might crumble or mold; better to use mold-resistant board. Or not using pressure-treated wood on the slab – it can rot. Also, using cheap paints or not priming can result in a shoddy finish you won’t be happy with. You don’t have to buy top-of-the-line everything, but use materials appropriate for basements (moisture-resistant, mold-resistant where needed). And when it comes to hidden things like wiring and plumbing, do it to code and quality standards. If you’re not sure, consult resources or professionals – professional help at the right moments isn’t a failure, it’s often smart.
- Overlooking Code Requirements: This ties to permits but goes beyond. Little code misses can be problematic. For example, finishing a basement bedroom but forgetting to install an egress window – that’s a safety hazard and code violation. Or not installing enough electrical outlets – leads to overusing extension cords (not safe). Even things like stairway lighting (most codes require 3-way switches so you can turn lights on/off at top and bottom of stairs) or smoke alarms (must be interconnected with the rest of house) can be overlooked by DIYers. Familiarize yourself with the key code requirements for finished basements: ceiling height minimum, emergency egress, electrical circuits, stairwell codes, insulation R-values, etc. As mentioned, building codes require certain features like proper exits, sufficient insulation, fire blocking, and dedicated circuits. Ignorance isn’t bliss here – it’s risky.
- Rushing the Finishing Touches: After months of work, you’re eager to be done – totally understandable! But don’t rush through the final steps like painting, trim, and caulking, as these detail pieces make the difference between a space that looks professionally finished versus “DIY-grade”. Take the time to fill nail holes in trim, caulk gaps, and apply that second coat of paint. These small steps give a polished look. Also, clean up construction dust thoroughly before moving furniture in – you’d be surprised how that drywall dust can linger on surfaces if not vacuumed and wiped.
Avoiding these mistakes will save you headaches and money. A well-executed DIY basement can look just as good as a pro job – and you’ll enjoy it more knowing you did it yourself and did it right!
Codes & Safety
When finishing a basement, safety should never be an afterthought – it must be built into the project from the start. That’s where building codes & safety considerations come in. Here are key code requirements and safety tips to keep in mind:
- Egress (Emergency Exits): As mentioned before, an egress window or exterior door is required in a finished basement, particularly if it has a bedroom. This is critical for fire safety – it provides an escape path and access for firefighters. Codes typically require the egress window to have a clear opening of at least 5.7 square feet (with minimum width and height specs). If you don’t already have one, this may mean hiring a contractor to cut a large window into your foundation and adding a window well. It’s a big job, but non-negotiable for safety if people will sleep down there. Even without bedrooms, having two ways out of the basement is smart. Make sure any security bars on windows can be quickly released from the inside.
- Ceiling Height: Most codes require a minimum ceiling height for living spaces (often around 7 feet, though it can vary). If you have a very low ceiling, you might not legally be able to call it “living space.” Small obstructions (like a beam or duct dropping to, say, 6’4″) can sometimes be okay if they’re limited in area, but you want the majority of the space to meet the minimum height. Check your local code – don’t finish a space that ends up being out of compliance for height.
- Stairway Safety: Basement stairs should be up to code like any other stair in the house. That means consistent rise/run, proper handrails, adequate headroom, and lighting. If your existing stairs are sketchy (common in old homes: steep stairs, no handrail, etc.), strongly consider rebuilding or improving them during the renovation. Install a solid handrail and ensure there’s a light switch at the top and bottom of the stairs (so you’re never walking up or down in the dark).
- Fire Safety: There are a few aspects here:
- Fire Blocking: In framed walls, building code often requires fire blocking material at certain points to slow the spread of fire inside wall cavities. Typically, you need to install fire blocks (wood blocks or drywall pieces) between studs at the top of the wall, between the top plate and the foundation, and at soffits. This stops a chimney effect of fire going behind your walls. If you used foam insulation, note that most foam board must be covered with a fire barrier (like drywall) because it’s flammable and emits toxic smoke.
- Smoke and CO Detectors: You should install smoke alarms in the basement (and they must interconnect with your existing alarms so that if one goes off, they all do). If you added a bedroom, a smoke alarm is required in it. Given fuel-burning appliances often reside in basements, a carbon monoxide detector is also essential. Many modern detectors can interconnect wirelessly if adding wiring is tough.
- Fire Egress: We covered egress windows; also ensure any barred windows or locked doors can be opened quickly from inside without a key or special knowledge (that’s a code requirement – egress points must open easily).
- Electrical Safety: All electrical work should comply with the National Electrical Code (NEC) or your local code variant. That includes:
- Circuit capacity – don’t overload an existing circuit with too many new basement outlets/lights especially if you’ll run high-draw devices (space heaters, mini-fridge, microwave, etc. might each need separate circuits).
- GFCI protection – outlets in bathrooms, near sinks, or generally in basements (some areas require all basement outlets to be GFI-protected) should be GFCI. Easy solution: use GFCI outlets or have those circuits on a GFCI breaker.
- AFCI protection – current codes require AFCI (arc-fault) breakers for many areas including finished basements. These breakers help prevent electrical fires.
- Outlet/switch heights – follow standard practices (usually about 12-18 inches from floor for outlets, and 42-48 inches for switches).
- Never bury junction boxes – any electrical junctions must remain accessible (with a cover plate visible on wall or ceiling). Don’t drywall over them. Plan access panels if needed.
- Plumbing and HVAC: If you added plumbing, make sure traps are installed (to prevent sewer gases) and vents are in place. All new plumbing should be tested for leaks. For HVAC, ensure that any required combustion air for furnaces/water heaters is provided (some newer high-efficiency furnaces take air from outside; older ones need indoor air supply). If you built walls around your furnace or water heater, you might need vents or a louvered door for air. Also keep required clearances around such equipment as per manufacturer instructions and code (usually a few inches of clearance to combustibles, etc.).
- Insulation and Energy Code: Many jurisdictions have energy codes that specify how much insulation (R-value) you need in basement walls. Commonly it’s something like R-10 continuous (foam) or R-13 in cavities for basement walls. Ceiling might not need insulation if above is conditioned space, but check if any requirement for rim joists or flooring (some codes want basement floors insulated if you’re conditioning the space). Following these will make your basement more efficient and code-compliant.
- Final Inspection: After everything is done, you’ll likely have a final inspection if you pulled permits. The inspector will check that you followed the plans and code: railings are secure, egress present, electrical tested, etc. If anything is amiss, you’ll get a chance to correct it. Once you pass, congrats – your basement is officially a legal finished space!
In short, build to code and think safety at every step. It might require a bit more effort or expense (like that extra egress window, or more smoke alarms), but it is absolutely worth it to protect your family and investment. A finished basement should be as safe as any other level of your home.
Basement Finishing FAQ: Common DIY Questions Answered
Do I need a permit to finish my basement?
Yes. Finishing a basement typically requires building, electrical, and plumbing permits, plus inspections at framing, rough-in, and final. Skipping permits can cause fines, insurance issues, and resale problems.
How much does it cost to finish a basement DIY?
Most DIYers spend about $10,000–$25,000 on materials (size and finishes vary). Add 10–15% for contingencies. Adding a bathroom can add $3,000–$10,000+ depending on plumbing conditions and fixtures.
How long will a DIY basement finishing project take?
A pro crew may finish in 4–8 weeks. DIY on nights/weekends often takes 6–16+ weeks depending on scope, inspections, and your skill level.
Do I need an egress window for a basement bedroom?
Yes. Bedrooms require an emergency escape/opening of at least 5.7 sq. ft., with a minimum 20″ width, 24″ height, and a sill no higher than 44″ from the floor (check your local code).
How do I check and fix moisture issues before finishing?
Do a plastic-sheet test on walls/floor for 24–48 hours. If you see condensation, address grading, gutters/downspouts, cracks, and consider waterproofing, a sump pump, and a dehumidifier. Never finish a wet basement.
What insulation is best for basement walls?
A common best-practice is rigid foam board against concrete (seams taped) plus a 2×4 wall with R-13/R-15 fiberglass. Spray foam or foam board at rim joists. Avoid bare fiberglass directly on concrete.
Do I need a vapor barrier in the basement?
It depends on climate and code. Many use foam board (which acts as a vapor retarder) behind studs, or a smart vapor retarder on the warm side. Avoid trapping moisture between impermeable layers.
What ceiling should I choose: drop, drywall, or open?
Drop ceilings = easy access to utilities; drywall = clean look and slightly more height; open/painted joists = maximum height and an industrial vibe. Many basements mix methods by area.
What flooring works best in a basement?
Waterproof options like luxury vinyl plank/tile, ceramic/porcelain tile, or carpet tiles are popular. Avoid solid hardwood below grade. Use a vapor barrier or subfloor panels if needed and follow manufacturer guidelines.
Can I DIY electrical and plumbing?
You can pre-run some work, but panel connections and complex plumbing should be done by licensed pros. Use GFCI/AFCI where required, follow outlet spacing (about every 12 ft), and pass rough-in inspections before drywall.
Do I need a subfloor over concrete?
Not required, but systems like DRIcore or foam underlayment make floors warmer, help manage moisture, and improve comfort. Balance benefits against added cost and reduced ceiling height.
What are the most common DIY basement finishing mistakes?
Skipping permits, ignoring moisture, burying junction boxes, missing fire-blocking/smoke & CO alarms, under-sizing circuits, and forgetting egress or ceiling-height rules. Plan thoroughly and build to code.
Final Touches
You’re almost at the finish line! Final touches are what turn your newly constructed basement into a lived-in, personalized space. Here are the last steps to wrap up your DIY basement finishing project:
- Cleaning Up: Construction can leave a big mess. Start by removing all tools, leftover materials, and drop cloths. Use a shop vacuum to thoroughly vacuum floors, corners, and inside any ducts (drywall dust gets everywhere). Wipe down surfaces to remove any lingering dust, especially on windowsills, ledges, and fixtures. If you haven’t removed any protective plastic from windows or light fixtures, do that now. You want a clean slate for move-in.
- Furniture Placement: Bring in your furniture and set up the rooms as you envisioned. This is the fun part – arranging the cozy sectional in the TV area, setting up the bed in the guest room, or putting your desk and bookshelves in your new home office. Take care when moving furniture on newly installed floors (use furniture pads to avoid scratches on hard flooring or snags on carpet). Seeing the space furnished really completes the transformation.
- Decor & Personalization: Now you get to decorate! Hang photos or artwork on the walls (be sure to use proper anchors in drywall). Add area rugs for comfort and to define areas (like a rug under the couch/TV area can make it feel distinct from a play area). Throw pillows, blankets, and curtains (if you have windows) will add color and warmth. Don’t forget mirrors – a mirror can help a basement room feel bigger and reflect light. If it’s a kid’s playroom, you might put up fun decals or a chalkboard wall. For a home gym, maybe mount a large mirror and a TV. Small touches like houseplants (real or good faux ones for low-light) can also liven up the basement and improve air quality.
- Tech and Entertainment Setup: If your basement includes a media area or home theater, set up your TV, speakers, and streaming devices. Hide cables as neatly as possible (you can use cable raceways along walls). If you wired surround sound speakers in the walls or ceiling, hook those up to your receiver. Test your internet/Wi-Fi signal; if it’s weak down there, you might need a mesh Wi-Fi extender for the basement. For a home office, get your computer, printer, and any networking gear set up. Essentially, make sure the space has all the tech functionality you need.
- HVAC Comfort: Now that the space is in use, monitor the temperature and humidity. You might need to adjust vents to balance heating/cooling with the rest of the house. Sometimes basements run cool; using area rugs, heavy drapes, or a space heater can help in winter (safely, of course – never leave heaters unattended). In summer, a dehumidifier might be useful to keep humidity around 50%. Since basements are below grade, it’s normal for them to be a bit cooler – that can be a boon in summer and an issue in winter, so just tweak accordingly.
- Enjoy and Maintain: Finally, step back and admire what you’ve accomplished. From bare concrete and exposed joists to a comfortable, inviting living area – that’s a big achievement! Now call the family down for a movie night or invite friends to see your handywork. Maintenance-wise, keep an eye out for any signs of moisture over time (e.g., after a heavy rain, check corners for water just in case). Also, because basements have less natural ventilation, be diligent about things like changing the air filter in your HVAC system and running a dehumidifier if needed to keep air fresh. If you ever notice a musty smell, investigate sooner rather than later.
Congratulations on finishing your DIY basement project! It’s not just an addition to your home’s square footage – it’s a whole new chapter of living space that you created with your own hands. Whether it’s used as a cozy family hangout, a rental suite, or the ultimate man-cave or she-shed, take pride in the result and enjoy it for years to come.


Pingback: Best Paint for Concrete Basement Walls (Waterproofing Guide)
Pingback: Best Dehumidifier for Allergies (2025) | Improve Indoor Air Quality & Reduce Mold
Pingback: Finished Basement Ideas: Creative DIY Designs for Every Space
Pingback: Best DIY Basement Flooring Options for Every Budget
Pingback: Can You Put a Pool in Your Basement? - Basement Repair Guide