

Is your basement floor starting to flake, dust, or break apart? A crumbling concrete basement floor is a common issue in older homes and can be alarming to homeowners. The good news is that in many cases it’s a simple cosmetic issue you can tackle yourself with a bit of elbow grease. In this comprehensive guide, we’ll explain why concrete floors deteriorate and outline the best ways and effective methods to repair them. You’ve come to learn how to fix your crumbling basement slab in a few simple steps, restoring your floor and preserving your home’s value. A DIY fix will not only save you from more costly repairs down the road but also give you peace of mind. Before we dive into the “concrete steps” for this DIY repair, let’s understand what causes a basement floor to crumble and why early action is important.
Why Basement Concrete Floors Crumble
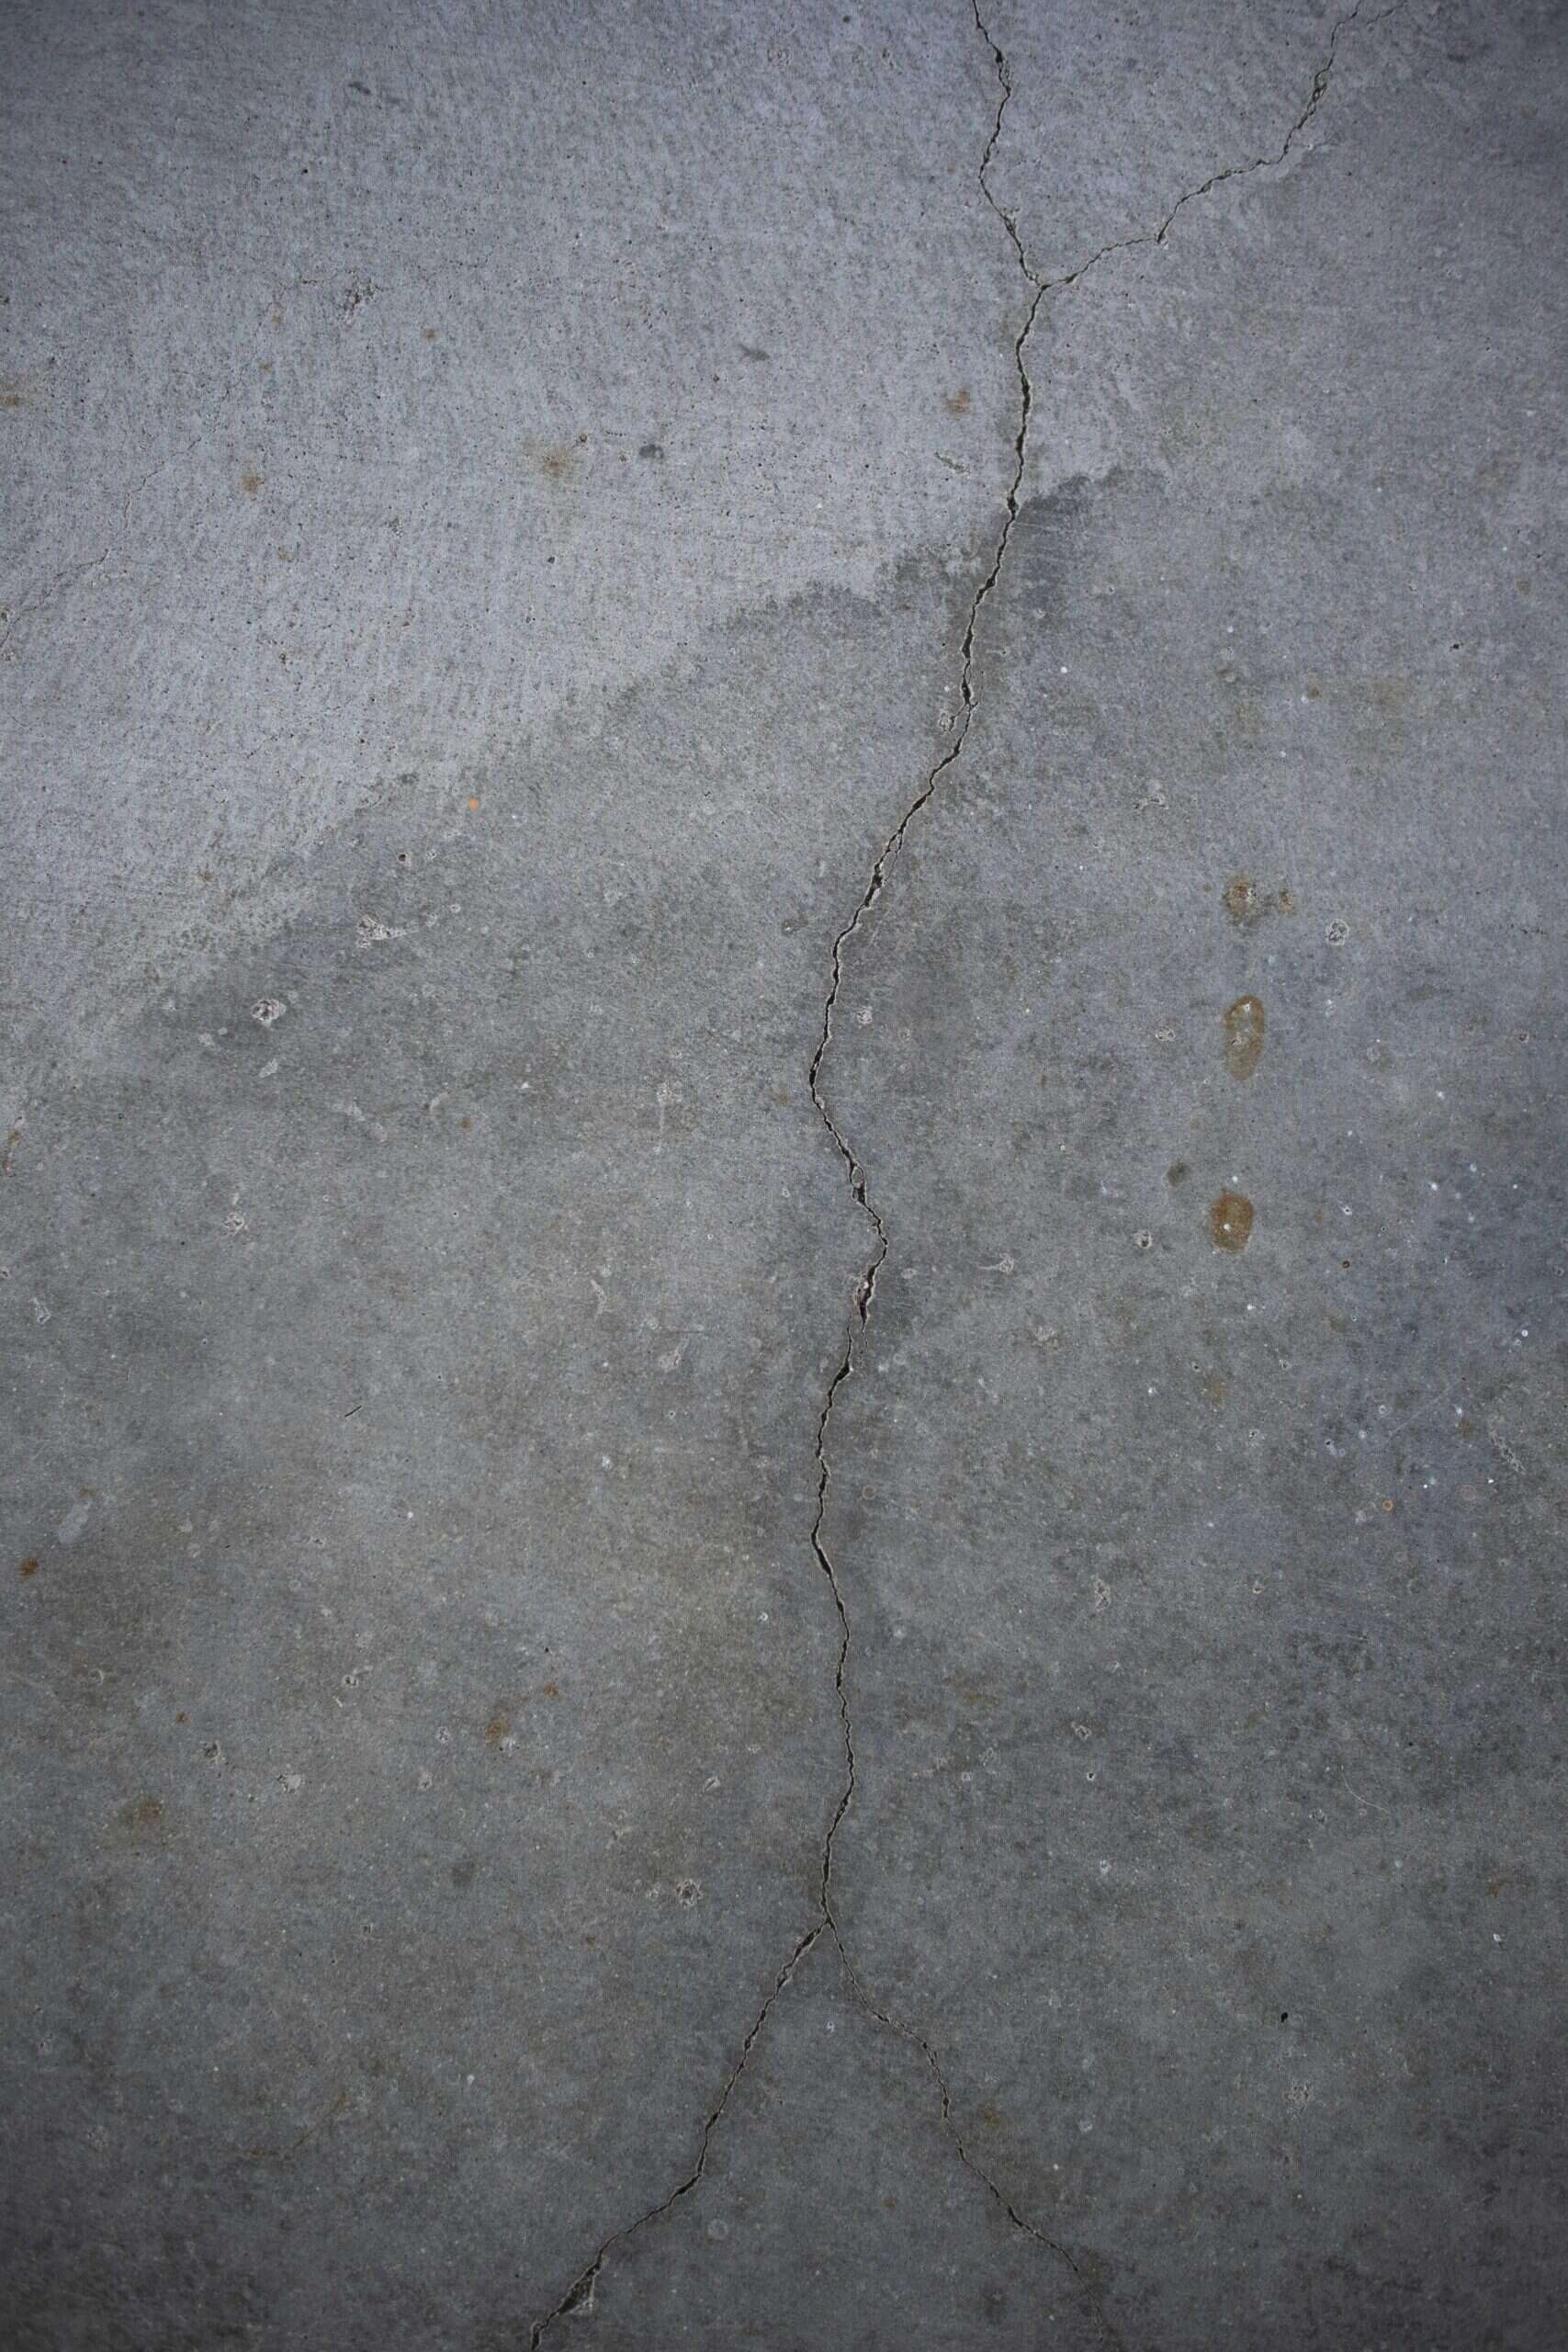
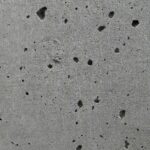
Signs of Wear: Over time, even a strong concrete basement floor (essentially a concrete slab) can show signs of wear. You might notice loose concrete chips, small holes or pits (called pitting), hairline cracks, or dusty powder on the surface. These are indicators that the top layer of the concrete is deteriorating. Worn-out concrete surfaces like this are unsightly and can lead to uneven floors or tripping hazards if ignored. It’s important to address these issues promptly to prevent further deterioration.
Common Causes: Why does a basement floor start crumbling in the first place? There are several possible causes:
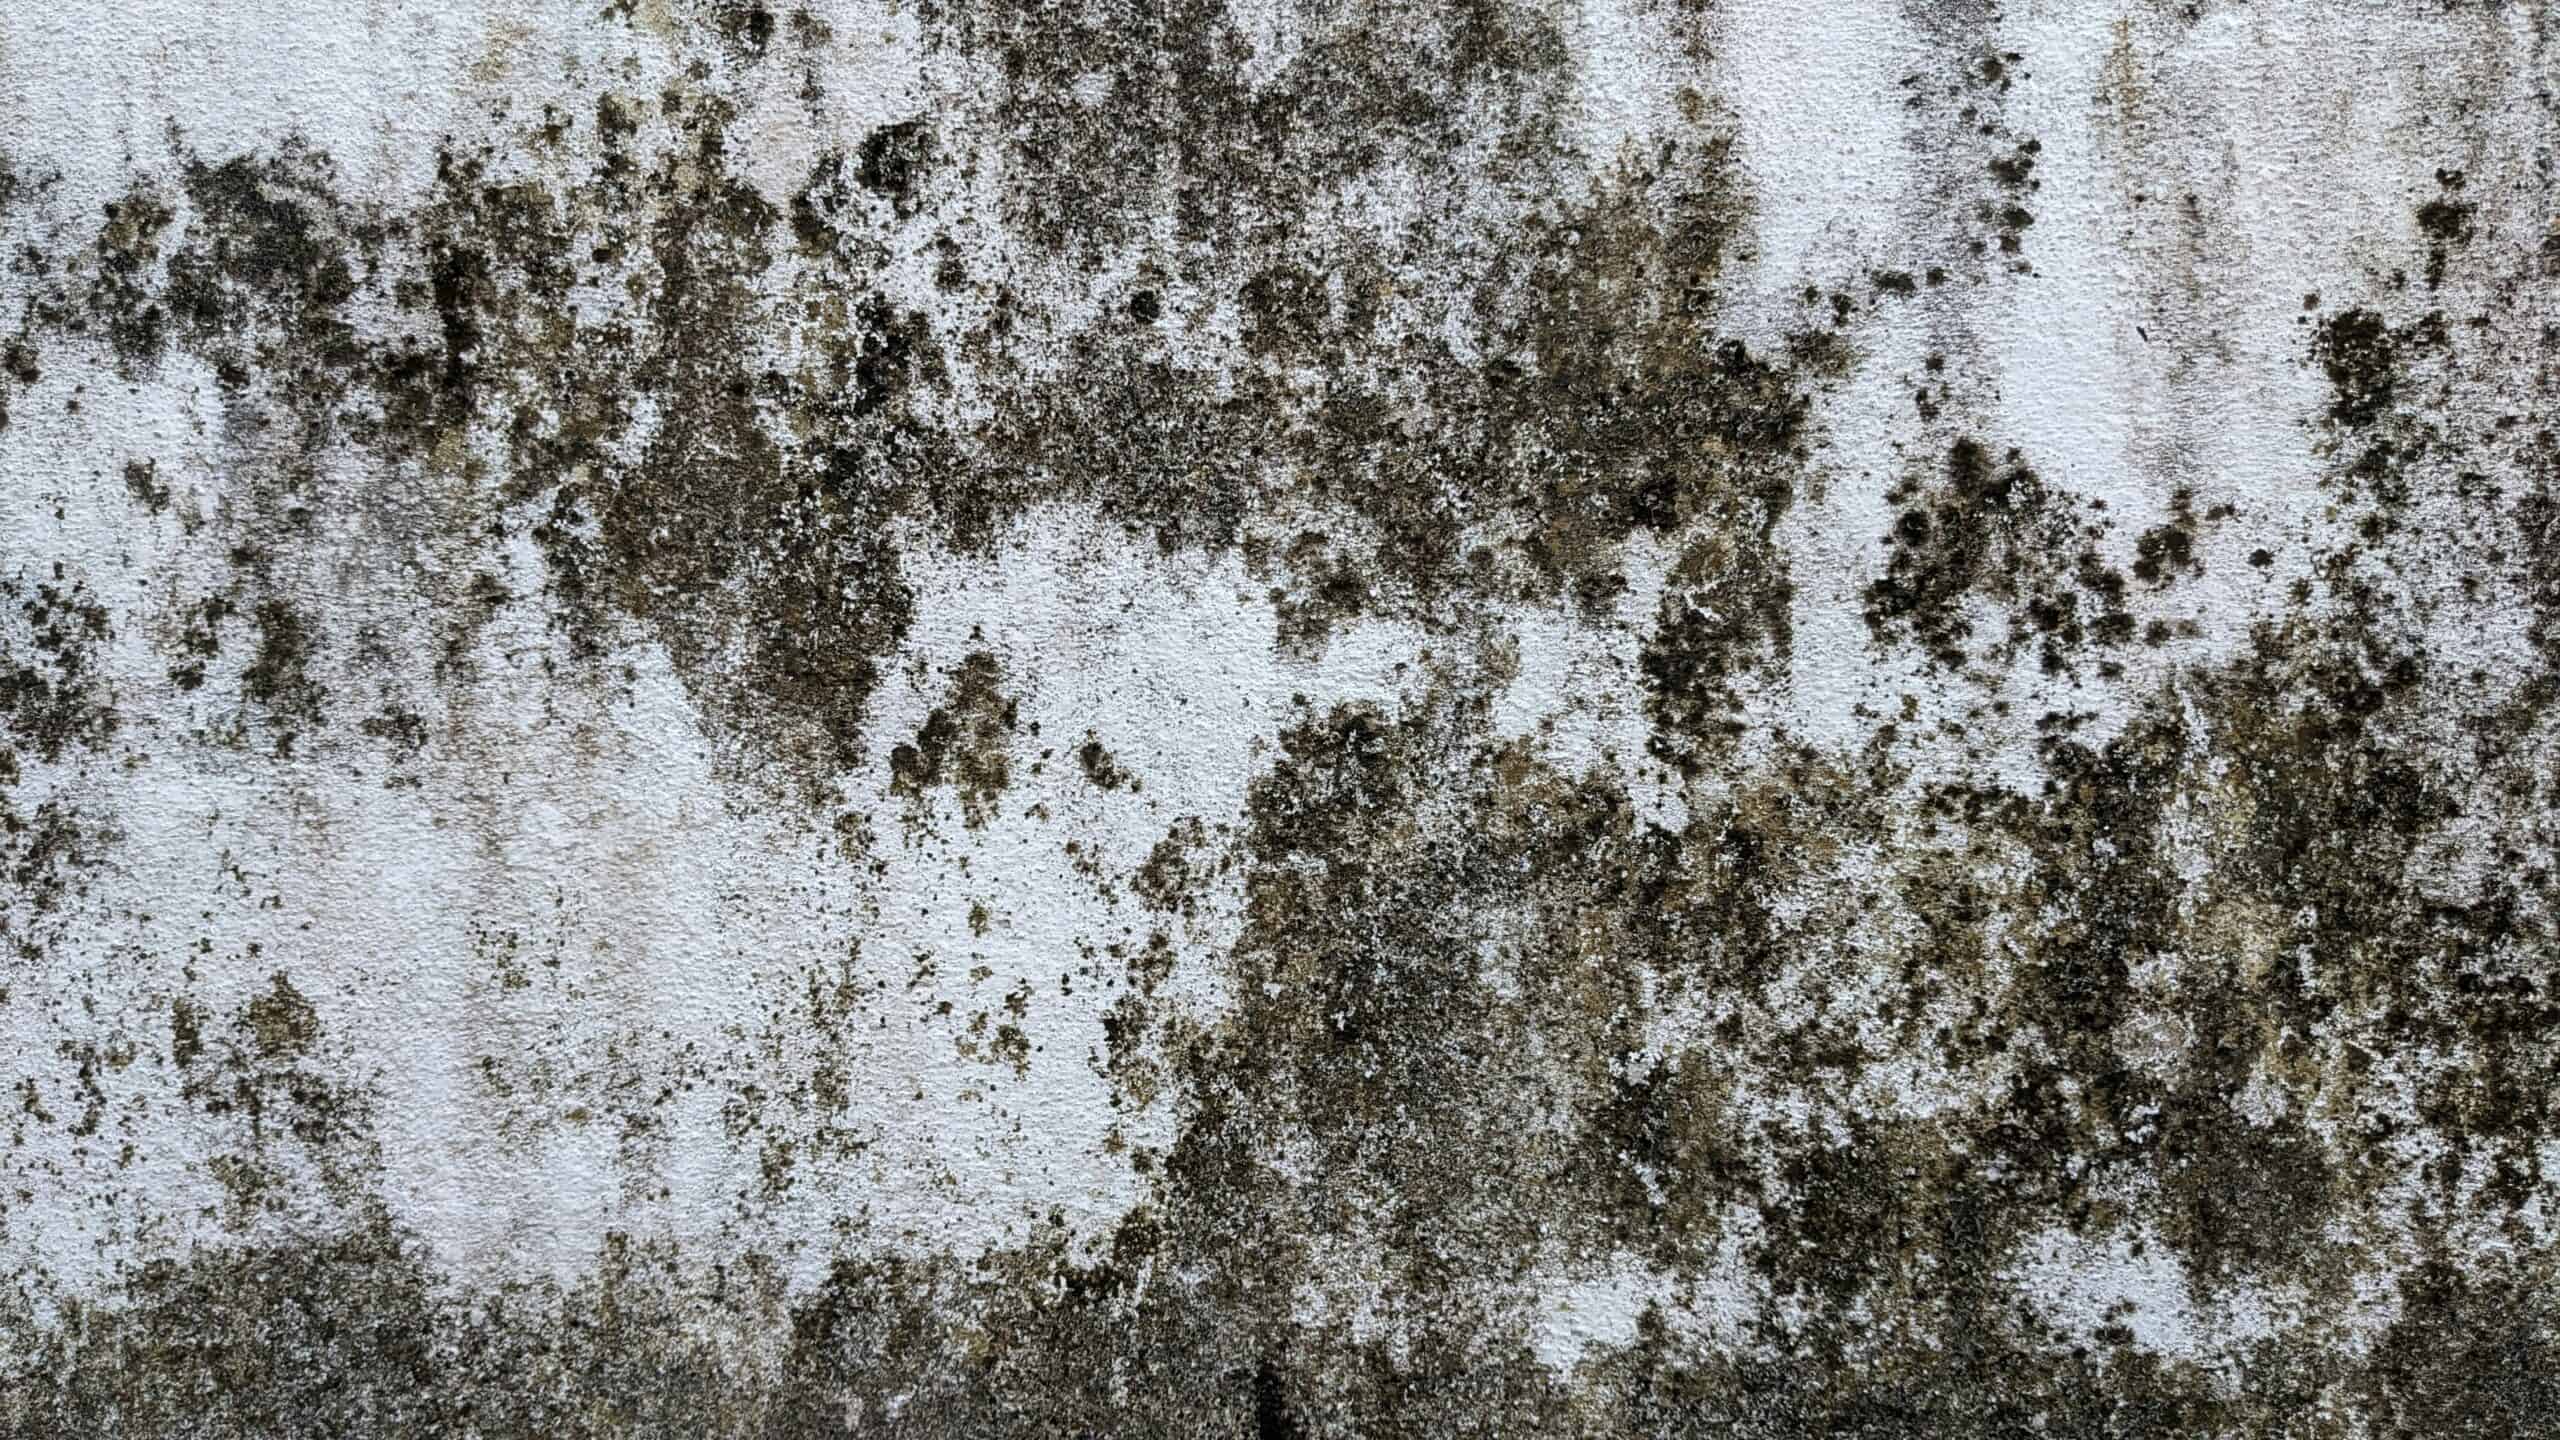
- Moisture and Poor Drainage: Water is the enemy of concrete. If your basement has poor drainage or a high water table…If your basement has poor drainage or a high water table, moisture can seep up through the slab. Over time, water infiltration and hydrostatic pressure (water pressure from the ground) can cause the surface to spall (chip away) and crumble. If you’re unsure whether moisture is actively contributing to the damage, a simple moisture meter for concrete floors can help confirm whether the slab is damp or if the issue is limited to surface deterioration. These inexpensive tools are often under $30 and can quickly remove the guesswork before you start repairs. You might see chalky white mineral deposits (efflorescence) or even traces of rust if embedded steel (rebar) has started to corrode. Water damage from plumbing leaks or seepage can similarly weaken the concrete. Inadequate exterior drainage (no french drains or clogged gutters) means rainwater saturates the soil around your home’s foundation, increasing pressure under the slab. This pressure (much water under the slab) can force moisture through the concrete and contribute to crumbling.
- Concrete Quality and Age: Not all concrete is created equal. If the original floor was mixed with too much water or poor-quality ingredients, the cured concrete will be weaker. Excess water in the concrete mix can leave the slab more porous and prone to damage. Old floors (many decades old) may simply be at the end of their lifespan, especially if they were a thin pour to begin with. As old concrete ages, the binding cement can degrade, leading to a dusty, friable surface. Minor cracks from shrinkage may have expanded over years. Regular maintenance might not have been done, and small issues compounded into larger crumbling areas.
- Temperature and Chemicals: In basements that experience wide temperature swings or occasional freezing (for example, unheated crawl space-like conditions or drafts), the freeze-thaw cycle can cause surface cracking. However, true freeze-thaw damage is more common in outdoor concrete steps or driveways than in interior floors. More likely, chemicals can play a role – for instance, if someone applied harsh acidic cleaners or if cement paint or improper coatings were used on the floor, they might have contributed to scaling. Basement floors aren’t usually exposed to deicing salts (a common cause of concrete spalling outdoors), but any chemical exposure can weaken the cement.
- Structural Issues: In some cases, a crumbling floor could hint at deeper problems. Settlement of the ground or foundation can cause the slab to crack and sections to heave or sink. Heavy loads or serious foundation issues (like sinking footings or expansive soil) could stress the slab beyond what it was designed for. Usually, a basement slab is non-structural (only carrying its own weight and what’s on it), whereas foundation walls bear the house load. However, if you see wide or uneven cracks, or sections of floor at different heights (uneven floors), it may indicate an underlying issue. Also check your basement walls – if they have large vertical cracks or bulging, the floor damage might be related to foundation movement or water coming through wall cracks. Foundation cracks in walls or a crumbling concrete foundation (e.g. flaking foundation walls) are beyond a floor patch job and may require professional attention.
When to Worry: Most of the time, a flaking basement floor is a simple cosmetic issue. Hairline cracks on a concrete basement floor or slight chipping are normal as concrete cures and ages. Concrete foundations usually develop some cracks over time, and the same goes for floors – a few thin cracks or surface flakes don’t mean your home is falling apart. The key is to assess the extent of the damage. If the crumbling is localized (say, a few spots or along a crack line) and the rest of the slab is unaffected concrete in good shape, it’s likely a candidate for DIY repair. You can patch these minor cracks and spalled areas to prevent further damage.
On the other hand, if large sections of the floor are breaking up, or you have cracks you can fit a coin (or wider) into, you might have more than a surface problem. Cracks wider than ~1/4 inch, or offset cracks (one side higher than the other), or deep basement floor cracks that go through the slab might require more extensive fixes. According to experts at the University of Vermont, cracks larger than 2 inches wide or pits deeper than 2 inches are often best addressed by cutting out and re-pouring that section of floor rather than just patching. We’ll discuss later when to consider professional foundation repairs or a new slab as the best course of action.
For most typical cases, you can proceed with a DIY patch. Next, we’ll gather the right tools and materials and go through the repair process step by step.
Safety Precautions
Repairing a concrete floor is straightforward, but be mindful of safety hazards before you begin. Crumbling concrete creates a lot of dust, and concrete dust contains crystalline silica – a hazardous material if inhaled. According to the CDC/NIOSH, materials like concrete and mortar contain silica, and you should prevent exposure and control dust when working with them. Here are some safety tips:
- Wear Protective Gear: At minimum, wear safety goggles to protect your eyes from flying chips and a proper dust mask or respirator rated for concrete dust (NIOSH N95 or better) to avoid inhaling silica. Also use gloves to protect your hands, and consider knee pads if you’ll be kneeling on the hard floor. Long sleeves and pants will protect your skin from abrasions. These precautions will guard you against both chemical and physical safety hazards.
- Ventilation and Dust Control: If your basement has windows or a ventilation fan, use them to get fresh air in. Concrete dust is very fine – avoid creating clouds of it. Avoid dry sweeping or blowing the dust around; that will send silica into the air. Instead, use a shop vacuum with a HEPA filter to collect dust and debris. A small shop vacuum with a HEPA filter is especially helpful for basement repairs and makes cleanup safer when working with concrete dust. You can also lightly mist the work area with water to keep dust down (wet methods). The CDC recommends using water spray or local exhaust when working with silica materials. By keeping the concrete slightly damp during chipping and cleanup, you reduce airborne dust significantly. Do not use compressed air to clean up dust, as this will aerosolize silica particles.
- Watch for Lead Paint or Asbestos: This is a side note – if your floor was painted in the past (older homes sometimes paint basement slabs) or if tiles were glued to it (old adhesives or tiles might contain asbestos), be aware of those hazards. If you suspect lead paint or asbestos tile, you may need professional abatement. Generally, patching a concrete floor shouldn’t involve those materials, but it’s worth mentioning for completeness.
- Lighting and Electrical Safety: Ensure your work area is well-lit so you can see what you’re doing. Use a GFCI outlet for any power tools in the basement (basements are damp, so ground-fault protection is important to prevent shock). Keep power cords out of puddles if you are using water to wet the concrete.
By following these precautions, you’ll minimize risks and be able to focus on the repair. Now, let’s gather what you need and then get to work.
Tools and Materials Needed
Having the right tools and materials on hand will make this DIY repair go smoothly. Below is a list of items you’ll need to fix a crumbling basement floor. (You can find many of these at your local home center or online – we’ve included a couple of example products for reference.)
- Protective Gear: Safety glasses, dust mask/respirator, work gloves, and sturdy clothing (as mentioned in Safety Precautions). Also have a stiff scrub brush and a broom or vacuum for cleanup.
- Concrete Removal Tools: A masonry chisel and hammer are usually sufficient for most small basement floor repairs. For larger or heavily deteriorated areas, an electric rotary hammer can speed up the process, but most DIYers won’t need one for minor surface repairs.
- Cleaning Supplies: A bucket of water (preferably clean cold water) and a stiff scrub brush or wire brush for scrubbing the concrete. A shop vacuum (wet/dry vac) is extremely helpful to remove dust and debris after chipping and scrubbing. You may also use a mild concrete cleaner or degreaser if the floor is oily or very dirty.
- Concrete Bonding Agent (Adhesive Primer): This is a liquid adhesive primer specifically made to help new concrete or mortar bond to old concrete. It’s usually a latex or epoxy-based liquid. While not always required, it can greatly improve the patch’s adhesion to the old slab, especially if you’re doing a thin overlay. You apply it to the cleaned old concrete before the new patch. (Check your patching product instructions; some polymer-modified cements don’t need a separate bonding agent.) A large paintbrush or a paint roller will be useful to apply the bonding agent evenly. A basic concrete bonding adhesive is usually inexpensive, widely available, and one of the easiest ways to prevent patch failure—especially for thin repairs or feathered edges.
- Patching Material: You have a few options here, depending on the size and depth of the repair: For small patches such as shallow spalling or minor cracks, a ready-mix concrete patch is often all you need. A single quart-sized container is usually enough for most spot repairs and helps avoid overbuying material.
- For larger or deeper repairs, or resurfacing a whole area, use a bagged concrete resurfacer or repair mortar. These are usually polymer-modified cement mixes that you just add water to. Designed to spread in a thin layer over old concrete. It can fill small pits and renew the surface. Another option is a fast-setting repair mortar for deeper holes. Make sure whatever you choose is suitable for the thickness you need (some patches are only for 1/2 inch or less surface repair; others can be applied thicker). In most DIY basement repairs, one 40-lb bag is sufficient for small resurfacing areas, making this a practical option without committing to a full floor replacement.
- If you have basement floor cracks to fill (especially thinner ones), you might also get a tube of concrete crack sealant (polyurethane or epoxy based) that comes in a caulk tube. These flexible sealants are great for hairline to 1/4″ cracks and move with the concrete. However, if you are resurfacing the whole floor, a repair mortar will fill the cracks as you go.
- Mixing Tools: If using powder repair mix, have a clean bucket, a measuring container for water, and a mixing tool. For small batches, you can hand mix with a margin trowel. For larger batches, a drill with a paddle mixer attachment makes mixing easier. Always use clean water (room temperature or clean cold water is fine – cold water can give a bit more working time on a hot day).
- Application Tools: You’ll need a few masonry tools: a flat trowel (steel finishing trowel) for applying and smoothing the patching material, a pointed trowel or putty knife for tight spots or cracks, and possibly a larger float or screed for wide areas. A large paintbrush (4” or so) or push broom can also be handy to feather out thin coatings (some people use a broom to add a slight texture to the final surface for slip resistance). If you’re doing a leveling layer, a long straightedge can help to screed (flatten) the new surface.
- Curing Materials: Plastic sheeting can be useful to cover the patch during curing (to hold in moisture). Or you might need a curing compound (some repair products include this, or you can mist with water). Also have some rags or sponges for cleaning up tools and excess.
With everything assembled, you’re ready for the repair. In the next section, we’ll provide step-by-step instructions. Follow these steps methodically, and you’ll restore your basement floor’s surface and prevent further damage from occurring.
Concrete Steps for Repairing a Crumbling Basement Floor
Now we get to work! We will walk through the repair process in order. Even if you’re new to masonry work, these instructions will break it down into manageable tasks. Early intervention and careful work now will save your floor from worse problems later. Let’s begin with the first step – assessing and prepping the area.
1. Assess and Mark the Repair Area
Before jumping into demolition, take a moment to examine the damaged area closely. Identify all the spots where the concrete is crumbling or flaking. Is it just one section or multiple spots? Tap around the area with a hammer – if you hear hollow sounds or the surface easily flakes, those sections likely need removal. Mark the perimeter of the repair zones with chalk if that helps. Also, check the surrounding floor and foundation walls for any issues: if you see significant cracks radiating from the area or traces of rust (which could indicate rebar in the slab is rusting), make note of that. This step is about planning your repair so you don’t miss any weak spots. Extent of the damage matters – you don’t want to patch halfheartedly only to have adjacent loose concrete start crumbling next. If the problem areas are widespread over the floor, you might decide to resurface the entire floor for a uniform finish (in which case you’d prep the whole surface). If they’re isolated, you can do spot repairs. Also decide if any minor cracks nearby should be fixed at the same time (often it’s wise to address them together). At this stage, if you realize the damage is more severe than anticipated – for example, large deep cracks indicating serious foundation issues – you might pause and reconsider the best course of action (possibly calling a professional). But assuming it’s within DIY scope, proceed to the next step.
2. Remove Loose and Weak Concrete
Safety gear on! This part gets messy. Your goal is to remove all the crumbling, weak concrete until you reach solid unaffected concrete that will be a sound base for patching. Use your cold chisel and hammer (or the rotary hammer with chisel bit if you have one) to chip away the loose concrete. Angle the chisel at about 45 degrees and chip around the perimeter of the spalling area first, then work inward. You want to “square up” the edges of the repair zone if possible – undercutting slightly (the hole should be a bit wider at the bottom than top) helps the new patch hold in place like a key. Remove all thin flakes and any concrete that comes off easily. Don’t be timid: “If you do not break it off, it will break off on its own after your repair”, as one expert put it. In other words, take off anything that is questionable now, or you’ll be patching again soon. A stiff scrub brush or wire brush can help scrub out loose particles as you go. For cracks, use the chisel to widen them slightly (make it a small V-shape groove) so that patch material can get in – hairline cracks should be opened to at least 1/4 inch width. For deeper holes, chisel down until you reach sound material; you may expose coarse aggregate (gravel) in the concrete – that’s fine. Vacuum up debris frequently so you can see what you’re doing. This step determines the success of the repair: new concrete needs a solid base. If you find yourself chipping and it just keeps flaking without reaching solid material, that’s a sign the deterioration is widespread – you may end up removing a lot more than expected. (If it basically comes down to the whole slab being weak, that’s when a full replacement or professional foundation specialist consultation is warranted.) Most often, you’ll find a firm boundary between the bad top layer and intact concrete below. Also be careful around the edges: if the crumbling area is near a wall or column, avoid damaging those. Steel dowels: If you are removing a large area all the way through the slab (for example, a full-depth patch or partial slab replacement), you might need to install steel dowels (rebar pins) to tie the new concrete to the old slab or foundation wall. This involves drilling holes horizontally into the intact concrete and epoxying rebar rods halfway in, leaving the other half to be embedded in the new pour. This prevents the new slab section from shifting separately from the old. If your repair is just surface-level (which is most common for crumbling floors), you won’t need dowels.
3. Clean the Surface
With all the loose material gone, focus on cleaning. The motto here is “dust-free and bond-friendly.” New mortar will not stick to dust or oily grime. First, vacuum the area thoroughly to pick up all chips, dust, and grit from the chipping stage. Pay special attention to corners of cracks and pits – use the vacuum crevice tool or a brush to get everything out. Next, scrub the area with water and your stiff brush. It’s often a good idea to wet the surface with clean water (dampen it, but don’t leave puddles) and use a concrete cleaner or a few drops of dish soap to break any grease. Scrub vigorously; you want the old concrete as clean as possible. If the water you scrub with turns brown or murky, that’s dirt or possibly old glue, etc., coming off – keep scrubbing and rinsing until it’s clearer. Rinse with clean water and vacuum or mop it up. The repair area should be pristine and damp (but not glistening with water) before you apply patch. Important: If the slab is wet from cleaning, give it a little time to dry to a damp surface sheen. Very wet concrete can dilute your patch mix at the interface. You want it SSD (Saturated Surface Dry) – meaning the concrete is saturated with water but no standing water on the surface. A truly saturated slab might take an hour or more after washing to reach SSD, depending on how absorptive it is. Use fans to help, if needed. Also, remove any paint or sealers around the repair area (if the floor was painted or coated). You may need a wire brush, scraper, or a small grinder to get down to bare concrete. New mortar must grip the actual concrete, not a layer of old paint or latex paint. Now is also the time to double-check that the edges of your patch are sound – if scrubbing loosened something, chisel it out and reclean. Proper surface prep is critical for a long-lasting fix.
4. Apply Bonding Agent (If Required)
This step can make the difference between a patch that lasts decades and one that pops loose after a year. A concrete bonding adhesive (also called adhesive primer or bonding agent) helps the new patch material stick to the old concrete, especially when feathering the edges thin. Follow the manufacturer’s instructions on your specific bonding agent. Generally, you’ll stir the liquid and pour it onto the cleaned concrete or into a paint tray. Then, using a large paintbrush or roller, apply a generous coat over the entire repair area (and a few inches beyond) including inside cracks and pits. Work it in so it wets the surface. Ensure full coverage – the concrete should look evenly wet with the product (usually these agents look milky but dry clear or slightly tacky). Many bonding agents want you to apply the new mortar while the primer is tacky (not fully dry, but not puddled). Typically that means waiting 5–10 minutes after application, but check your product instructions. Do not let it dry completely unless the product specifies that (some require a dry coat). If it does dry and too much time passes, just re-coat it. If your chosen patch product says it contains a bonding agent or doesn’t require one, you can skip this step. However, it never hurts to use one for thin repairs. It’s extra insurance that your patch won’t detach. One exception: if you are using a hydraulic cement patch (for an active water leak crack, for example) you generally wouldn’t use a bonding agent, as those are designed to bond on their own in wet conditions. For our scenario of surface repair, bonding adhesive is recommended. After coating the area, move on to mixing the patch – you want to apply while this is still tacky.
5. Mix the Patching Material
Now, mix your concrete patching material according to the manufacturer’s directions. Whether you’re using a ready-mixed concrete patch from a tub or a powder from a bag, proper consistency is key. If it’s premixed (in a tub), stir it up with a trowel to ensure any settled material is reincorporated. For powder mixes: pour the measured amount of clean cold water into your bucket first (this helps with even mixing), then add the dry mix. Use your trowel or mixing paddle and drill to blend it thoroughly. Scrape the sides and bottom of the bucket to avoid dry pockets. The mix should be uniform with no lumps. Tip: Most repair mortars have a peanut-butter-like consistency when ready – thick enough to hold onto a trowel without running, but thin enough to press into crevices. If you are resurfacing a large area with a flowable resurfacer, the mix may be more fluid (like pancake batter) to allow it to self-level – again, follow the product’s ratio closely. Don’t add extra water “for luck” as it can weaken the cured patch (too much water in a mix reduces strength, which is partly why some old slabs crumble). Use clean, cold water for mixing; cold water can extend working time a bit because warm water speeds up the setting reaction. Also be mindful of pot life – many mixes will start to harden in 15-30 minutes, so only mix as much as you can place in that time. If needed, do multiple small batches rather than one big batch that might harden in your bucket. The goal is a well-mixed, homogenous patching material ready to go. You might notice the mix getting warm (exothermic) as it starts to cure; that’s normal. If it’s a fast-setting mix and you’re doing a big area, enlist a helper so one person can mix subsequent batches while the other patches.
6. Apply the New Concrete Patch
This is the moment where your floor gets rebuilt. Immediately after mixing (and while the bonding agent is tacky, if used), start applying the repair mortar to the prepared area. For small cracks: if you have a separate crack filler, squeeze it into the crack first. Otherwise, use a corner of your trowel to push the patch mix deep into cracks and pits. For spalled areas: shovel or lift some mix onto the area (with a trowel or scoop) and press it down into the surface. Key technique: force the material firmly against the edges of the cavity to ensure it bonds with the old concrete. You want to eliminate any air pockets. If the area is large, work in small sections at a time to ensure good contact. Use the trowel to roughly level the patch with the surrounding floor. Add more material than needed and then scrape off excess – it’s better to overfill slightly and then cut back. For wide/shallow repairs like a skim coat, pour the mix out and spread it with a squeegee, broom, or trowel across the surface. Work it back and forth to get it into all pores. If you’re patching small holes or pitted spots, a putty knife can help press the mix in. Feather the edges of the patch onto the surrounding good concrete so there isn’t a sharp boundary. You can do this by pressing the trowel at a very low angle at the edges and thinning out the mix to virtually zero thickness at the edges. (Note: If the edges of the old concrete are very thin and still weak, they might chip – feathering helps transition but keep in mind any feather-edge is delicate. That’s why earlier we squared up the edges to avoid paper-thin patches where possible.) Continue to apply and roughly shape the patch. If your product allows layering and the repair is deep, you may apply in lifts (let bottom layer set a bit, then add more on top) – check instructions. Often for >1/2” depth, two layers are recommended to avoid sagging. For a full concrete resurfacing (covering the entire floor), you would work systematically from one end of the room to the other, spreading the new concrete flooring layer evenly. For our guide, we assume spot repairs, but the principles are similar. While placing the material, keep an eye on the clock – you have limited working time. If it starts to stiffen before you finished shaping, you may have to stop and mix a fresh batch to apply on the remaining area. Don’t overwork the patch if it’s getting stiff as that can weaken it.
7. Smooth and Finish the Surface
Once the patch material is in place and roughly level with the surrounding floor, it’s time to finish it for a smooth (or appropriately textured) look. Smoothing: Use a steel trowel to float the surface – that is, hold the trowel nearly flat and move it over the patch with moderate pressure. This will compact the surface and bring up just a bit of moisture (cement paste) to slick it off. If the patch is small, a few strokes will do. For larger patches, work in a consistent pattern (e.g., circular or in one direction) to avoid leaving big ridges. If you find the trowel is sticking or digging in, the mix might be starting to set; you can sprinkle a little water on the surface or on the trowel to help, but use sparingly. Feather the Edges: Pay special attention to the transition between new and old concrete at the perimeter. You can use a wet paintbrush or sponge on the very edge to blend the thin edge of the new mortar into the old surface. This helps create a nearly invisible patch line. Texture Matching: Most basement floors are relatively smooth, but not polished. If you want to match a slight texture, you can use a damp sponge or broom lightly over the surface as it starts to firm up to create a subtle texture (this can also hide imperfections). Alternatively, finish with the trowel for a smooth surface if desired. If your repair is in an area that transitions to another room or surface, make sure the height matches so you don’t create a little “lip”. No Footprints: Obviously, keep yourself (and pets) off the patch at this stage – it’s surprising how often a cat or dog might wander in leaving marks! If you do accidentally dent the patch, quickly re-trowel it if still soft. Large Areas: For a large resurfacing, you might use a long handle magnesium float or darby to screed the floor flat, then follow with a steel trowel or broom finish. Also, when joining two batches of mix on a large area, blend them thoroughly while wet to avoid a cold joint line. Once you are satisfied the surface is appropriately smooth and blended with the old floor, you’re done with the active repair. Step back and admire the improved look – your basement floor should no longer have holes or loose chips. But your job isn’t finished yet; curing is critical for strength.
8. Cure the Patch Properly
Curing means allowing the new concrete to gain strength slowly by retaining moisture. If concrete dries out too fast, it can shrink, crack, or not achieve full strength. Basement conditions (cool and possibly humid) generally favor curing, but you still need to take steps to keep the patch from drying out prematurely. After finishing, do not disturb the patch. Most repair mortars will set (harden) within a few hours to where you can’t easily dent them, but they are still far from fully cured. Follow product guidelines – some fast-set cements reach high strength in 1 day, others take longer. A good rule of thumb: keep the patch damp for at least 48 hours. You can mist it with water occasionally and/or cover it with plastic sheeting to hold in moisture. If using plastic, tent it so it doesn’t mar the surface; also be aware covering can cause a mottled appearance (less an issue in a basement). If the manufacturer provided a curing compound or recommends using one, apply it as directed (usually sprayed on to form a membrane). Prevent foot traffic on the patch during this initial cure period. It might bear weight after 24 hours for many products, but avoid dragging heavy equipment or doing any further work on it for a couple of days if possible. The patch will continue to gain strength over 1–2 weeks (or even longer for some high-strength mixes). Also avoid heavy shocks or vibration in the area during curing (for instance, don’t hammer on the adjacent floor or operate heavy machinery next to it). Slow, proper curing ensures your repair develops maximum durability and bonds well to the old concrete.
9. (Optional) Apply a Protective Finish
This final step is not strictly necessary for the structural fix, but it can provide a protective layer to your floor and enhance the appearance. Once the patched concrete is fully cured (typically after a few days, but check product specs – some recommend waiting 7+ days before coating), you may choose to seal or paint the basement floor. Concrete Sealer: Applying a concrete sealer over the floor will help repel water and chemicals. There are penetrating sealers (silicate or silicone-based) that soak in and block pores, and film-forming sealers (clear coat acrylics, epoxies) that create a thin layer on top. For basement floors, a water-based clear sealer is often used to keep dust down and make cleaning easier. Epoxy or Paint: Another route is to use a concrete floor paint or epoxy coating. Many homeowners use epoxy paint kits on basement and garage floors to create a durable, colored finish. If you go this route, ensure the patch is well cured and follow the coating instructions for surface prep (you may need to etch the entire floor or apply a primer). Masonry paint: If you prefer a simpler approach, you can use a masonry latex paint or epoxy-fortified cement paint on the floor. This will unify the color between patched and old areas and provide a layer of protection. Be sure to use a product intended for horizontal concrete surfaces so it can handle foot traffic. When applying any finish, cut in along edges with a brush and use a roller for large areas, or as directed. One important note: do not rely on paint alone to “fix” a crumbling floor. Painting over damaged concrete without removing loose parts will result in peeling and continued deterioration beneath. We mention paint here only after proper repair. If you did all the hard work of patching, covering the entire floor with a uniform paint or sealer coat can give it a like-new look and make future maintenance easier. Plus, a sealed floor resists moisture penetration, giving you an extra layer of defense against water damage and future spalling. Always allow proper drying/curing time before placing furniture or walking extensively on a painted/sealed surface (usually a day or two). If you want a more durable, finished look, epoxy coatings are a popular option for basement floors after proper repair. See our guide to DIY basement floor epoxy coating for prep, cost, and product considerations.
By following these steps, you should now have a solid, repaired concrete floor. If you are looking for additional flooring options look to our Basement Flooring Guide. But our job isn’t quite done – the last thing to consider is preventing a repeat of the problem. Below we discuss how to avoid future issues and when to call in the pros if needed.
Preventing Future Crumbling and Moisture Issues
Congratulations on fixing your basement floor! To protect your work and home’s foundation going forward, it’s wise to address any underlying causes of the crumbling concrete. Here are some tips to maintain your basement floor and home’s structural integrity, and prevent further damage:
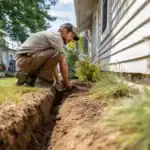
- Keep Water Away from the Foundation: Since poor drainage is a major cause of concrete problems, ensure your gutter and downspout system is directing rain clean water away from your foundation. The ground around your house should be graded (sloped) to carry water away. Consider installing or repairing french drains or an exterior drain tile system around the foundation if you have chronic groundwater issues. Experts recommend proper grading and guttering as the first line of defense against basement water. In areas with high water tables, a perimeter drain (weeping tile) with a sump pump is common. An interior drain tile system (along the inside perimeter of the basement) can also relieve water pressure by collecting water from under the slab and pumping it out. The University of Minnesota Extension notes that drain tile systems are recommended around basement walls even in sandy soils to handle groundwater. Keeping water out of your basement will prevent the moisture-driven deterioration (efflorescence, spalling of concrete, mold, etc.) that we discussed. If you fixed the floor but don’t solve the moisture problem, the concrete may start to crumble again or you could get foundation cracks in the walls from continuing pressure.
- Control Basement Humidity: Even with drainage in place, basements can be damp. Use a dehumidifier to keep humidity in check, especially in summer. Aim for below 50-60% relative humidity to prevent mold and reduce moisture absorption by concrete. (Be cautious as one study noted: running a dehumidifier without addressing water entry can draw moisture through the concrete faster, causing efflorescence and spalling of concrete. So fix leaks first, then dehumidify to handle residual humidity.) Insulating basement walls can also help reduce condensation on surfaces. Good ventilation of the basement (not bringing in humid air, but circulating indoor air) is also helpful. In short, a dry basement is a healthy basement – for both you and the concrete.
- Avoid Harsh Chemicals on the Floor: Do not use salts or deicers on your basement floor (sometimes people might do this near door entrances – avoid it). If you must clean the floor, use neutral pH cleaners rather than strong acids which can etch and weaken concrete. If you disinfect (perhaps in a basement used for food storage or pet areas), ensure the cleaners won’t attack concrete. Rinse chemical spills promptly. This will preserve that protective layer you added.
- Monitor and Maintain: Make it a part of your regular maintenance routine to inspect the basement floor and walls a couple of times a year. Look for new cracks (or expansion of old ones), damp spots, or flaking. Catching issues early (early intervention) means you can do a small diy repair touch-up rather than a major one. For example, if you see a hairline crack has gotten longer, fill it with a concrete crack sealer before it widens. If a patched area ever shows signs of loosening, address it immediately. Also keep an eye on that joint between the floor and walls – water often enters there if it’s going to. Keep it clean and if you ever notice gaps forming, you can seal them with an appropriate sealant.
- Address Causes of Signs of Wear: If you notice signs of wear returning, ask why. Is there a new water source? (E.g., a plumbing leak under the slab or a nearby appliance like a water heater or washer leaking onto the floor.) Is there much water in the soil after heavy rains due to landscaping changes? Perhaps your sump pump failed during a storm – maintain that pump regularly. Also check if a damp crawl space or ongoing water intrusion is contributing humidity—moisture can migrate upward and make basement conditions worse. See the signs you need basement waterproofing before surface damage returns.
By being proactive about moisture control and maintenance, you’ll greatly extend the life of your basement floor and avoid recurrence of the crumbling problem.
When to Seek Professional Help
Not every basement floor issue can or should be fixed by a homeowner. It’s important to recognize when a problem is beyond a DIY fix so you can get professional help in time. Here are scenarios when calling a professional or a foundation specialist is the best course of action:
- Structural Concerns: If your basement floor’s condition is accompanied by other warning signs like significant wall cracks, a sinking feeling in areas (settlement), or doors/windows sticking (which can indicate foundation movement), you may have serious foundation issues rather than just surface wear. In such cases, a foundation specialist or structural engineer should evaluate your home’s foundation. A crumbling concrete basement floor itself is usually not load-bearing, but it could be symptomatic of foundation settlement or soil problems underneath. Foundation repairs (like piering, slabjacking, or drainage corrections) might be needed to stabilize the situation before resurfacing the floor. Don’t simply patch and ignore signs of a bigger structural issue.
- Widespread Deterioration: As mentioned earlier, if nearly the entire floor is crumbling or further damage is happening rapidly, you might need a new concrete slab. Replacing a basement floor involves breaking up and removing the old slab, addressing the base (adding compacted gravel, a polyethylene vapor barrier, etc.), and pouring fresh concrete – possibly a 4-inch slab reinforced with wire mesh or rebar, with expansion joints at the perimeter. This is a big job that typically requires a contractor. Many waterproofing and foundation companies offer free inspection and estimates for these kinds of jobs, so you can get an expert opinion. If you ever need to go this route, ensure proper steps are followed (as one guide notes: remove old concrete, add gravel fill, vapor barrier, then pour new slab with joints between floor and walls) to avoid future issues. It will be more expensive than a patch, but a correctly poured new slab can last many decades and give you peace of mind.
- Persistent Water Problems: If water is still coming in despite your efforts (say you patch the floor but water bubbles up through cracks during heavy rain), professional intervention is needed. Basement waterproofing specialists can install drainage systems such as a sump with interior channels or repair any breaches in the foundation. Hydrostatic pressure problems (water under the slab) can sometimes be relieved by an interior drain system that runs along the footer beneath the slab. These are not simple DIY projects because they involve jackhammering the slab edge or exterior excavation. If left unresolved, water will continue to deteriorate the concrete and could lead to mold or damage to belongings – making for costly repairs later. It’s wise to get a pro to handle water issues at the root.
- Unsure of Extent: If you feel uncomfortable assessing the problem, there’s nothing wrong with calling a reputable contractor or structural engineer for an evaluation. Many will come for a free inspection or a minimal consultation fee. They can tell you if it’s just a surface fix or something more. This can give you peace of mind. Even if you plan to DIY, knowing that you’re not dealing with a bigger issue is reassuring.
- Lack of Time or Tools: Lastly, even if the repair is straightforward, you might simply not have the time, tools, or physical ability to do it. Patching a floor involves labor – chipping concrete and handling heavy materials is hard work. Professionals have industrial tools (e.g., power scarifiers, industrial vacuums, mixers) that can do the job faster and perhaps more thoroughly. If you started the DIY and find it’s more than you bargained for, it’s perfectly okay to call in a pro to finish or redo it. The goal is a safe, solid floor – whether you do it or someone else does.
When hiring professionals, get multiple quotes and check references. Ensure they are licensed and insured for foundation or concrete work. For major foundation concerns, consider a structural engineer’s assessment in addition to a contractor’s opinion. That way you know the recommended solution is sound and not just upselling.
Remember: Addressing the problem sooner rather than later is important. Small cracks or slight crumbling can be handled easily now, but if neglected, they can expand and potentially hint at further deterioration. In worst cases, ignoring water-related crumbling could allow moisture to compromise your home’s structural integrity over time. So if in doubt, reaching out for professional help is wise. It can save you money in the long run by tackling the correct issue. Many homeowners find that a combination approach works: handle the diy repair for minor issues, but bring in the specialists for the underlying causes (like installing that exterior drain tile or fixing foundation settlement), thereby ensuring a long-term fix.
Crumbling Concrete Basement Floor FAQ
What causes a concrete basement floor to crumble?
Crumbling concrete is usually caused by moisture infiltration, poor-quality original concrete, age-related wear, or freeze-thaw cycles. Over time, water and humidity can break down the cement binder in the slab, causing the surface to flake or spall. Poor drainage, a high water table, or hydrostatic pressure are common contributing factors.
Can I repair a crumbling basement floor myself?
Yes, in most cases. If the damage is surface-level—such as flaking, pitting, or small cracks—homeowners can typically handle the repair as a DIY project. You’ll need tools like a chisel, vacuum, bonding agent, and a polymer-modified concrete patch. However, if the deterioration is widespread or structural, consult a professional.
How do I know if I need a professional to fix my basement floor?
You should call a professional if:
– Cracks are wider than 1/4 inch
– The slab is heaving, settling, or uneven
– There are signs of foundation issues (e.g. bulging walls, stuck doors)
– Water seeps up through the floor consistently
– The floor continues to deteriorate rapidly after patching
– A structural engineer or foundation specialist can help assess the severity.
What is the best patching material for a crumbling concrete floor?
Use a polymer-modified cement patch or concrete resurfacer. For example:
– Sikacryl Ready-Mix Patch (for small areas)
– Quikrete Re-Cap Concrete Resurfacer (for large, thin overlays)
Choose a product suitable for the depth and area of your repair. Use a bonding agent to improve adhesion unless the patch already includes one.
How long does it take to repair a concrete basement floor?
Most DIY repairs can be done in 1 to 2 days, including curing. You’ll need time to:
1. Remove loose concrete
2. Clean and prep the area
3. Apply bonding agent
4. Mix and apply the patch
5. Cure for 24–48 hours before light use
Full curing may take up to 7 days depending on the product.
How can I prevent my basement floor from crumbling again?
Improve exterior drainage (gutters, downspouts, grading)
– Use a dehumidifier to control humidity
– Avoid harsh chemicals or acidic cleaners
– Seal the concrete with a penetrating or film-forming concrete sealer
– Monitor for new cracks and patch them early
Preventing moisture intrusion is the most important step.
Is sealing my basement floor after repair necessary?
While not required, applying a concrete sealer or floor epoxy after the patch cures is highly recommended. It protects the surface from future water damage, reduces dusting, and improves durability. Use a product designed for interior concrete floors.
How much does it cost to fix a crumbling basement floor?
DIY repairs typically cost between $50 and $300, depending on the extent of the damage and tools needed. Professional repairs may range from $500 to several thousand dollars, especially if structural issues or full slab replacement is involved.
Can I just paint over a crumbling concrete floor?
No. Painting over crumbling concrete will not solve the problem and can worsen it by trapping moisture. You must first remove all loose material and patch the floor. After it cures, you can then paint or seal it with the appropriate product.
Final Words
A crumbling basement floor can be unsettling, but as we’ve shown, effective methods exist to restore it. By understanding why concrete floors fail and following these simple steps for repair, you’ve empowered yourself to take action. In summary, you evaluated the problem, prepped the area by removing all weak concrete, and used quality patching material to create a durable new surface. With the repair complete, you also addressed preventative measures like moisture control and regular maintenance to keep your basement dry and your concrete strong. Whether it was a simple cosmetic issue or part of a bigger waterproofing picture, you’ve tackled it head-on.
By investing a bit of effort now, you have saved yourself from potential costly repairs later. Your basement floor is no longer a source of dust and worry, but a solid foundation for whatever you use your basement for – storage, workshop, or living space. And if you ever decide to finish your basement, you’ve got a sound floor to build on. Should any new issues arise, you know what to watch for and when to seek help.
Maintaining your basement floor (and overall home’s foundation) is an ongoing process, but not an overwhelming one. Keep water in check, fix small foundation cracks or floor cracks as they appear, and your concrete will last for the long haul. A little early intervention goes a long way in preserving the structural and functional integrity of your home.We hope this guide has given you the knowledge and confidence to fix a crumbling concrete basement floor yourself. With the right tools and approach, even a DIY novice can achieve professional-quality results. Here’s to a job well done and the peace of mind that comes with knowing your basement floor is safe, strong, and sound!

Pingback: Best Paint for Concrete Basement Walls (Dry, Mold-Resistant)
Pingback: DIY Basement Floor Epoxy Coating for Concrete Floors
Pingback: Best Dehumidifier for Allergies (2026) – Reduce Mold & Dust Mites
Pingback: Basement Waterproofing: Warning Signs to Watch For
Pingback: Best DIY Basement Flooring Options for Every Budget
Pingback: Best Basement Humidity Level (2026 Guide)
Pingback: Best Size Generator for Sump Pump Backup Power
Great post! Fixing a crumbling concrete basement floor involves cleaning the area, filling cracks or holes with repair mix, leveling the surface, and sealing it to prevent future damage and moisture issues.